
はじめに
この記事で使用したLinux Mintのバージョンは、22.1です。
LiveUSB作成記事とバージョンが異なっている場合がありますが、記事の更新時期によるものです。
ご容赦ください。
前回作成したLiveUSBでLinuxを起動してみましょう。

日本語入力の設定までを紹介します。
今回試しに使用したPCは、HiMeLE Overclock4C Intel N95 です。

Overclock4Cについての記事もアップしてます。こちらからご覧になれます。

USBから起動する
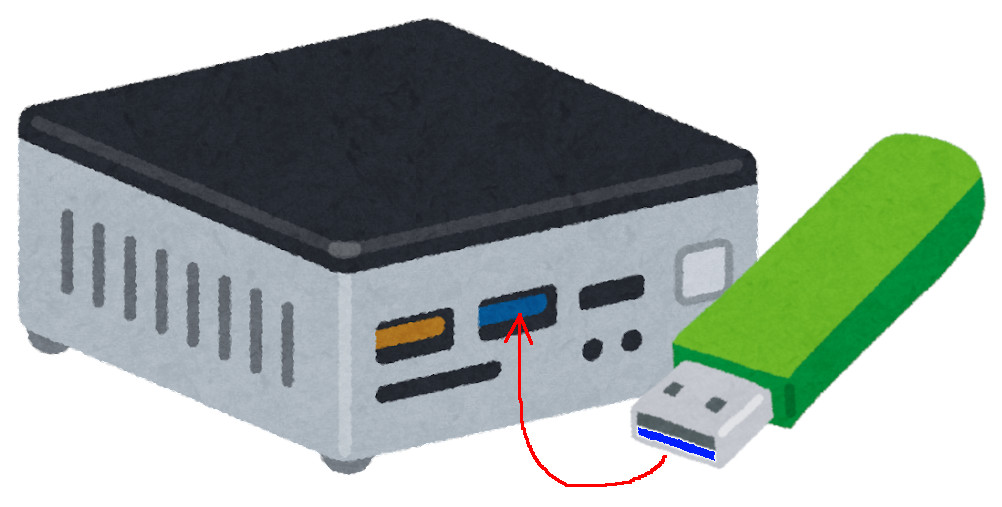
作成したLiveUSBをPCにさす
電源を入れる
電源スイッチを押して、電源を入れます。
biosに入る

delキーを連打してbiosに入ります。機種によっては、「Esc」キーだったり、「F2」などのファンクションキーだったりします。
biosに入らなくても起動ドライブを選択できる機種もあります。
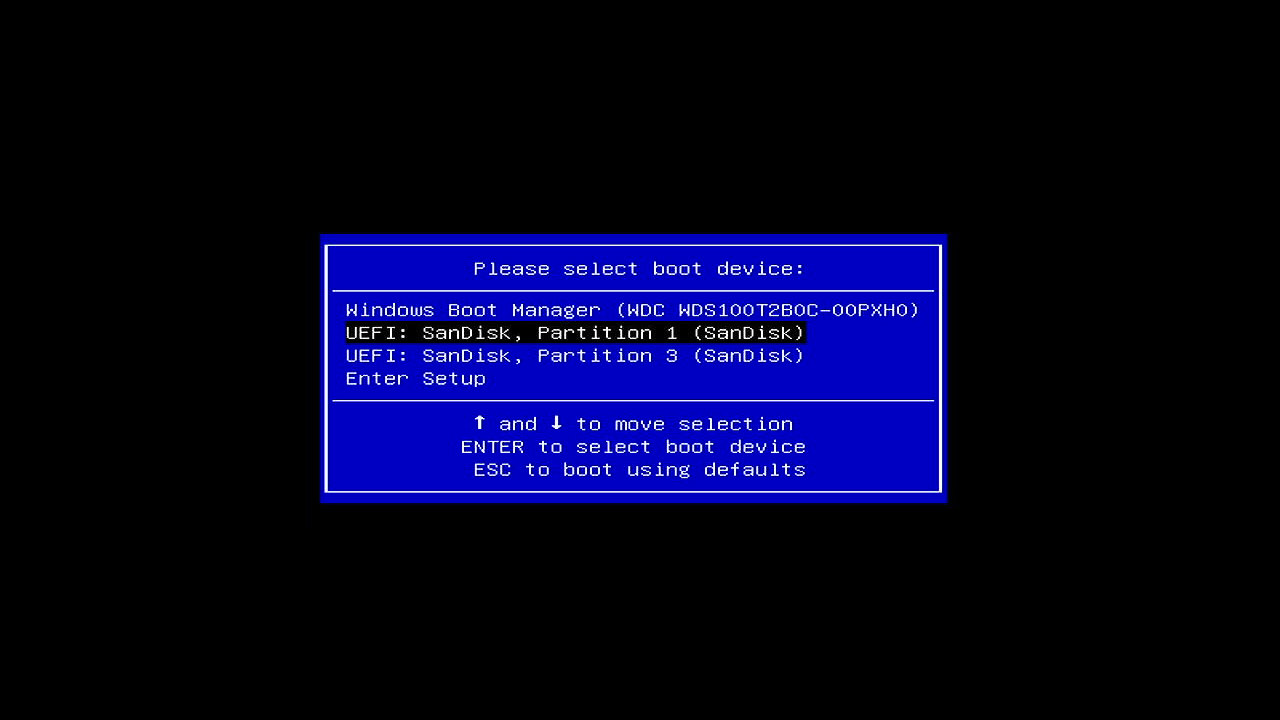
HiMeLE Quieter 4C では、「F7」キーで、起動ドライブの選択画面を表示させることができます。
biosから起動ディスクにLiveUSBを選択して起動
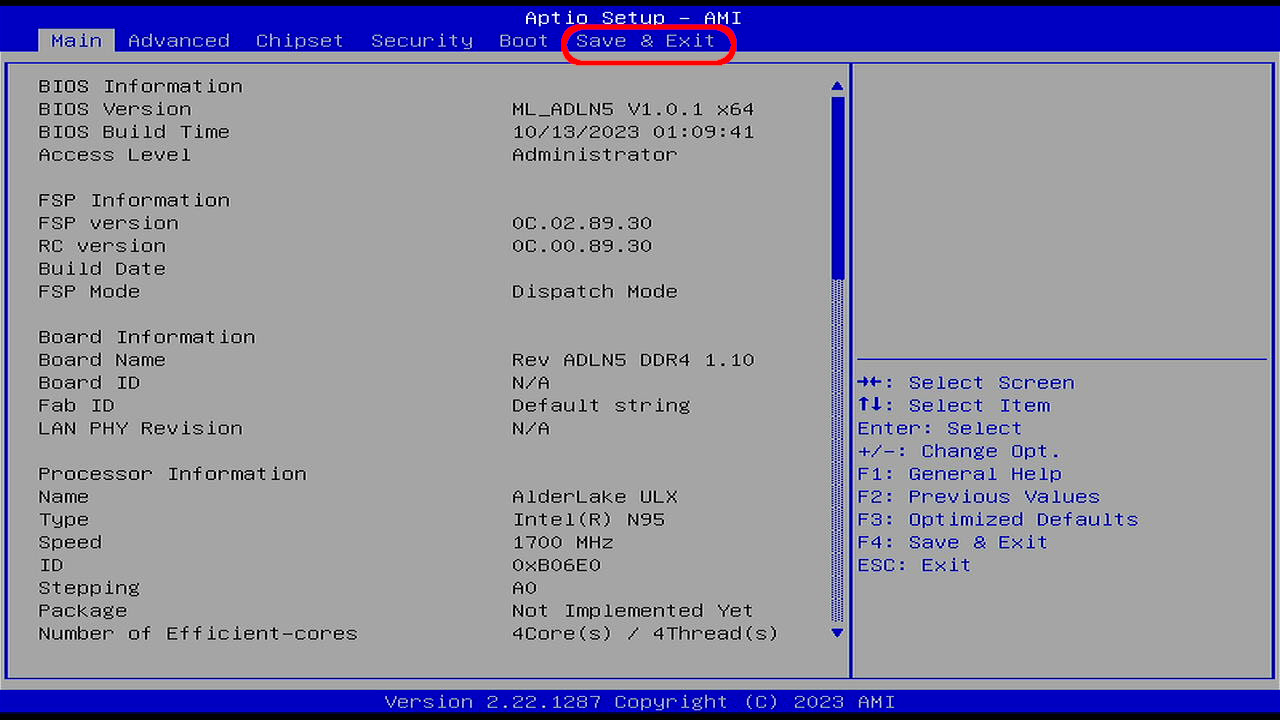
bios画面になったら、「Save & Exit」タブを選びます。
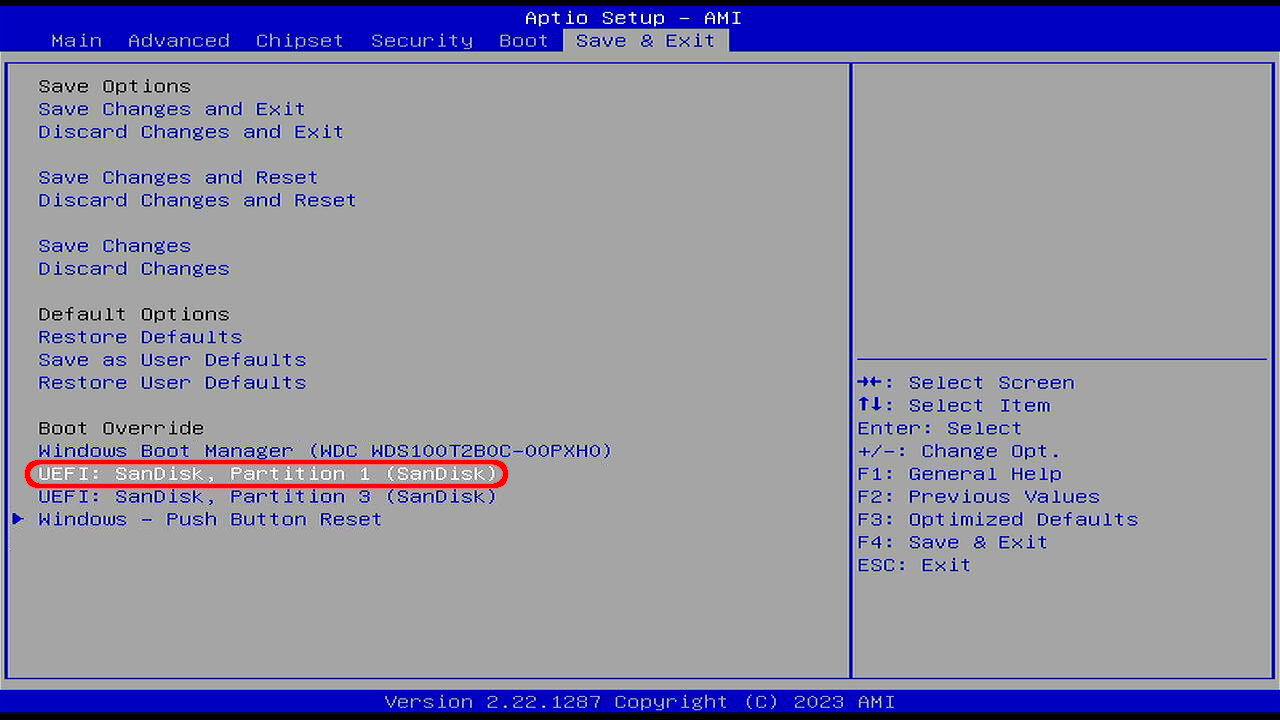
「UEFI: ○○」(○○はUSBメモリの名前)を選択、「Enter」キーで起動が始まります。
GRUB画面の起動メニュー
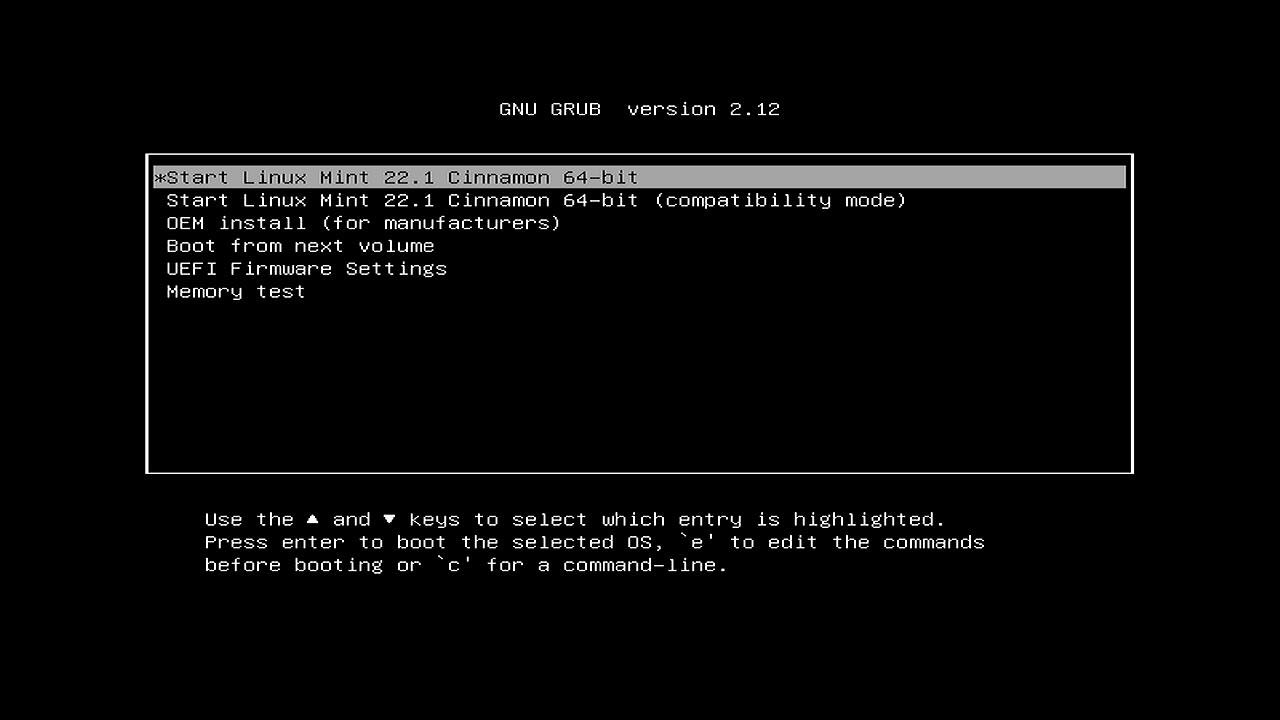
GRUBという起動選択画面が出ますので、「Start Linux Mint...」を選択して「Enter」するか、放置(時間がたつと自動で起動します)

待ちます。
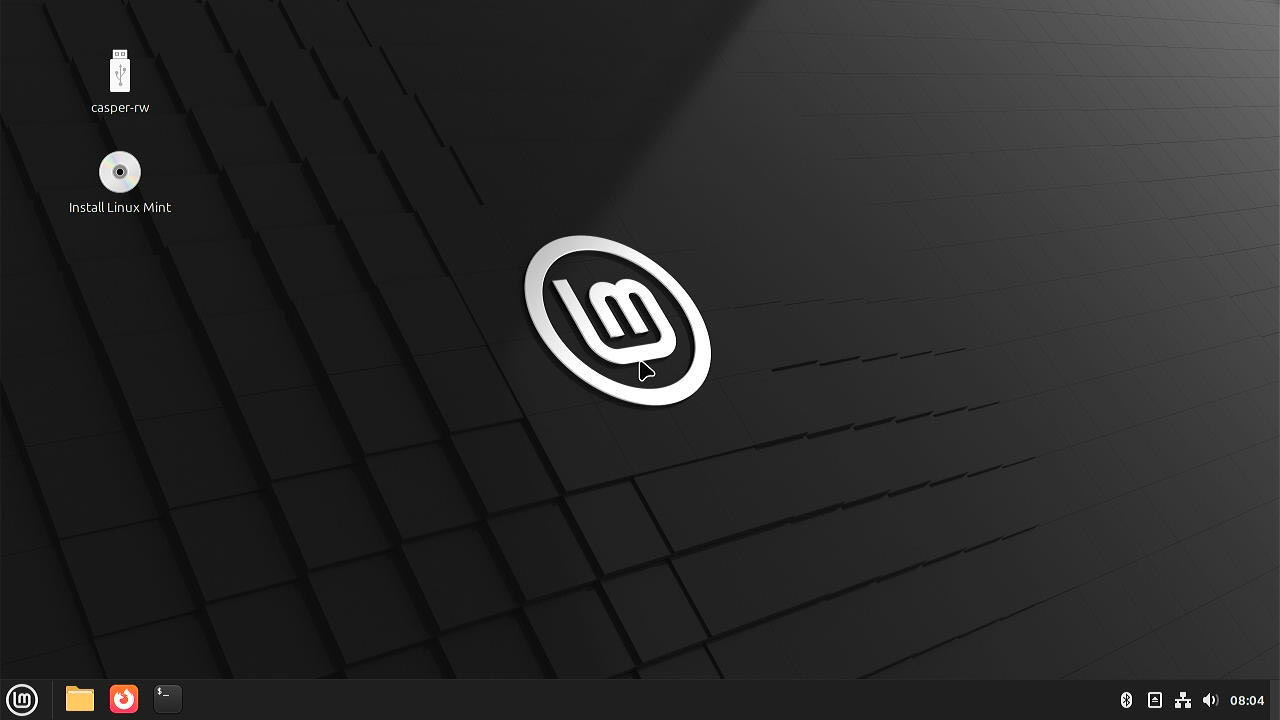
デスクトップアイコンについて
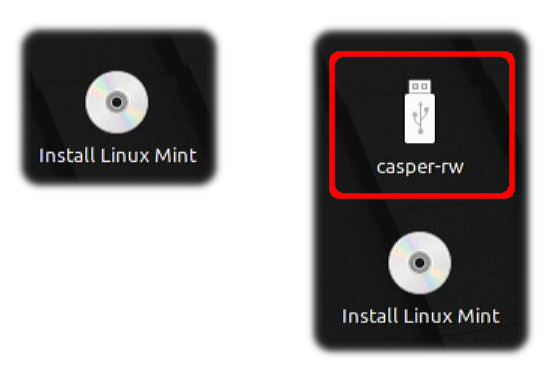
「LiveUSB作成」編で作ったLiveUSBで起動した場合は、左側のように1つのアイコンが表示されます。
「保存できるLiveUSBでLinuxを始めよう!」編で作ったLiveUSBで起動した場合は、右のように「casper-rw」というアイコンが追加表示されます。
保存できるLiveUSBは、この「Casper-rw」に設定やデータが保存されます。
Linux Mint Xfce Editionで保存できるLiveUSBを作った場合、デスクトップ上に「casper-rw」アイコンは表示されません。
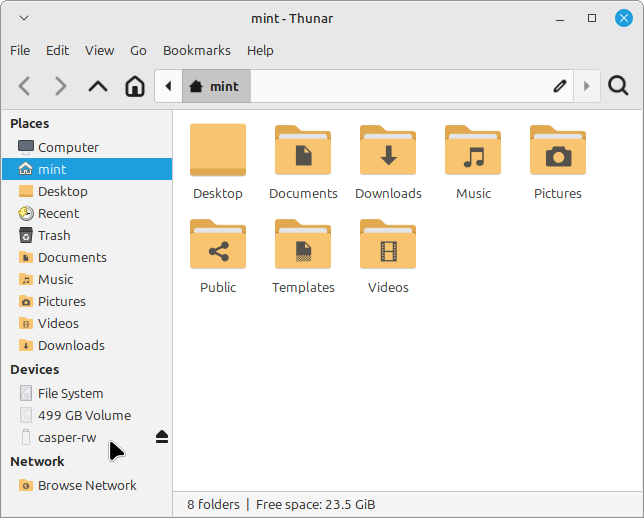
ファイルブラウザのThunarで見ると、上図の状態でcasper-rwはマウントされていないのですが、ユーザー「mint」内の、各フォルダにはファイルが保存できる状態になってます。
ただ、環境により異なるかもしれませんので、ファイル保管が本当にできるのか、ご自分でご確認ください。
ここからの設定は、
「LiveUSB作成」編でつくったLiveUSBでは、再起動すると設定はすべて初期状態に戻ってしまいます。
「保存できるLiveUSBでLinuxを始めよう!」編で作ったLiveUSBは、設定が保存されます。
WiFi設定
有線LAN接続の場合、WiFi設定は不要です。
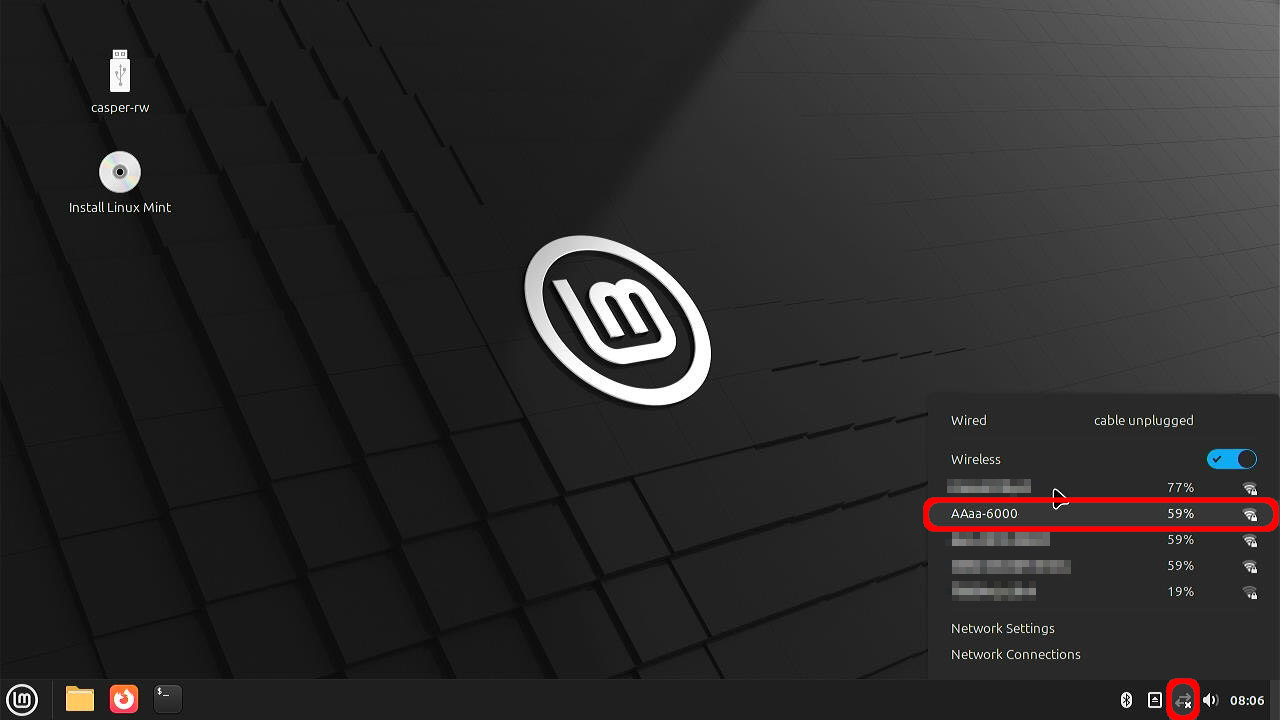
右下のネットワークアイコンを左クリックして、出てくるメニューのなかから、WiFI接続先を選択。
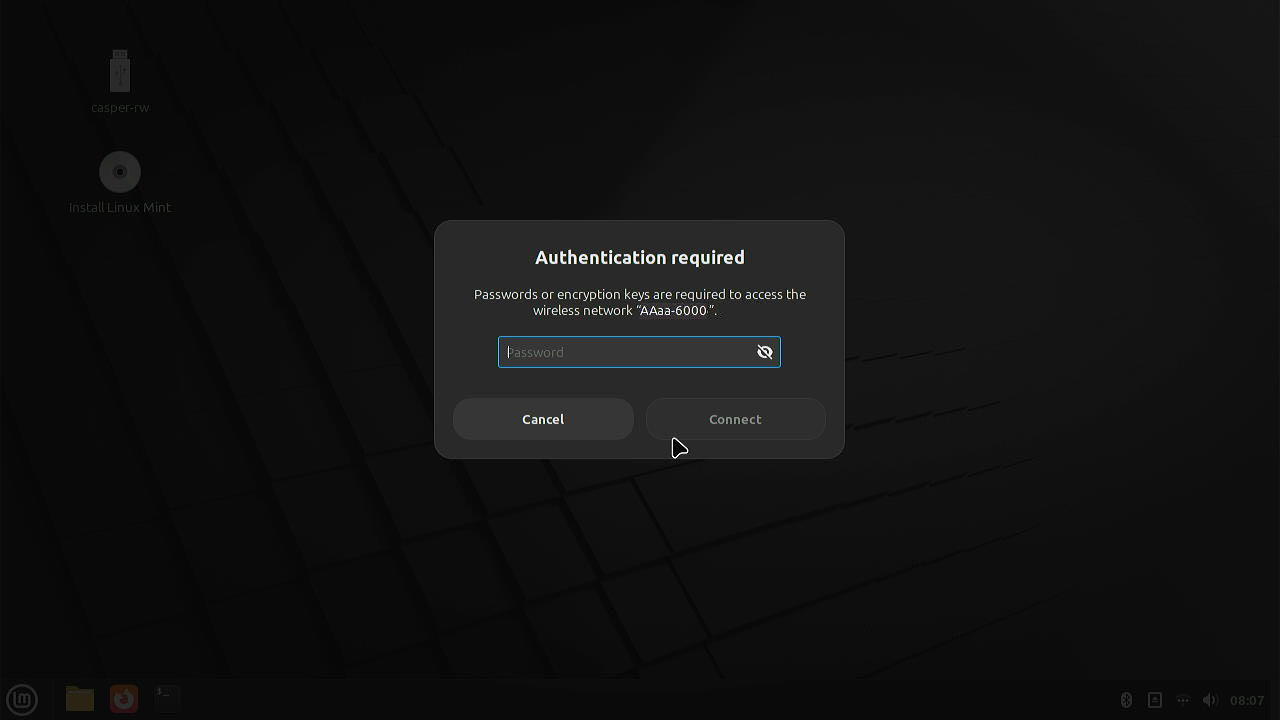
Password入力ウィンドウが表示されるので、入力します。

入力したら、「Connect」をクリック
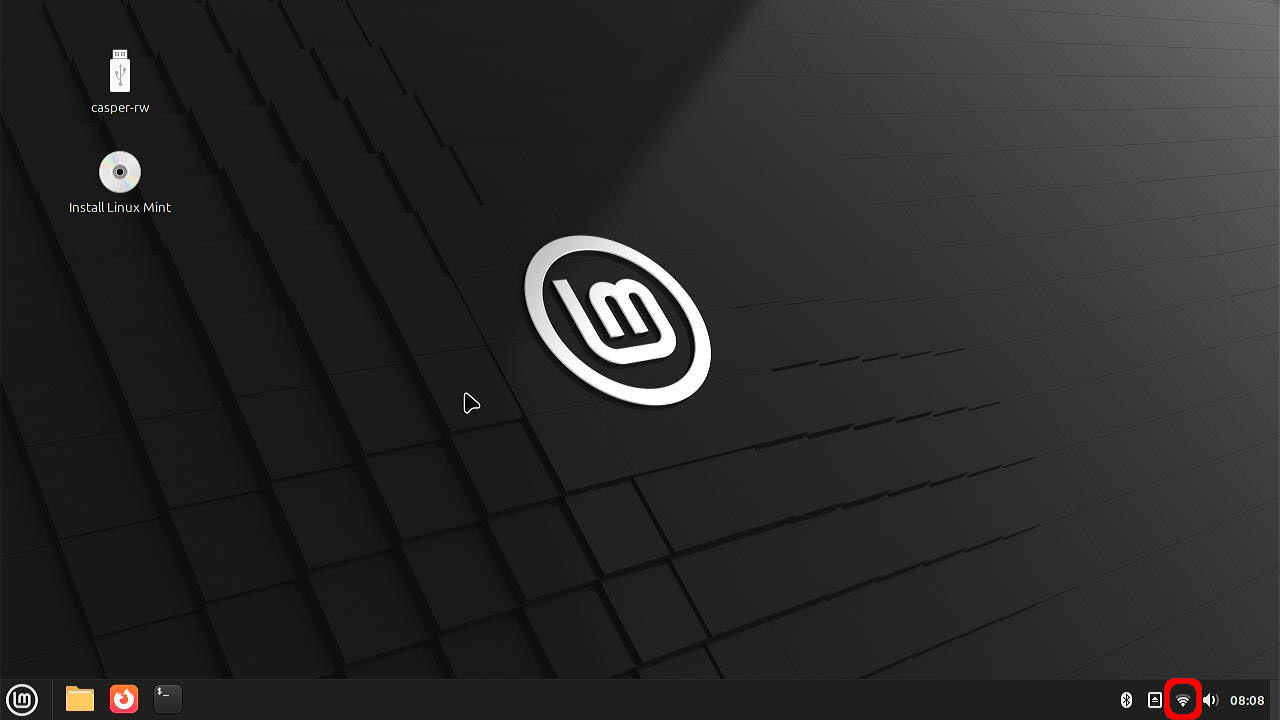
接続が成功すれば、右下のアイコンが電波の強さを表すアイコンに変わります。
日本語表示・入力設定
Linux mintのLiveUSBは、初期状態では英語表示で、日本語入力もできません。これをできるように設定していきます。
日本語表示設定
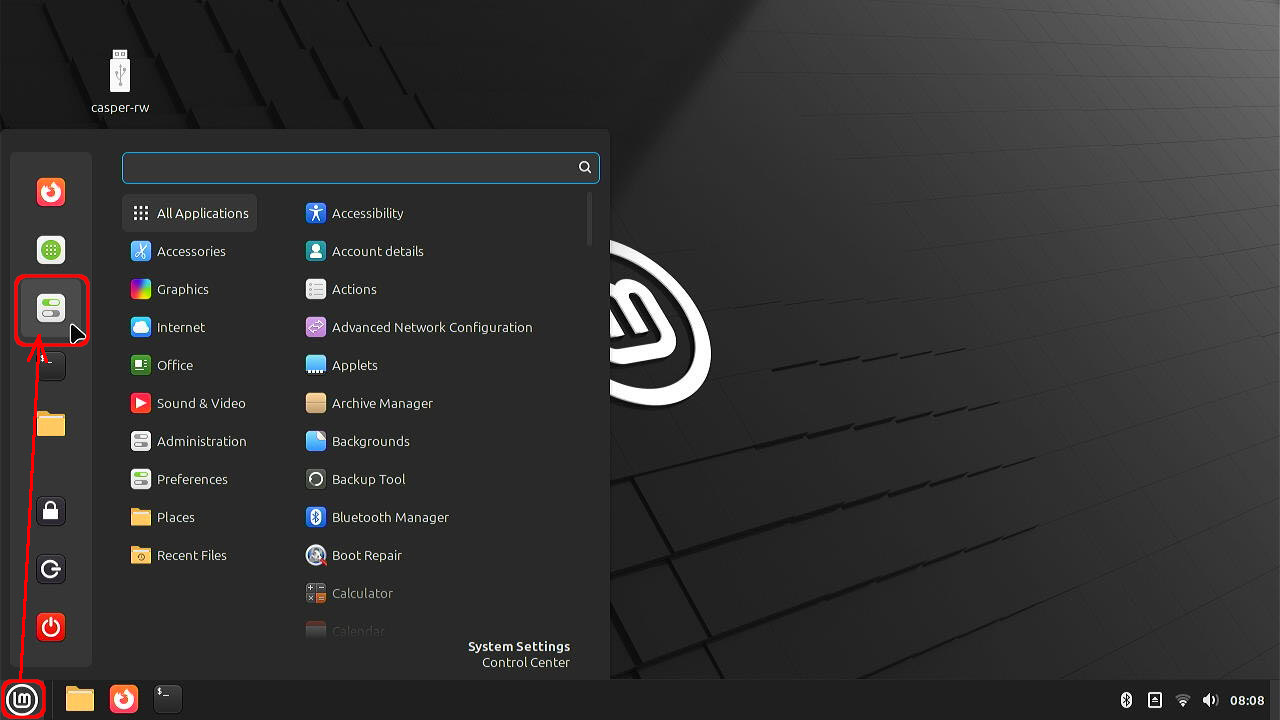
左下のアイコン(Windowsのスタートメニューなようなもの)をクリック
メニューが表示されるので、「Preferences」アイコンをクリック。
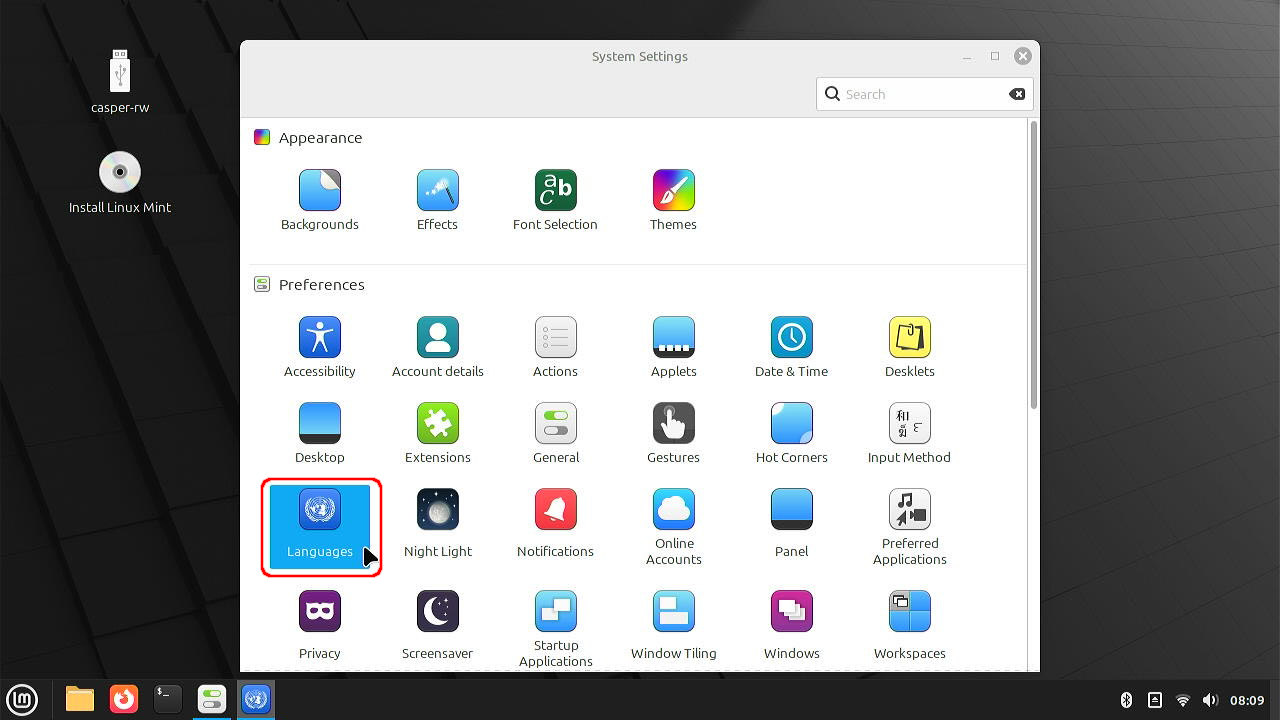
「System Settings」ウィンドウが開くので、「Languages」を開きます。
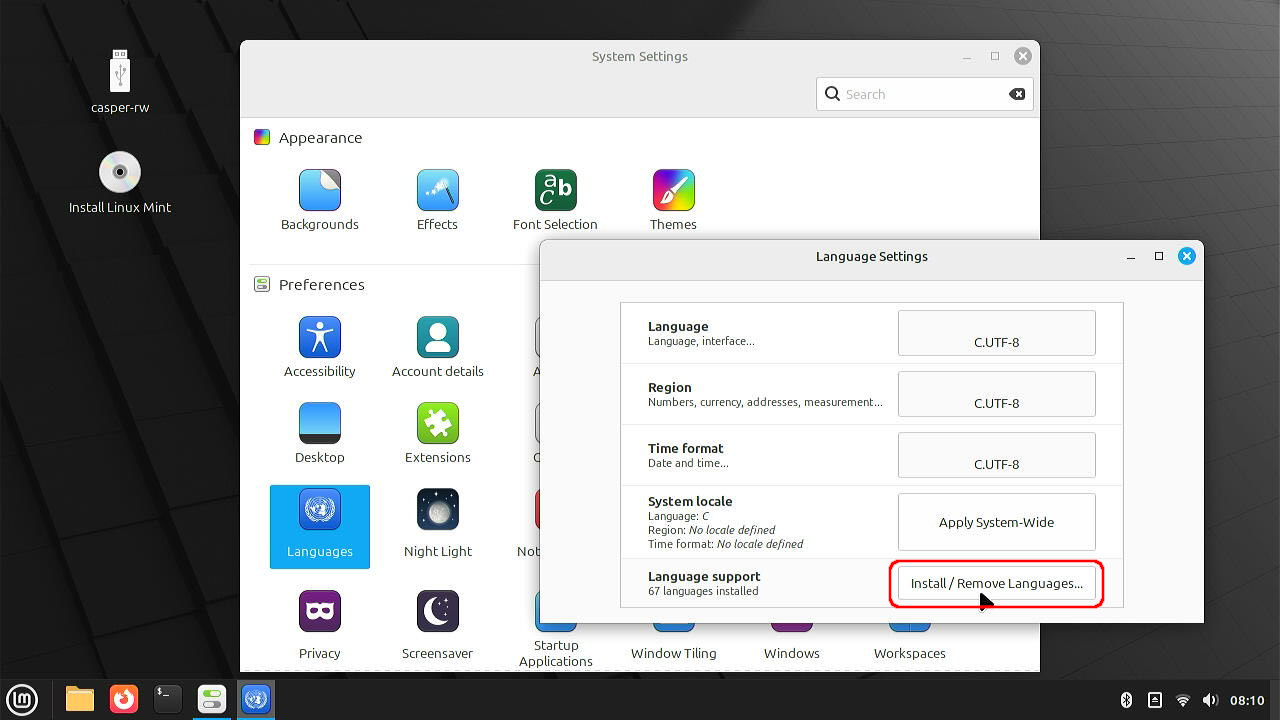
「Install / Remove Languages...」をクリック
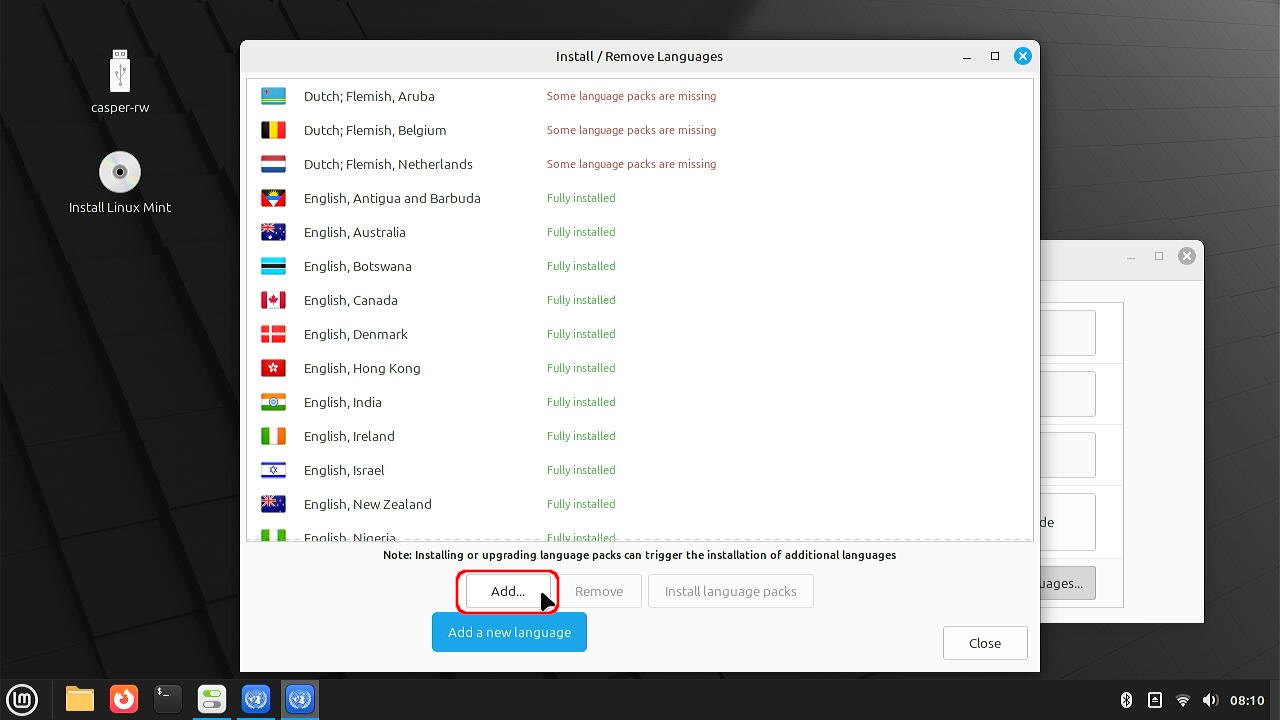
開いたウインドウで、「Add...」をクリック

「Japanese, Japan」を選んで、「Install」をクリック
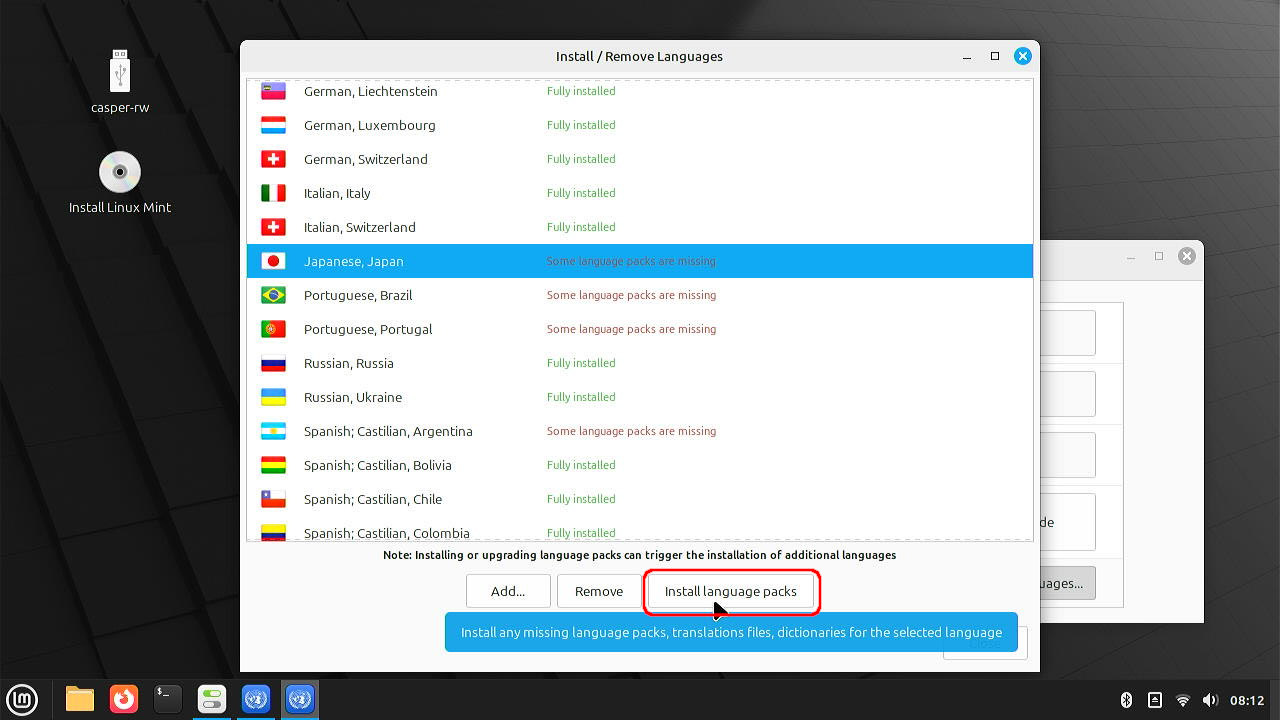
一つ前のウィンドウに戻るので、「Install language packs」をクリック
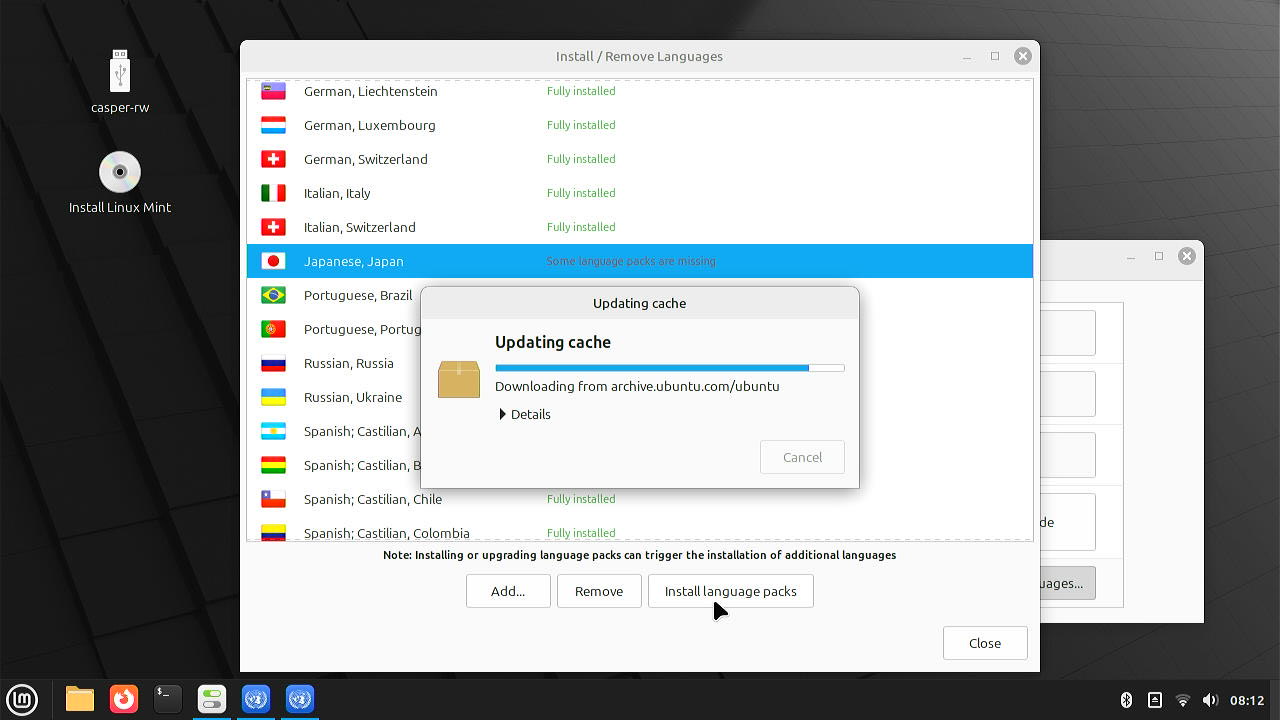
経過が表示されます。しばらく待ちます。
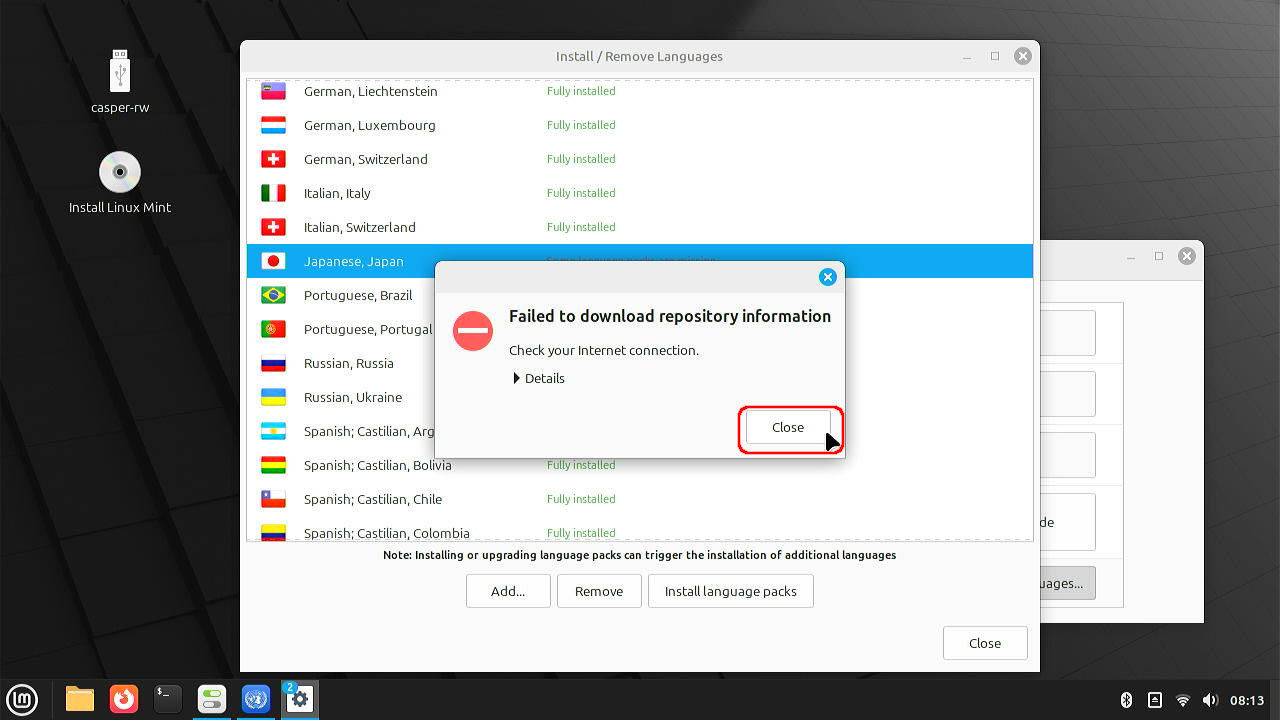
エラーが出ました。repositoryがダウンロードできない、と表示されていますが、「Close」で閉じて、その後問題なくインストールできています。
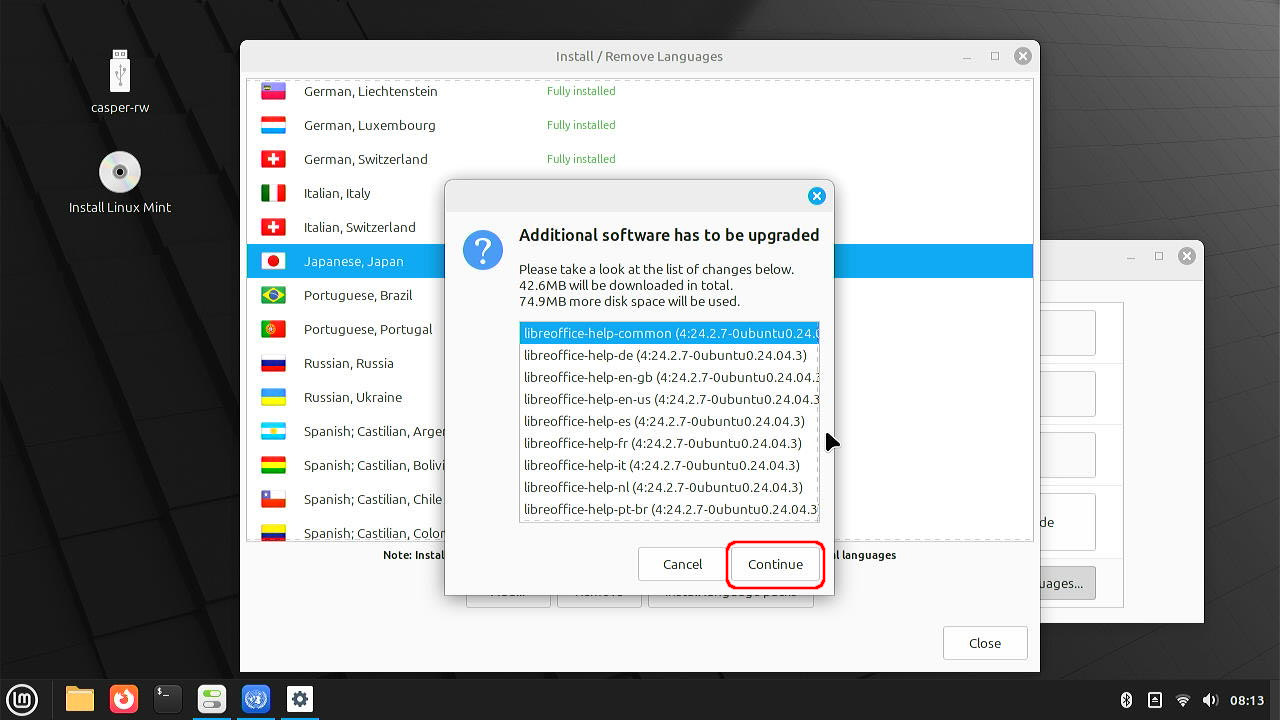
インストールしてよいかと確認されますので、「Continue」をクリックして、継続します。
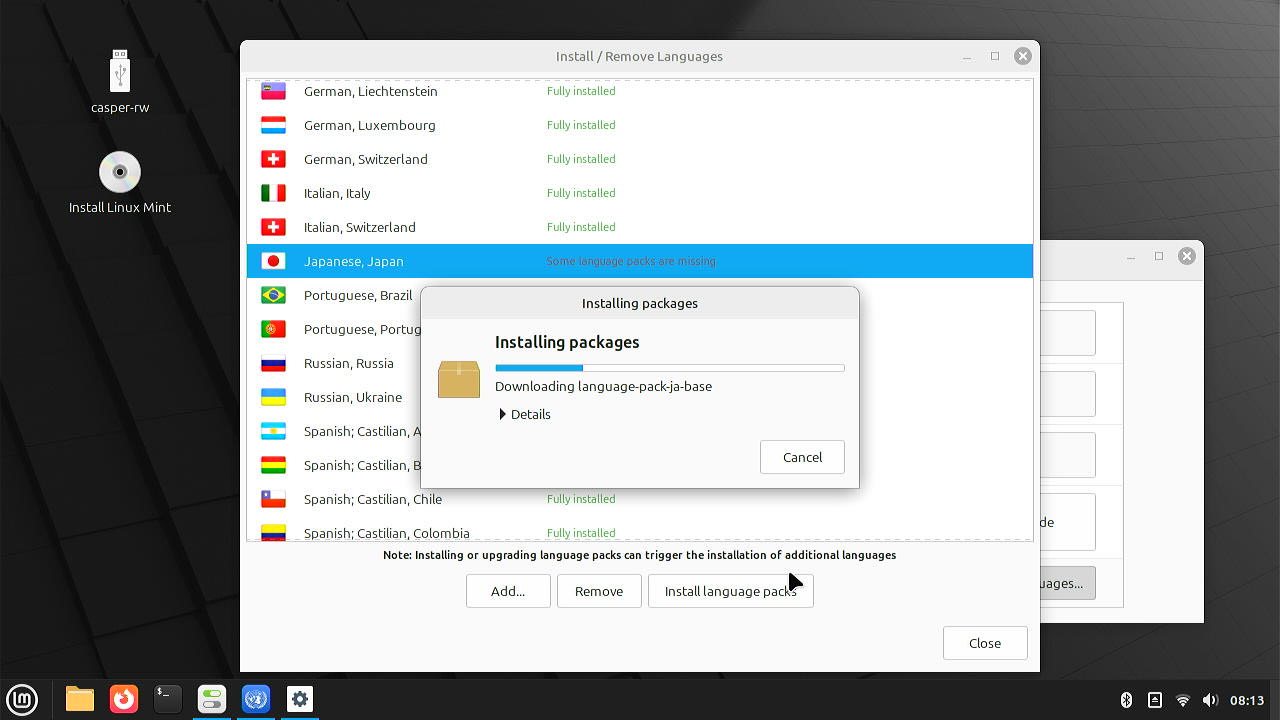
インストール状況が表示されます。
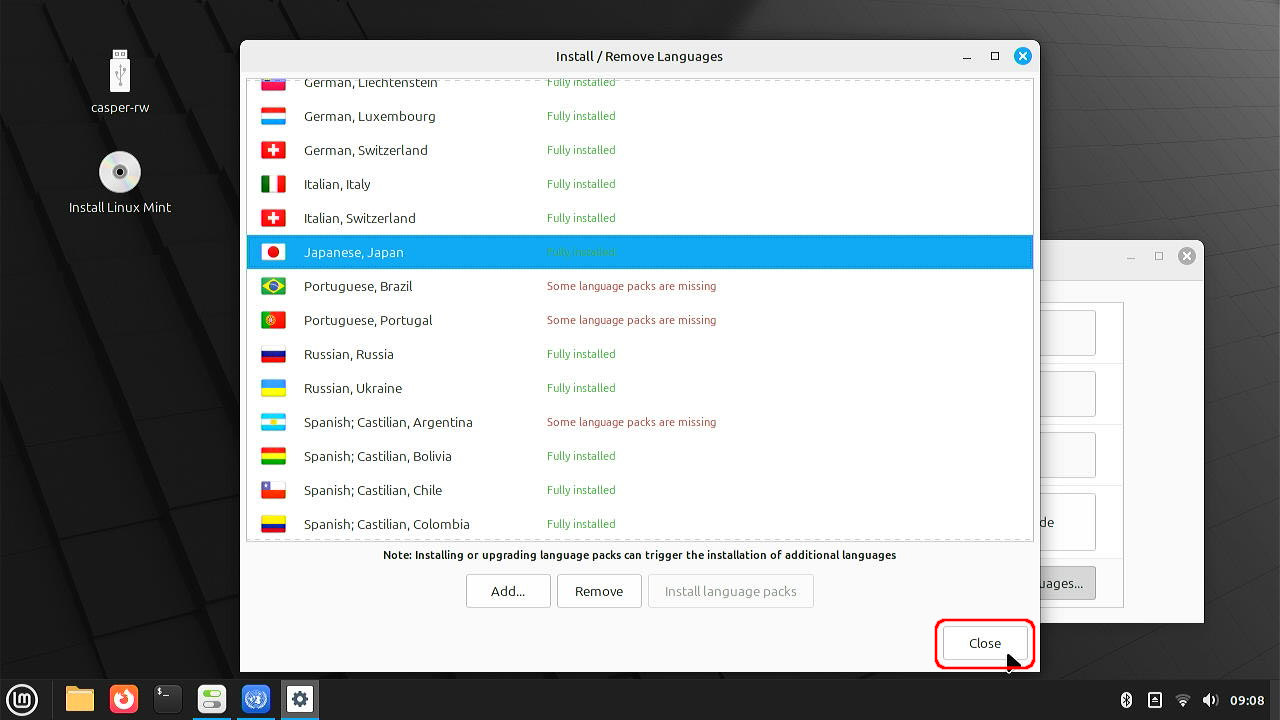
「Japanese, Japan」の横に、「Fully installed」と表示されれば、日本語表示に必要なものはインストール完了です。「Close」でウィンドウを閉じます。
Language-表示言語、Region-地域、Time format-時間形式を日本語に変えていきます。
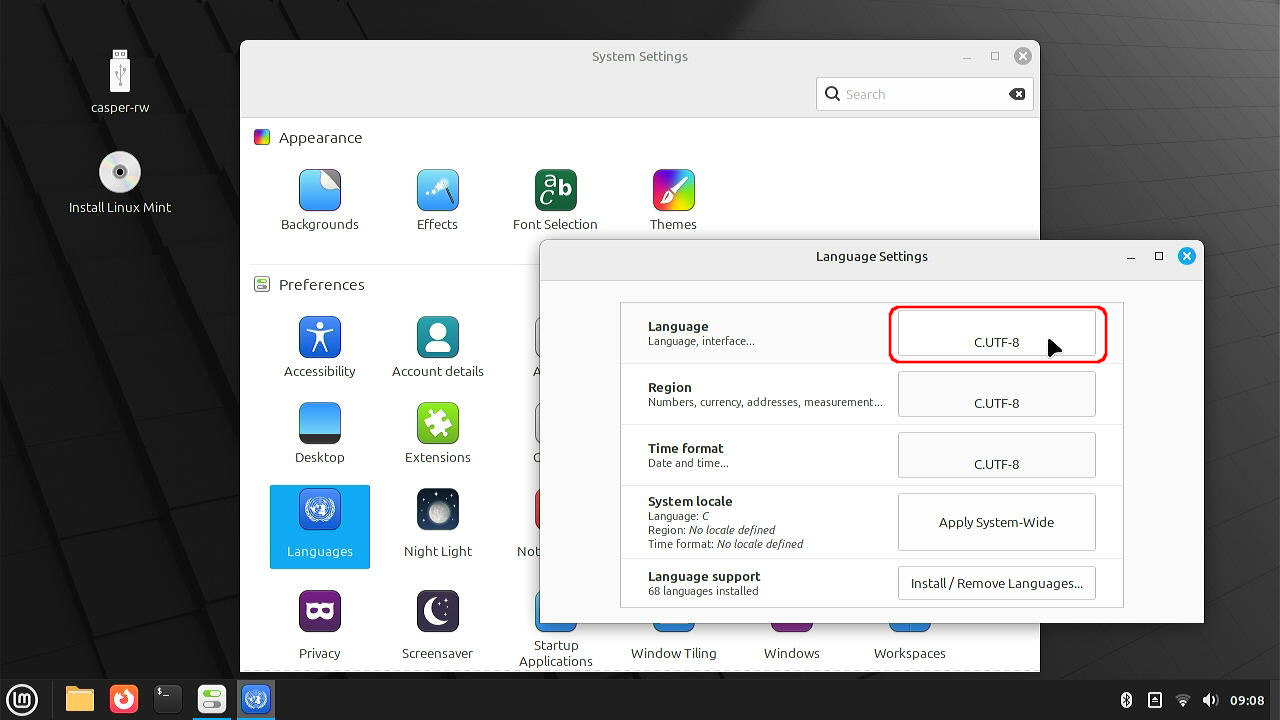
まずは、Languageの「C.UTF-8」となっているボタンをクリック。
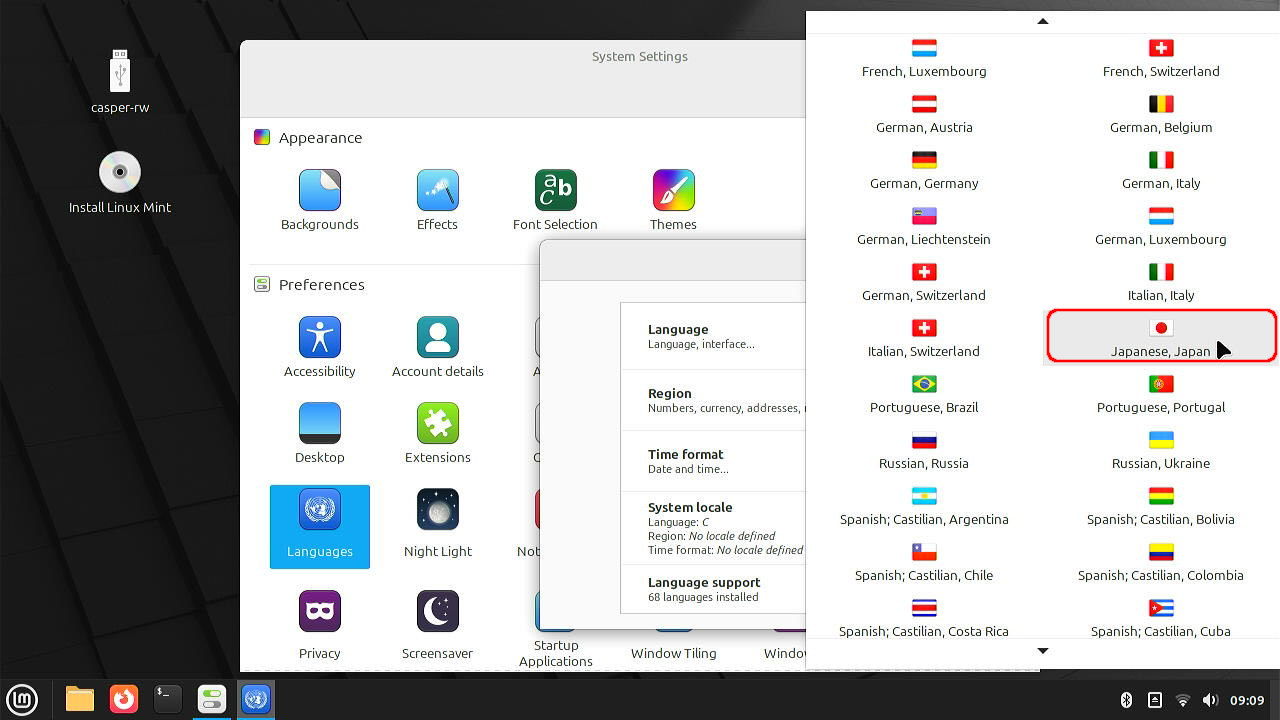
現れるウィンドウから、「Japanese, Japan」を選択
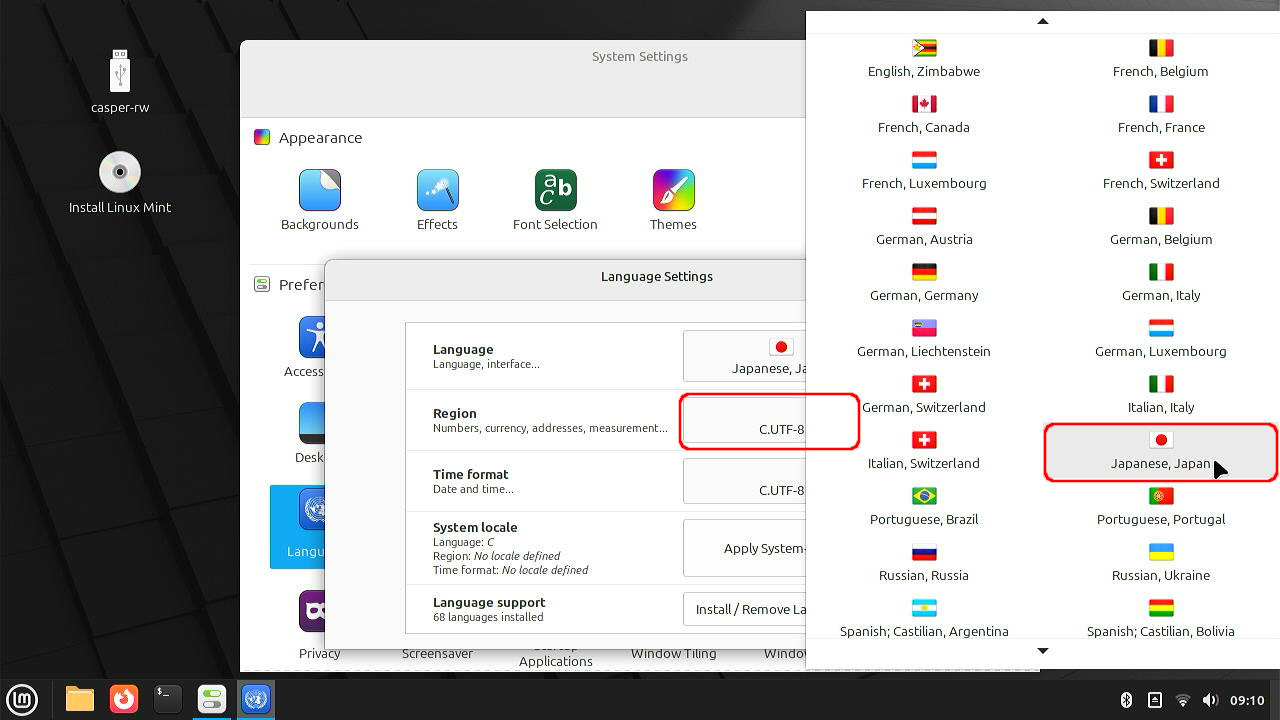
同様に、Region-地域も「Japanese, Japan」へ
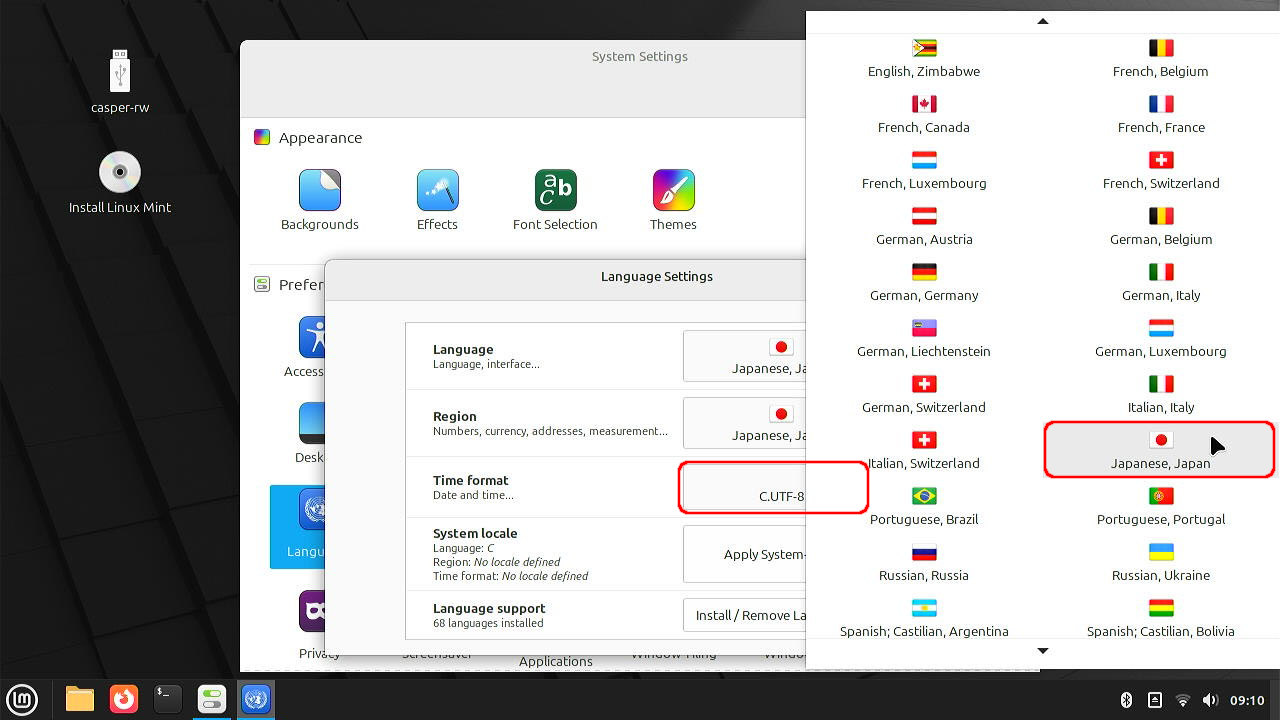
Time format-時間形式も「Japanese, Japan」へ
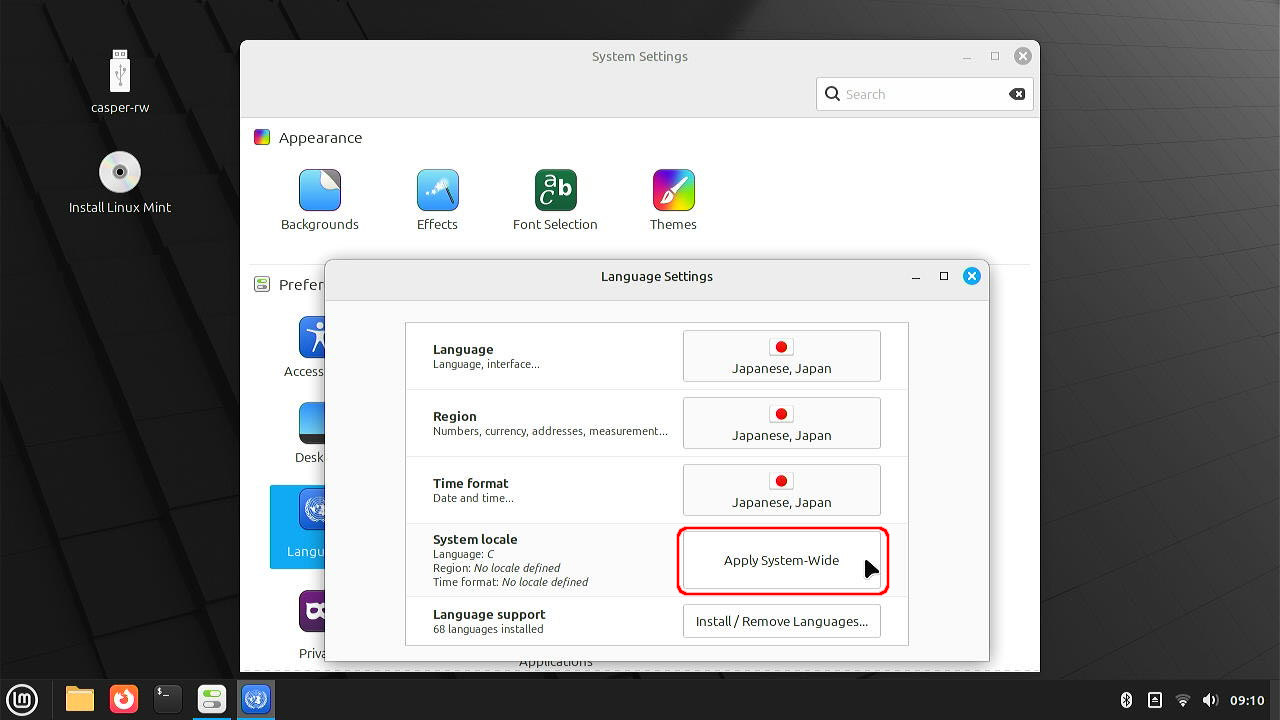
「Apply System-Wide」をクリックして設定完了です。
日本語入力設定
次に、日本語が入力できるように設定します。
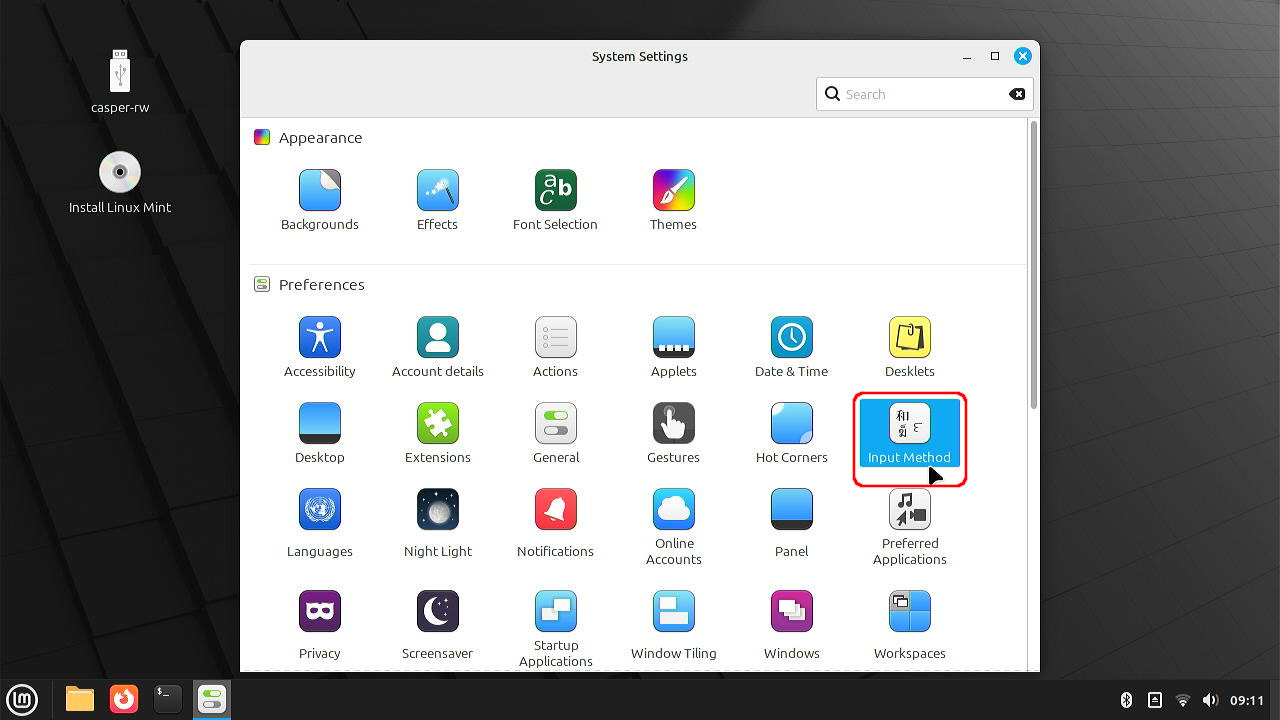
「System Setting」のウインドウで「Input Method」を開きます。
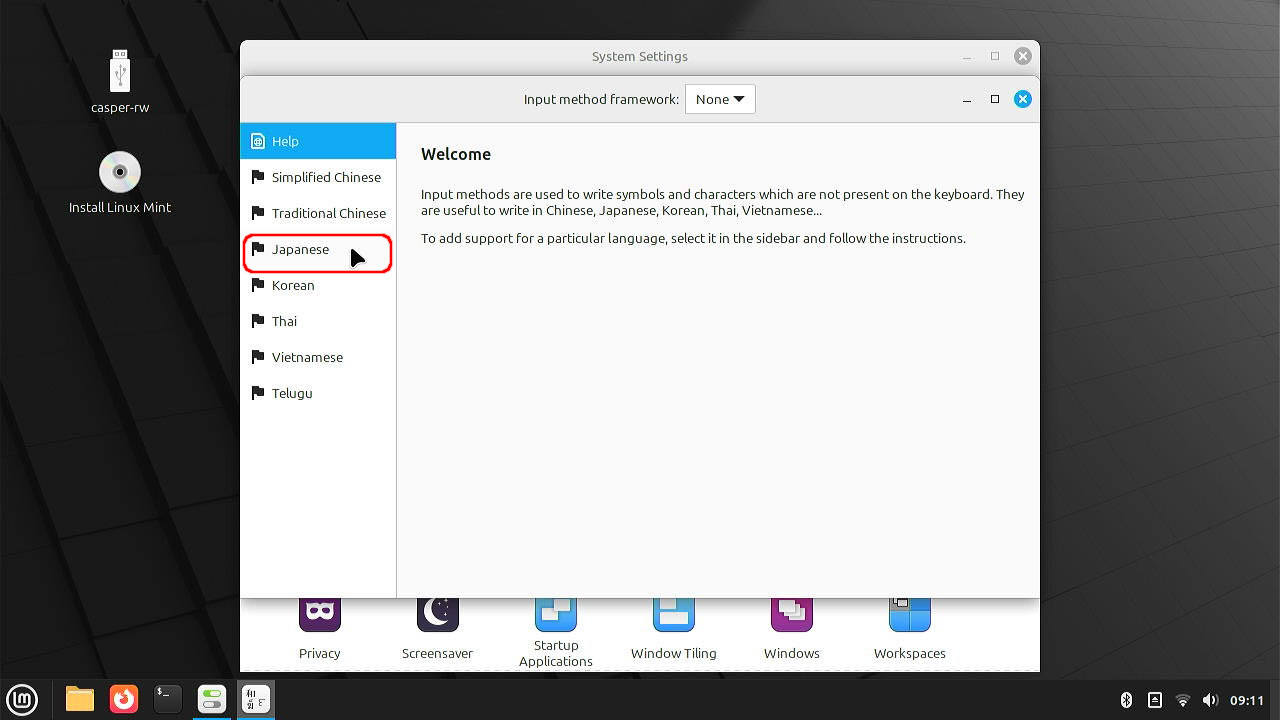
開いたウインドウの左側リストから、「Japanese」を選択
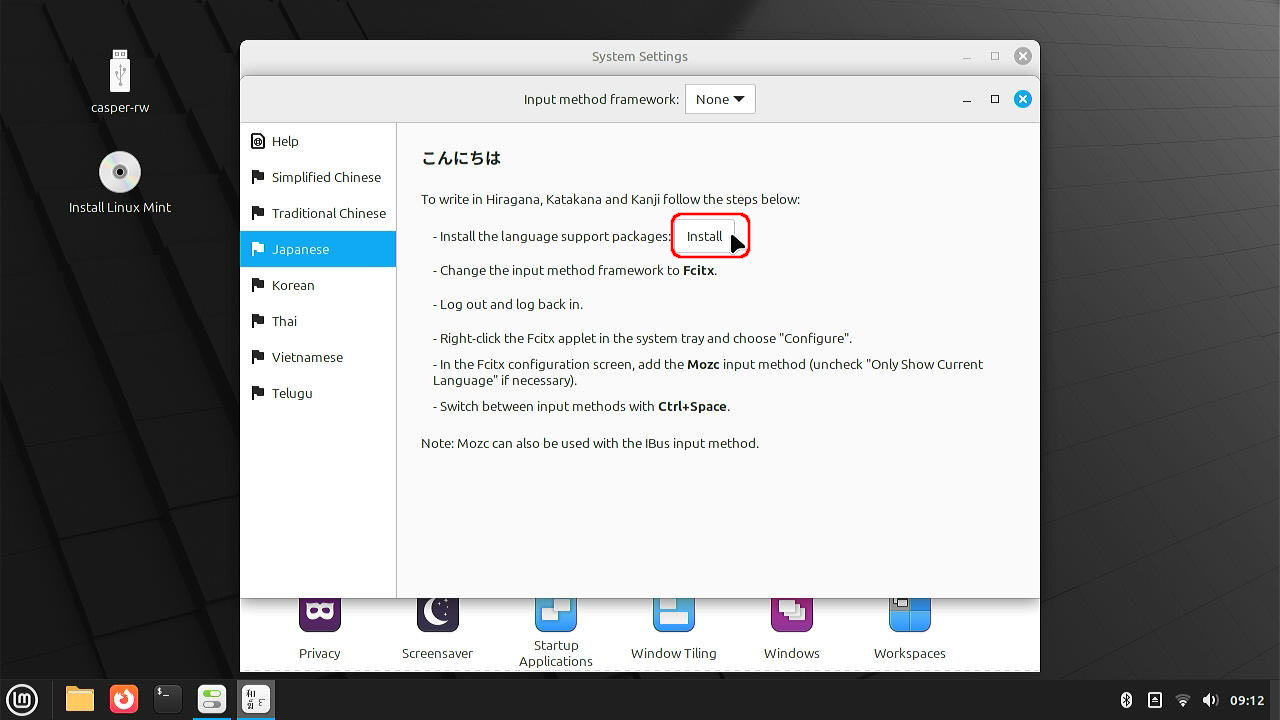
「Install」ボタンをクリック
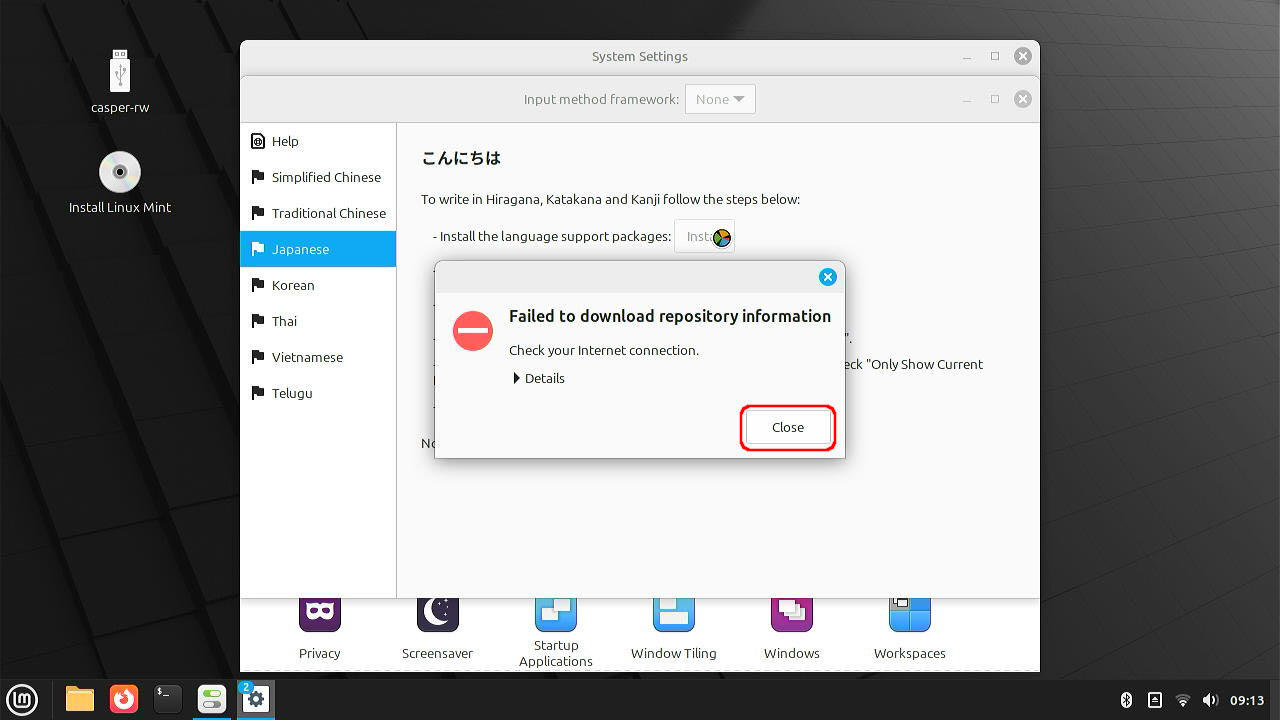
またエラーが出ますが、気にせず「Close」をクリック

インストールが開始されます。

インストールが完了したら、ウィンドウ中央上のプルダウンメニューから
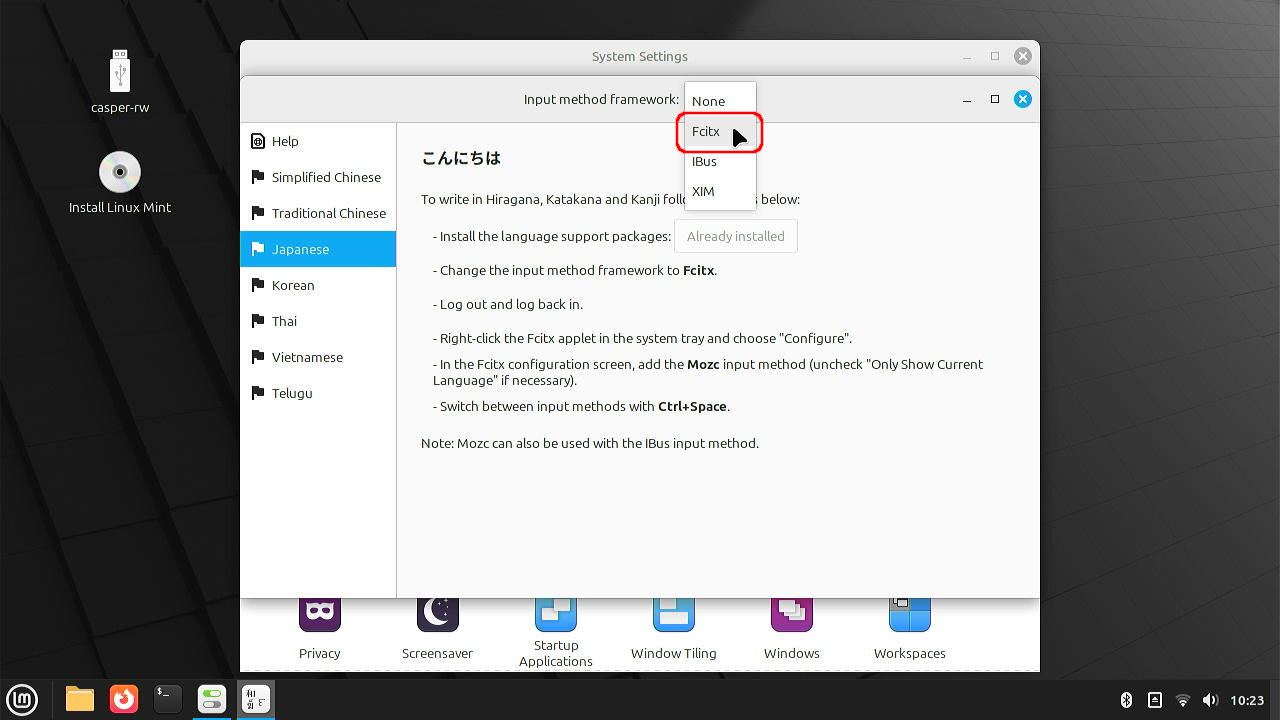
「Fcitx」を選びます。
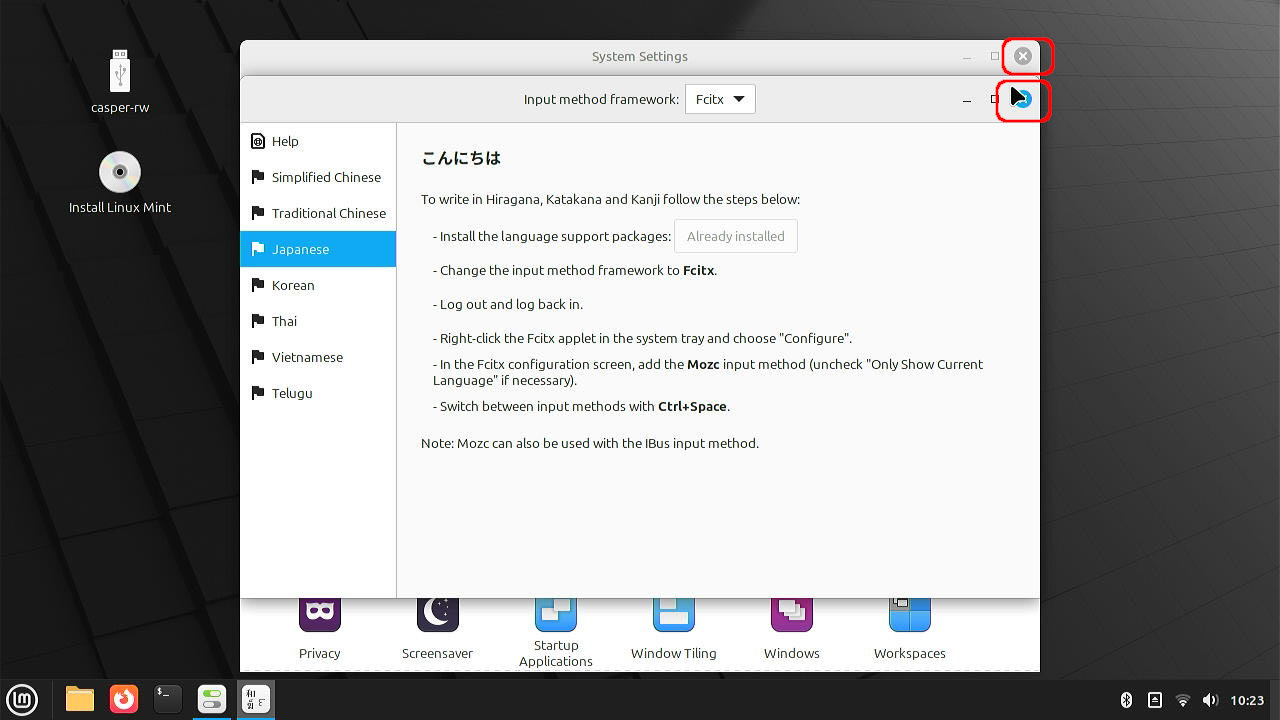
ウィンドウを閉じて、設定完了です。
ログアウトーログインで設定を反映
ログアウト→ログインで設定を反映させます。
再起動しなくとも、設定は反映されます。再起動してもOKです。
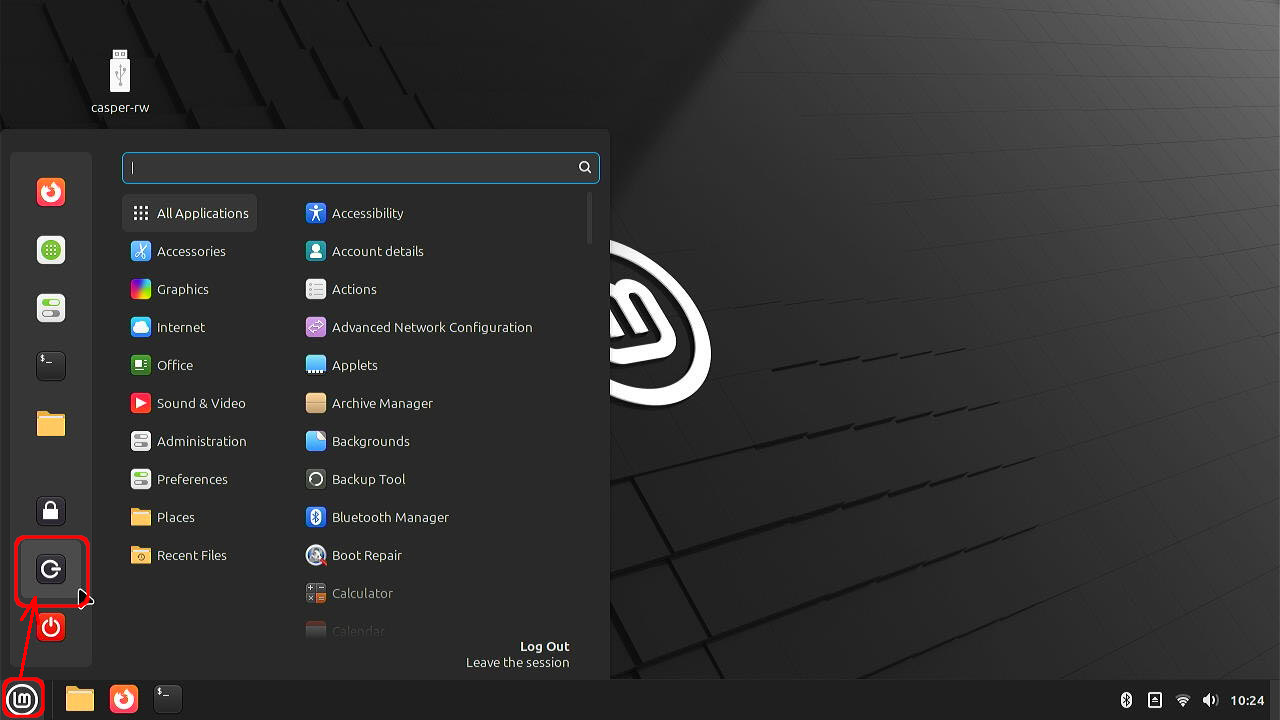
左下のアイコンをクリックして、メニューを表示させ、ログアウトのボタンをクリック。
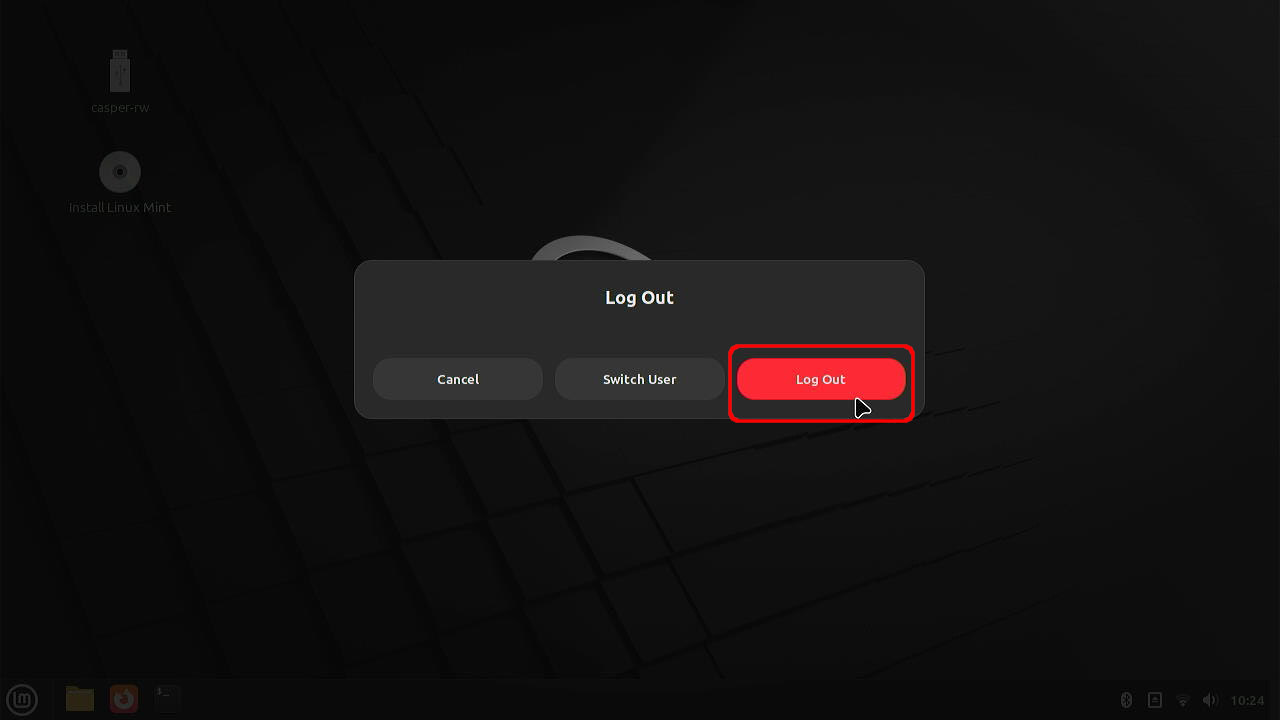
「Log Out」ボタンをクリック
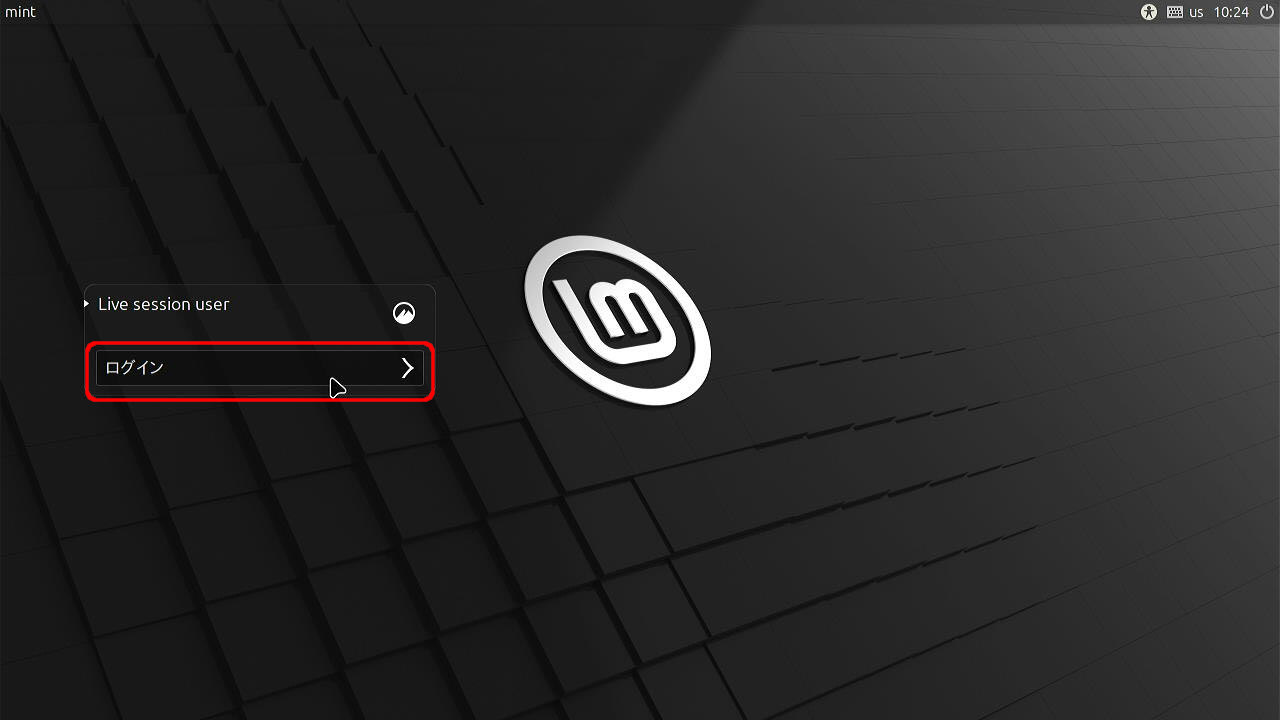
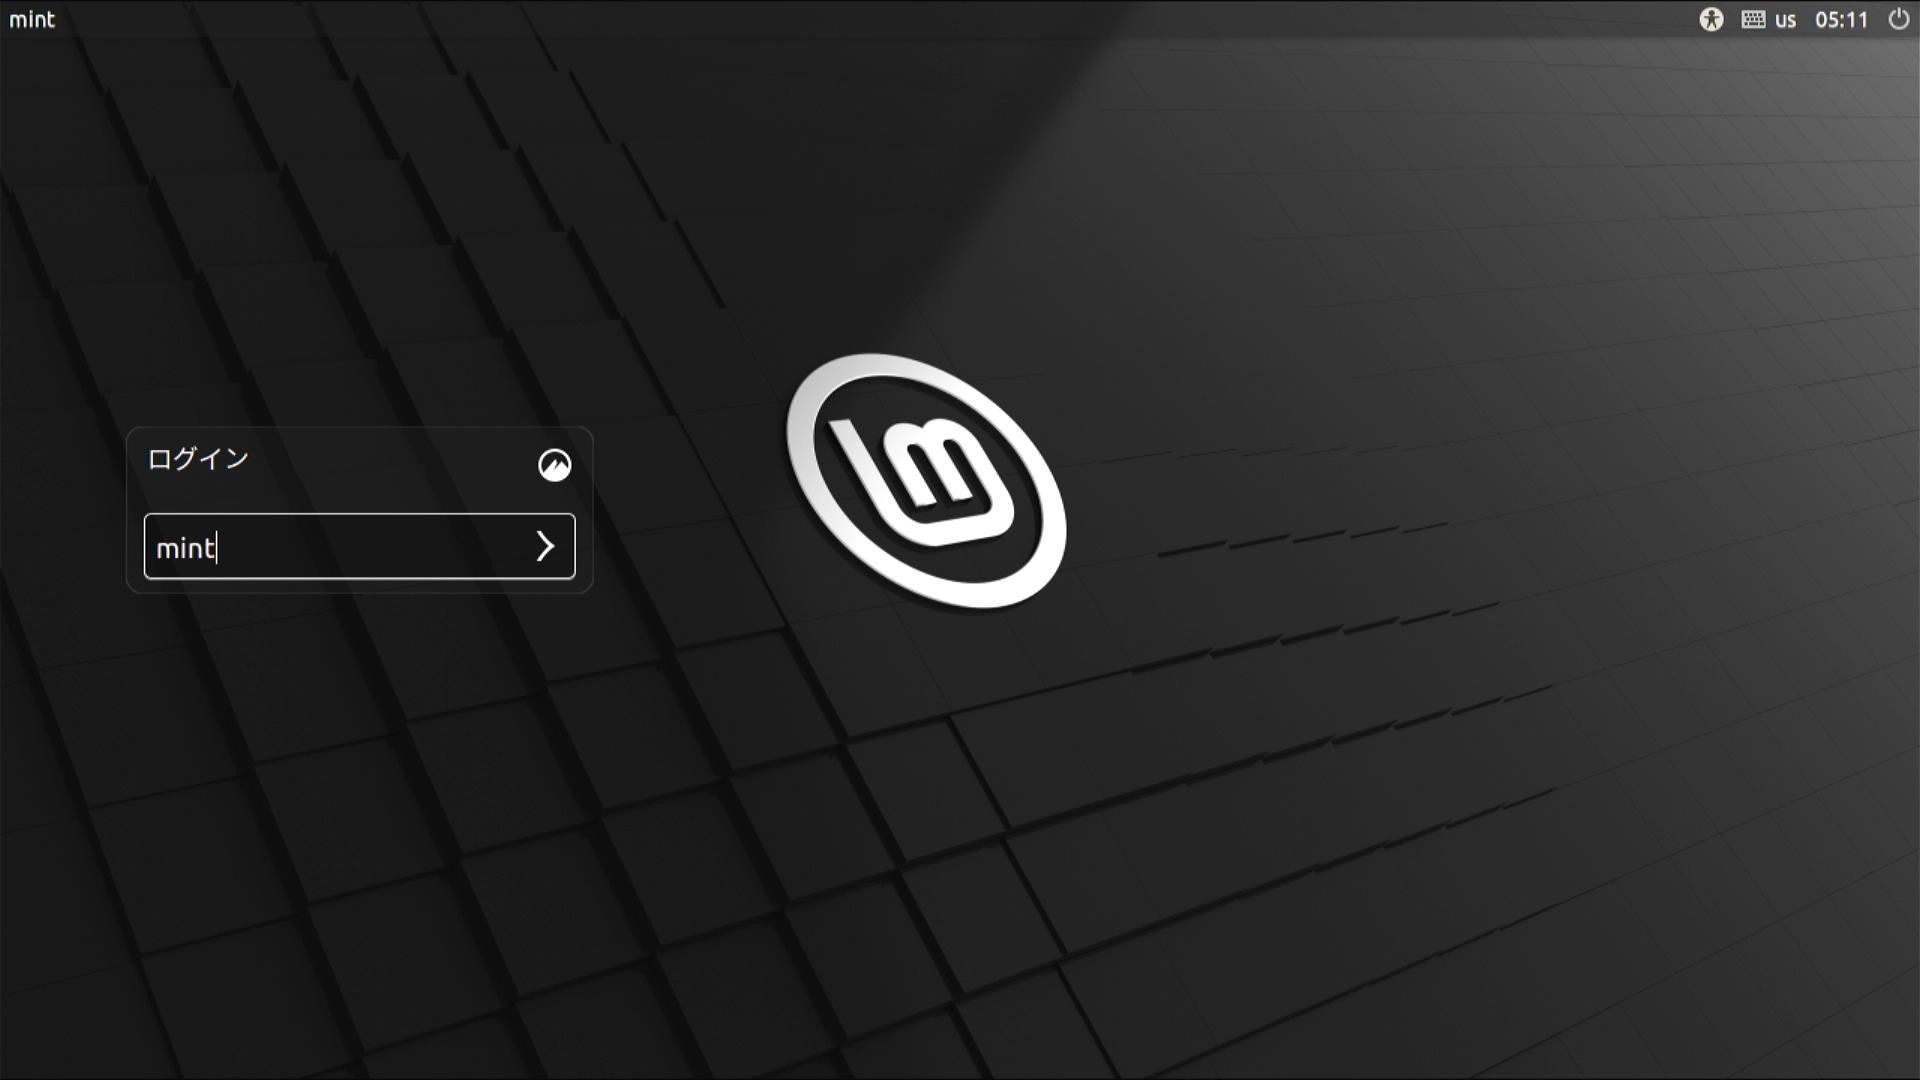
ログイン画面が出ますので、「ログイン」をクリックします。
Linux mintのLiveUSBは、ユーザー名は固定、パスワードはありません。
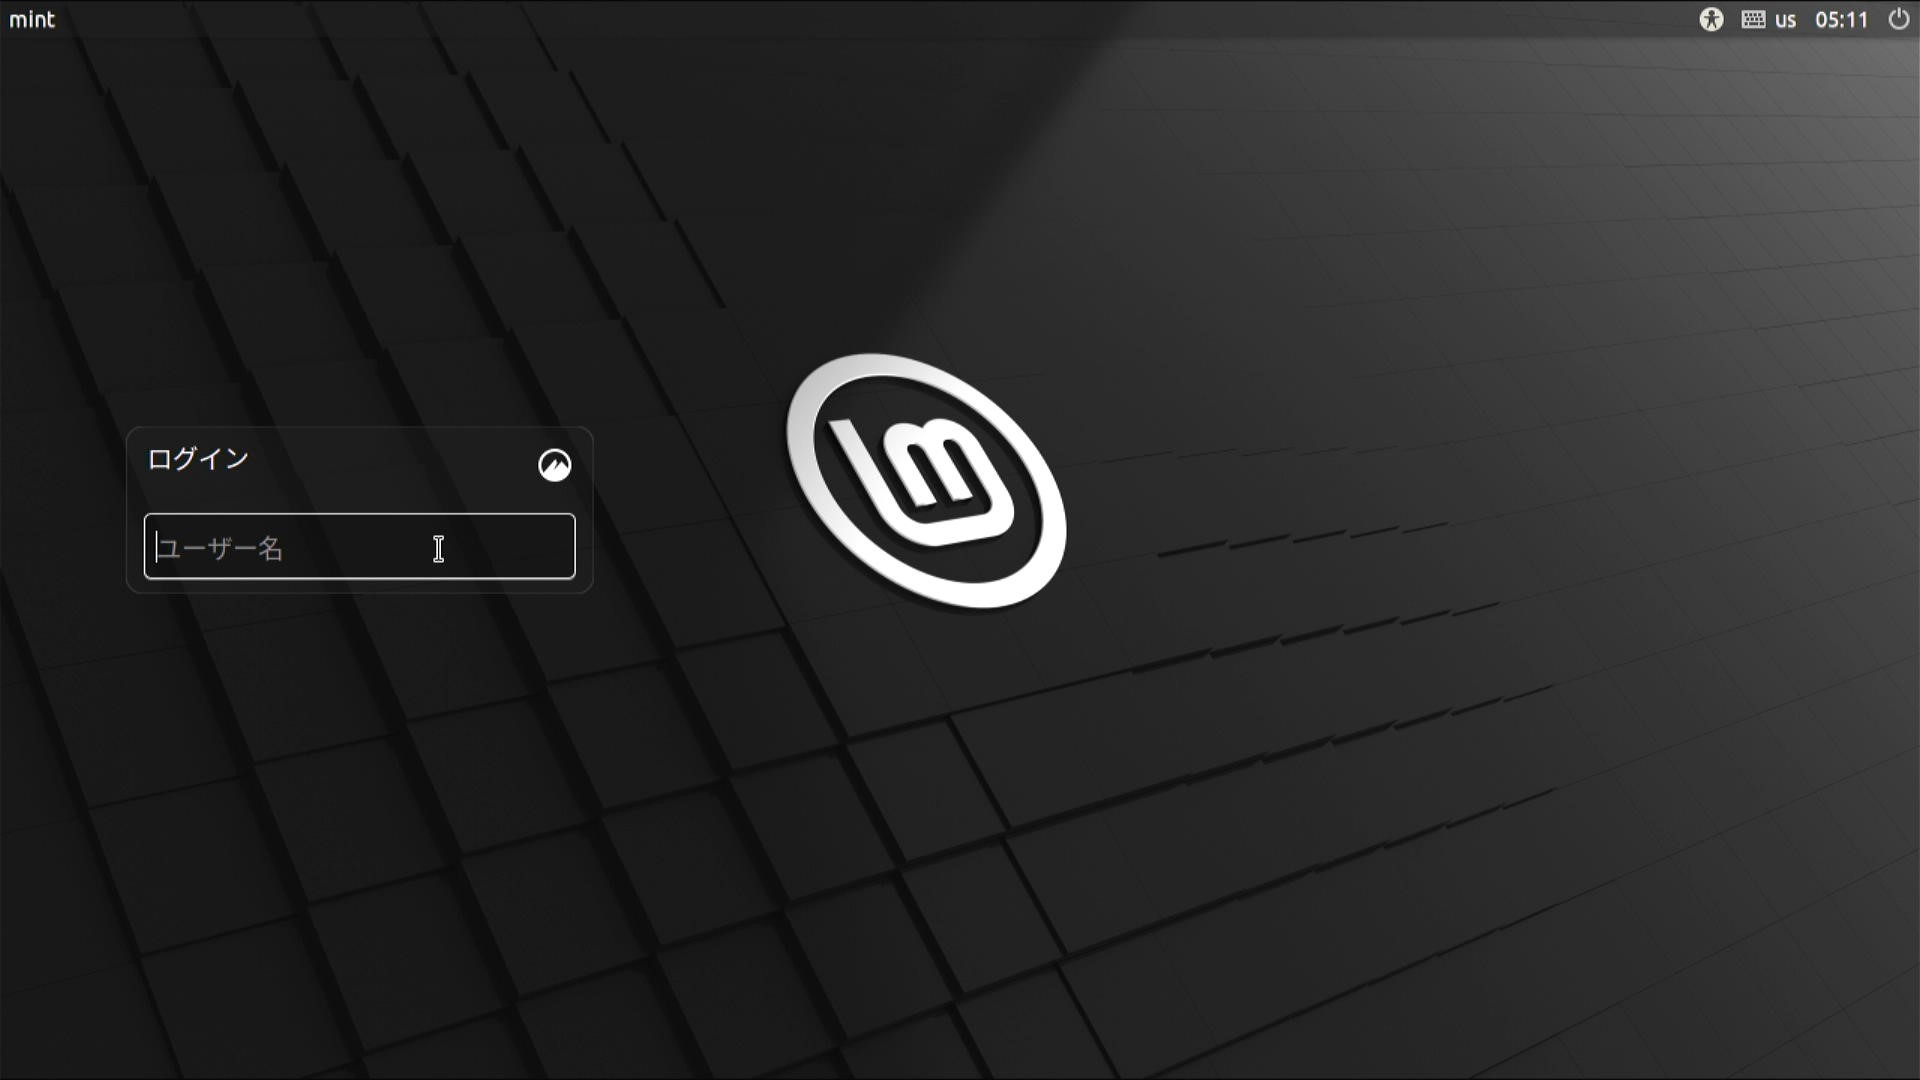
バージョンによっては、ログイン画面が異なります。ユーザー名を求められる場合あり。
下記はユーザー名「mint」、パスワードなしのパターン

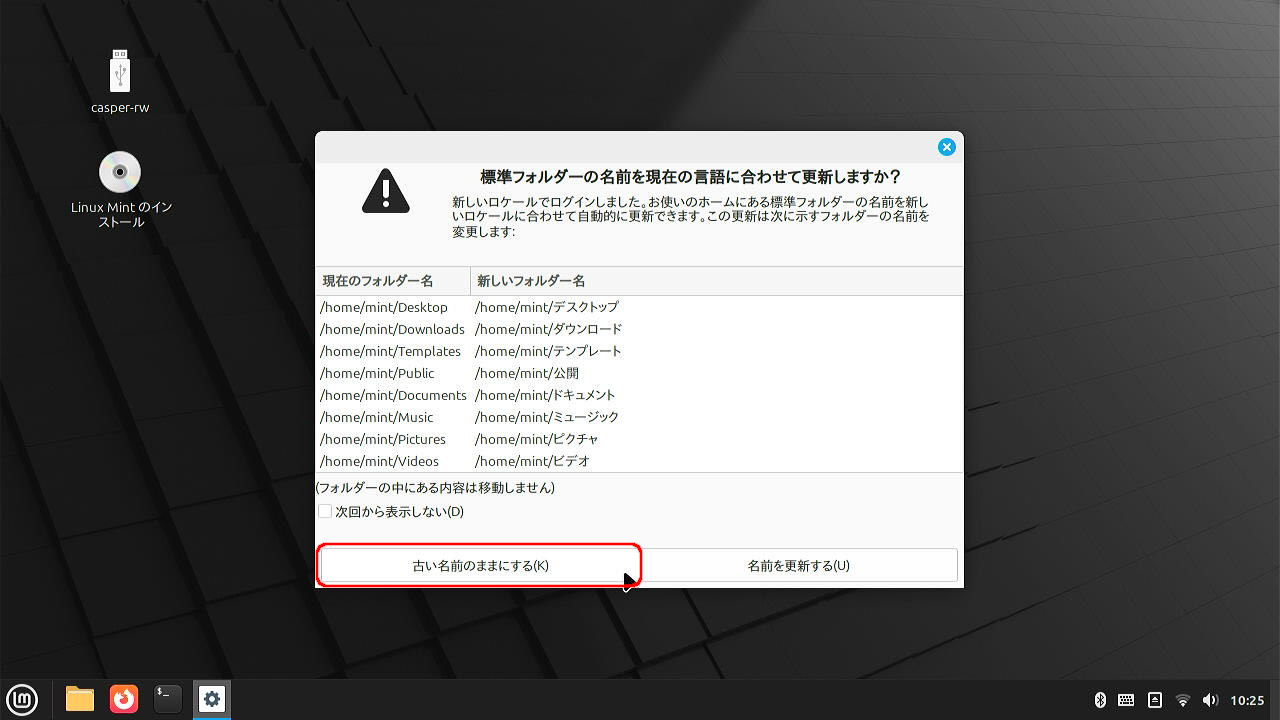
日本語で表示されているのがわかると思います。
すぐ、上のような案内が出ます。フォルダの名称を日本語にするかどうか(例:Downloads → ダウンロード)の問い合わせです。私は、英語のままでよいので、「古い名前のままにする」を選択しました。
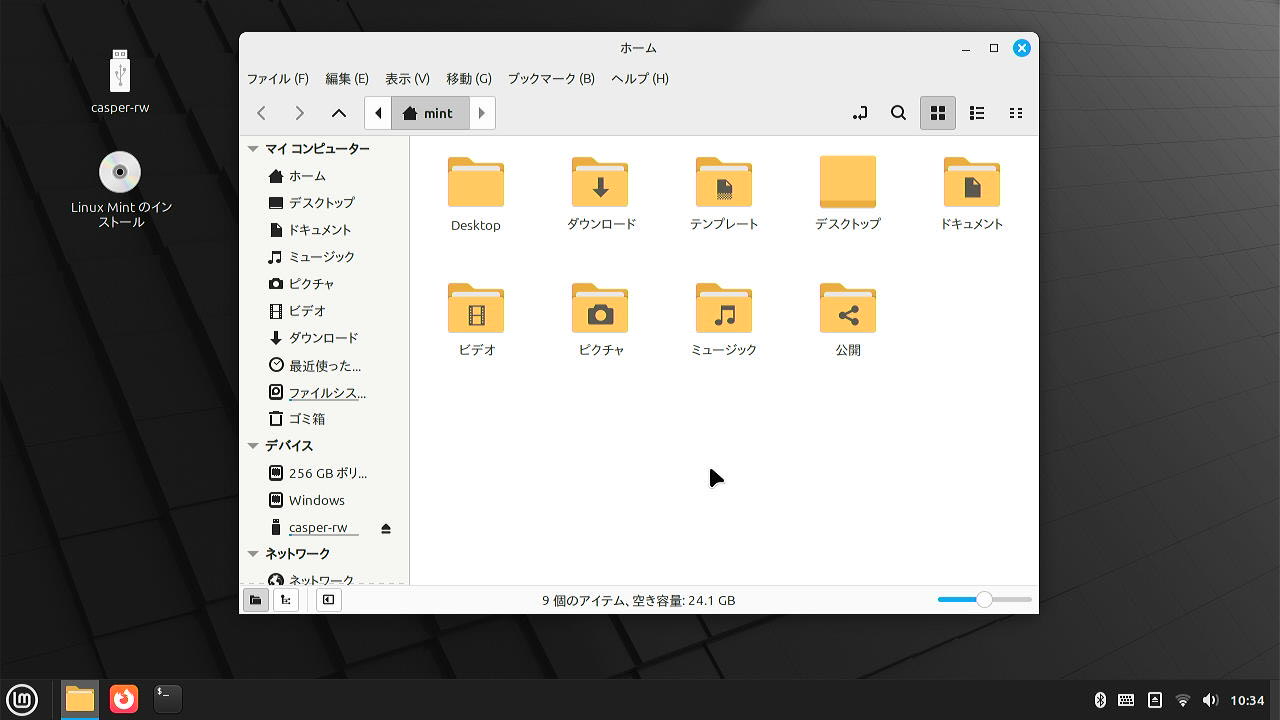
フォルダを日本語表記にすると、このようになります。
日本語入力がインストールできているか確認
右下のキーボードアイコンを、右クリックします。
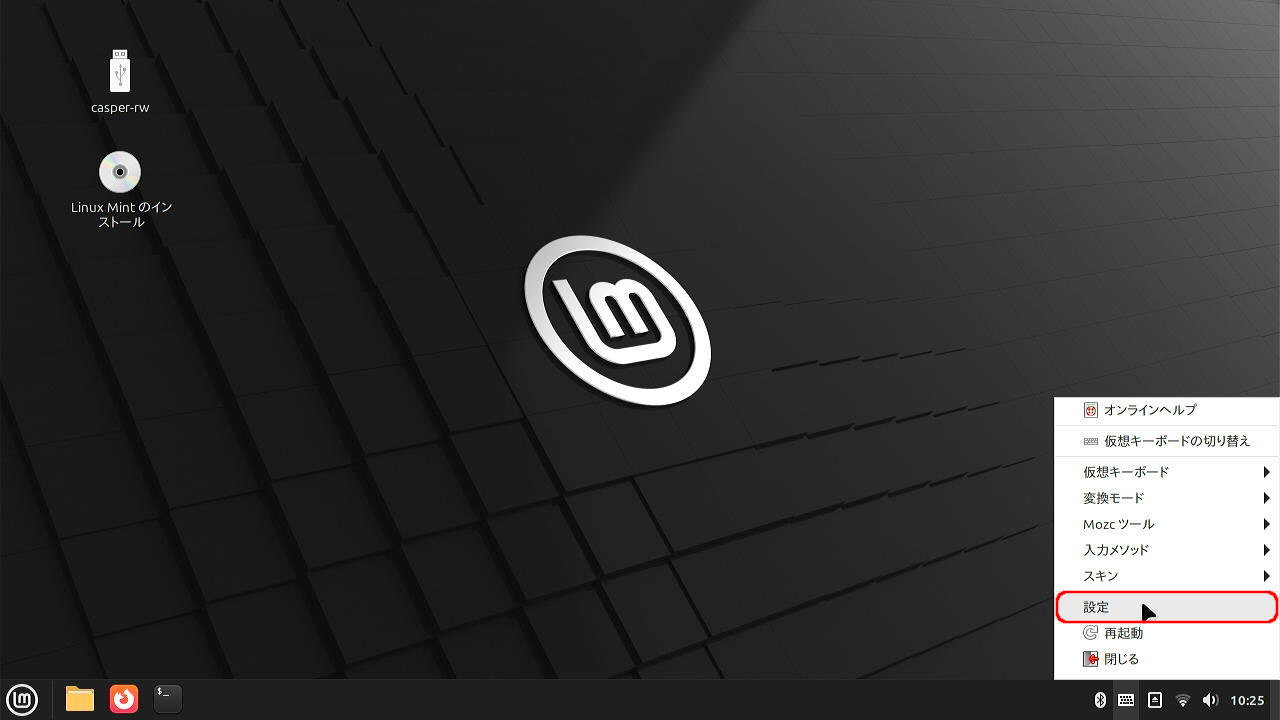
「設定」をクリック
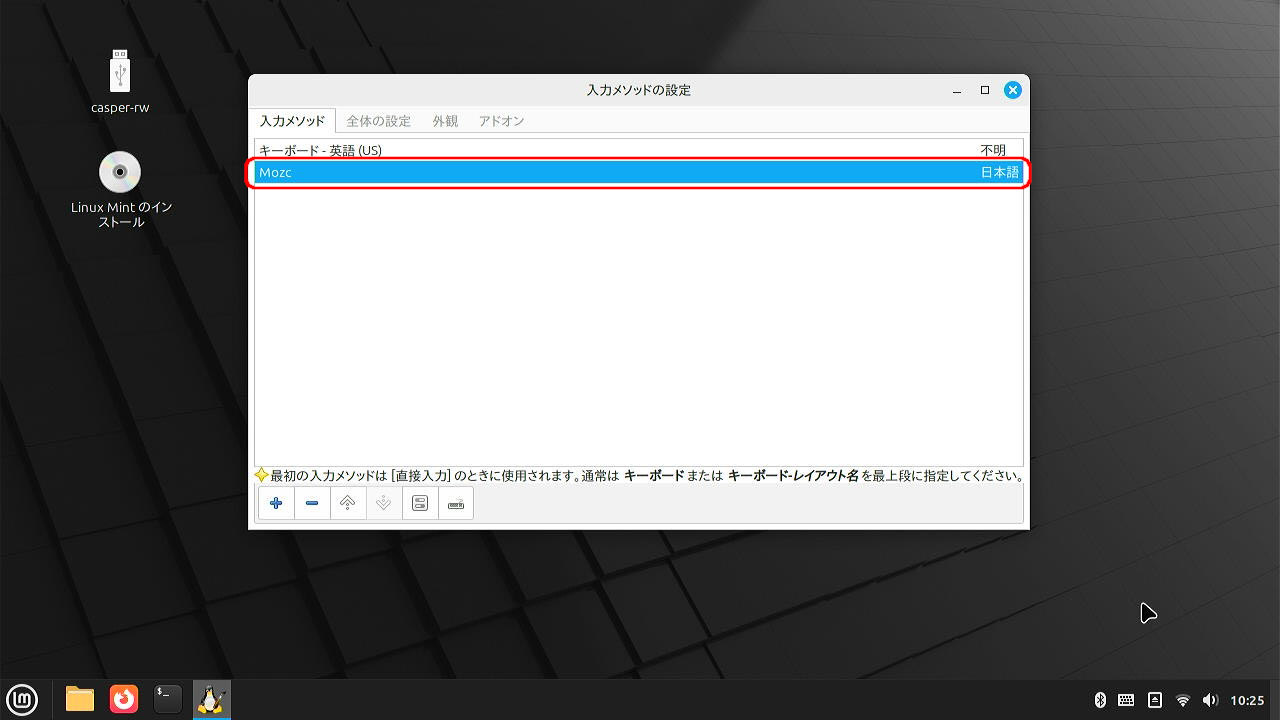
「Mozc」があればOKです。
日本語を入力してみる
日本語入力ができるかやってみましょう。
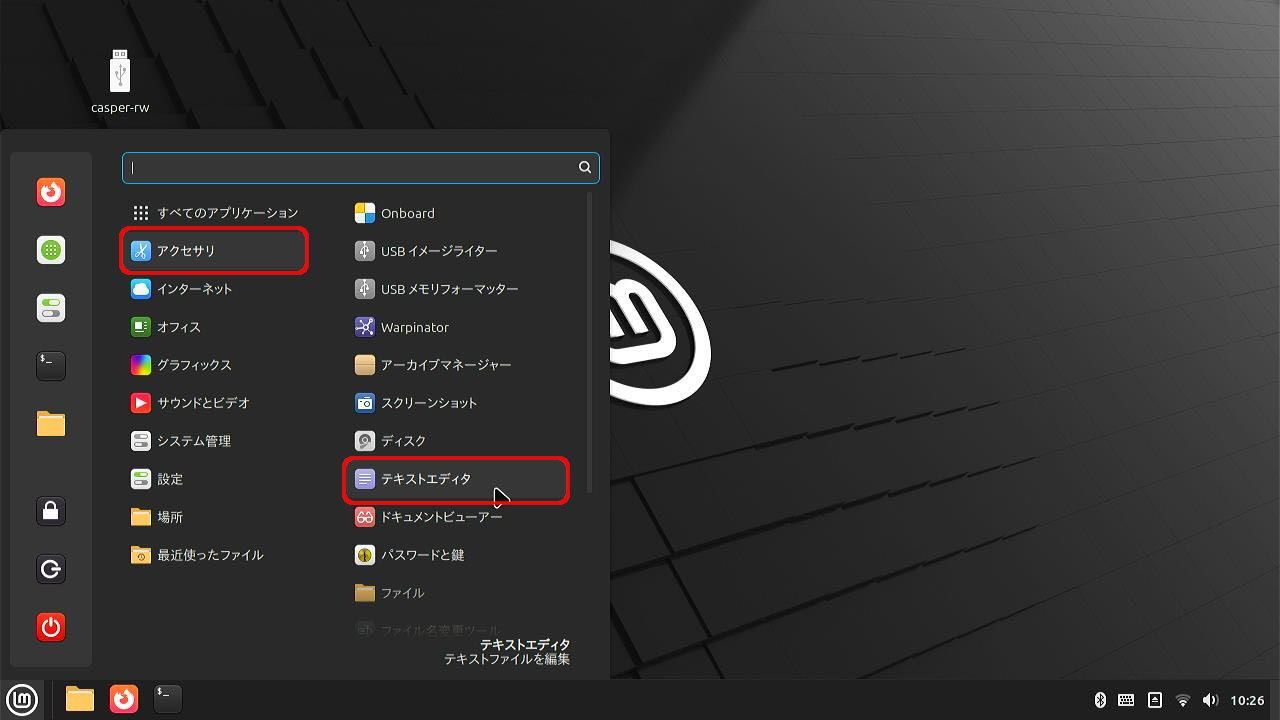
「メニュー」-「アクセサリ」ー「テキストエディタ」を開きます。
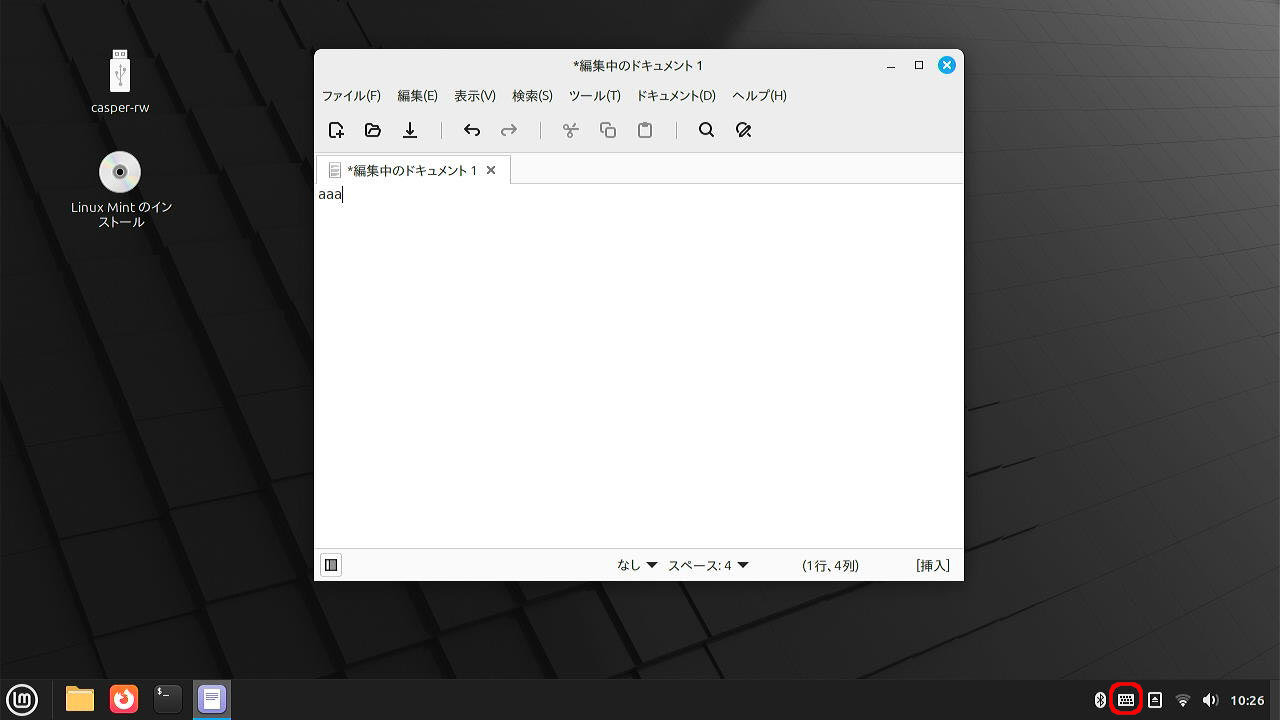
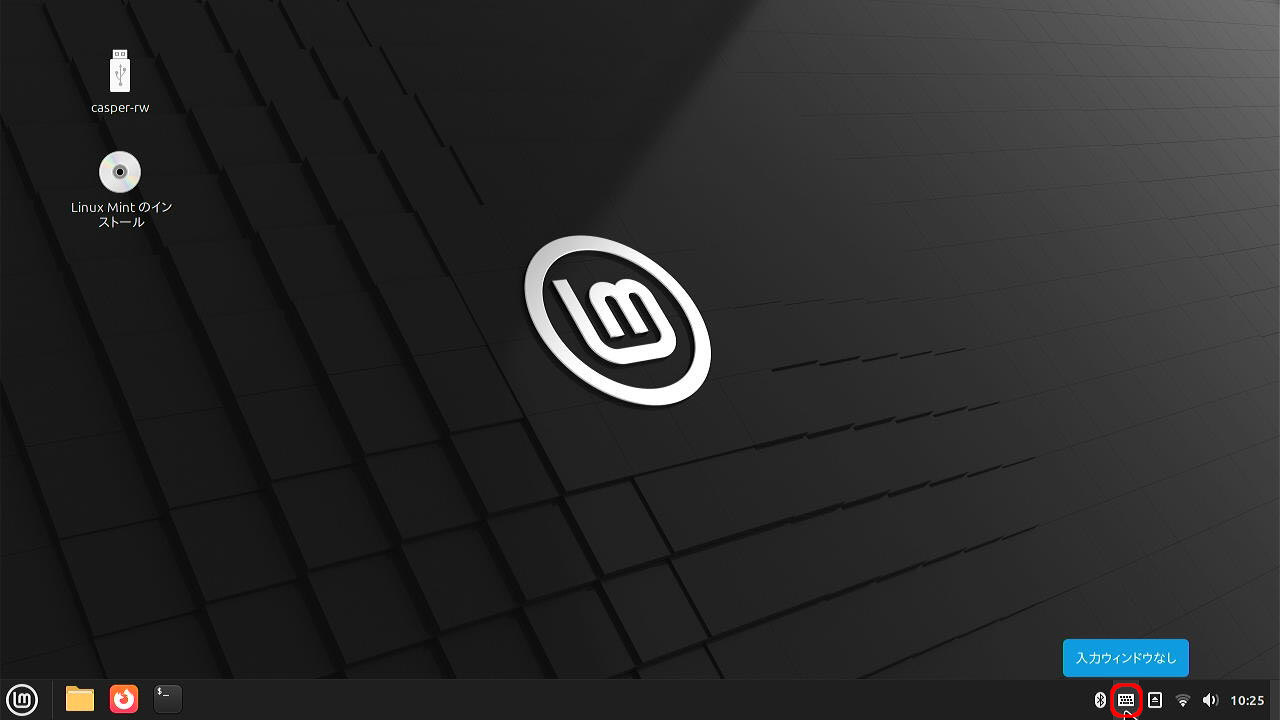
キーボードアイコンが、下のアイコンになっていない場合は、キーボードアイコン(赤枠のところ)を左クリックするか、「CTRL」+「スペース」で切り替えます。

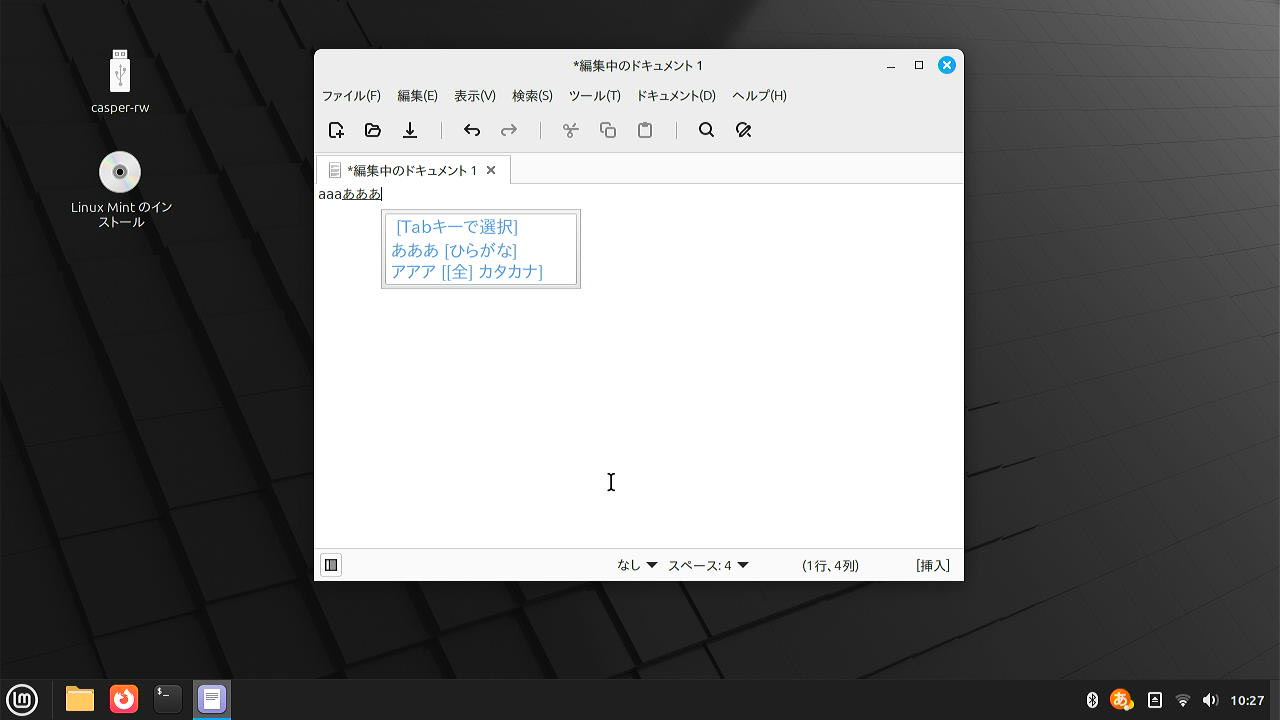
あとはWindowsと同じ「半角/全角」キーか、「Ctrl」+「スペース」で全角/半角を切り替えながら入力します。
これで、基本的な設定は終わりです。Webブラウザ(FireFox)を使ったり、ファイルの操作をしたり、いろいろ触ってみてください。
PCの終了のさせ方
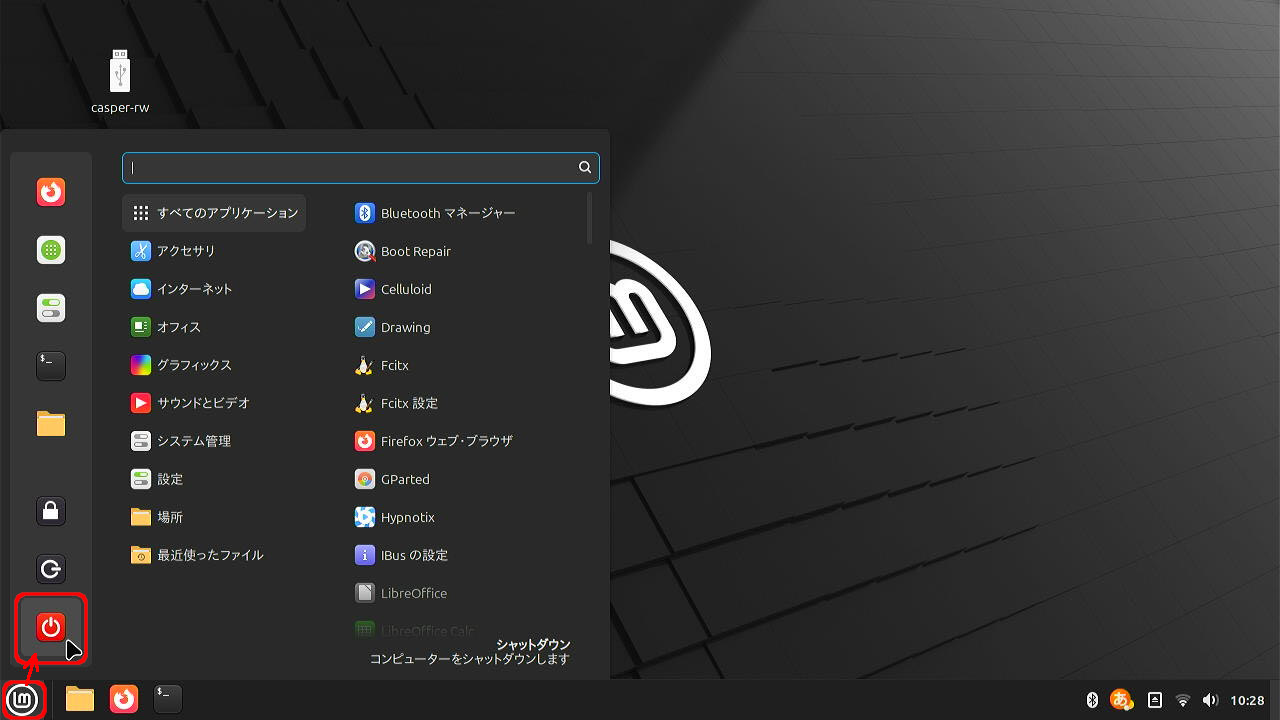
スタートメニューから、赤のボタンをクリック。
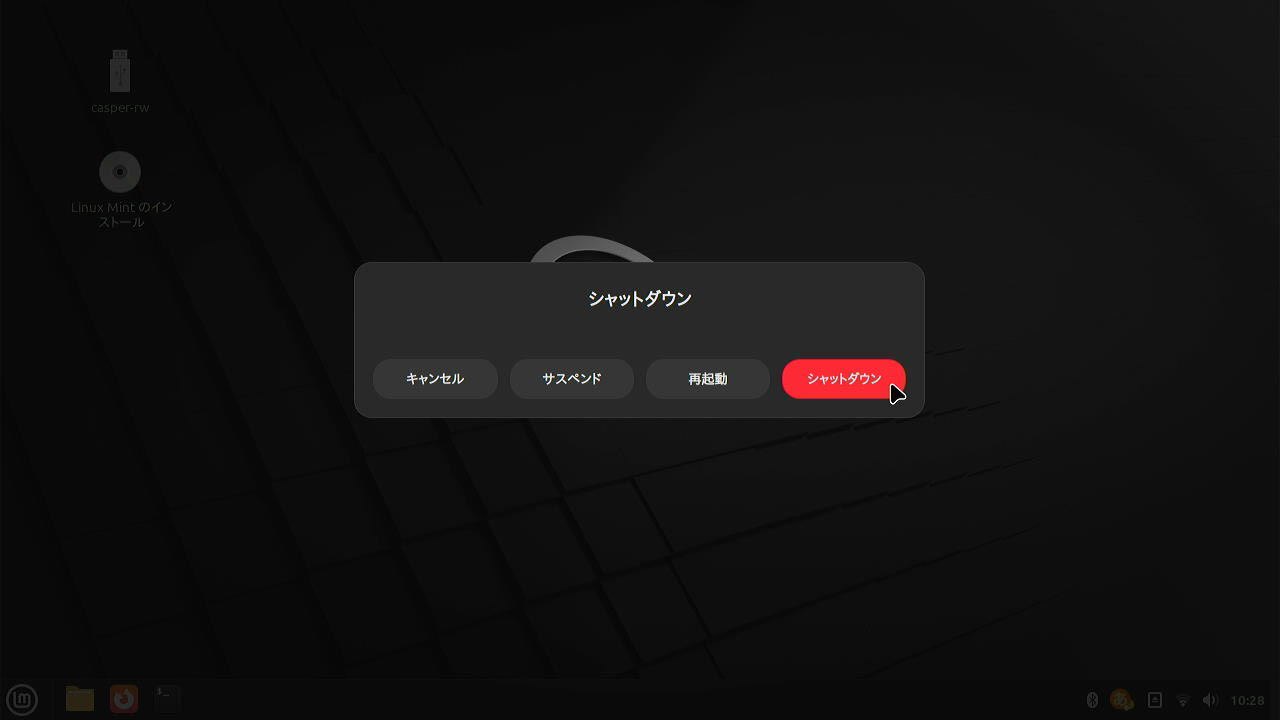
シャットダウンか、再起動を選ぶウィンドウが出るので、「シャットダウン」を選択
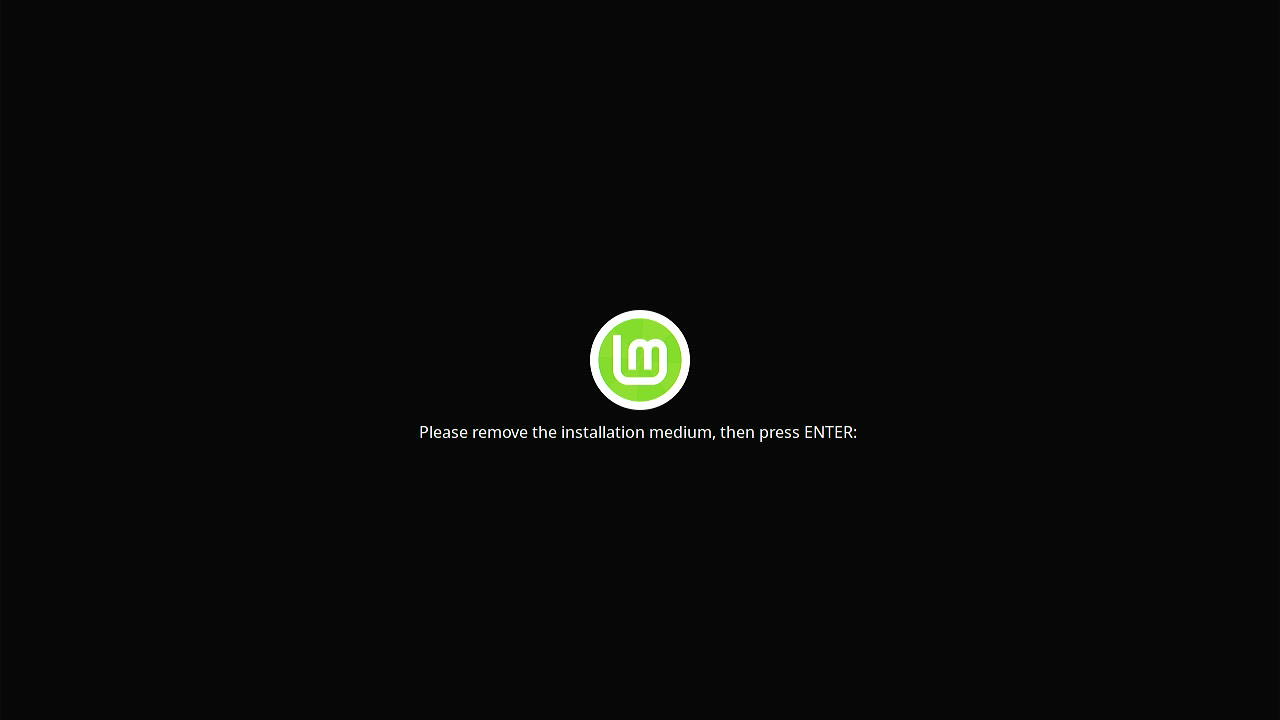
このような画面が出るので、LiveUSBをぬいて、「Enter」キーで終了です。
時間設定
タイムゾーンの設定
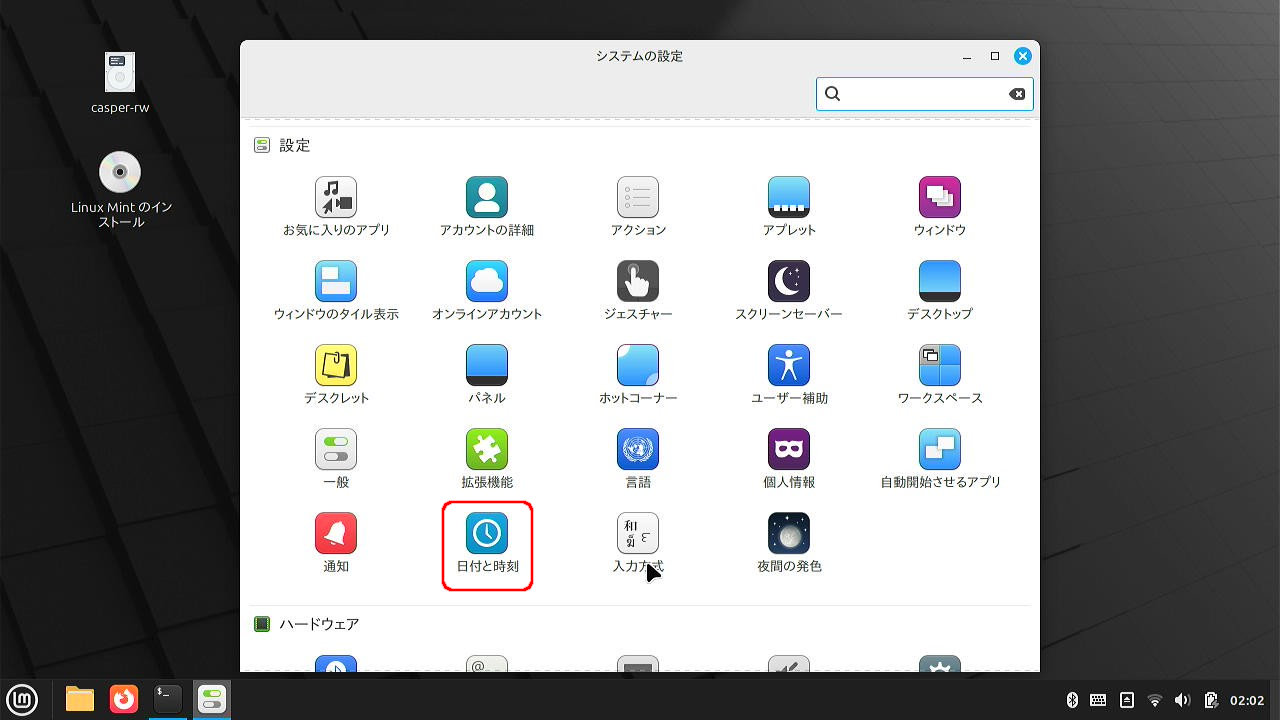
システムの設定から、「日付と時刻」をクリックして開きます。
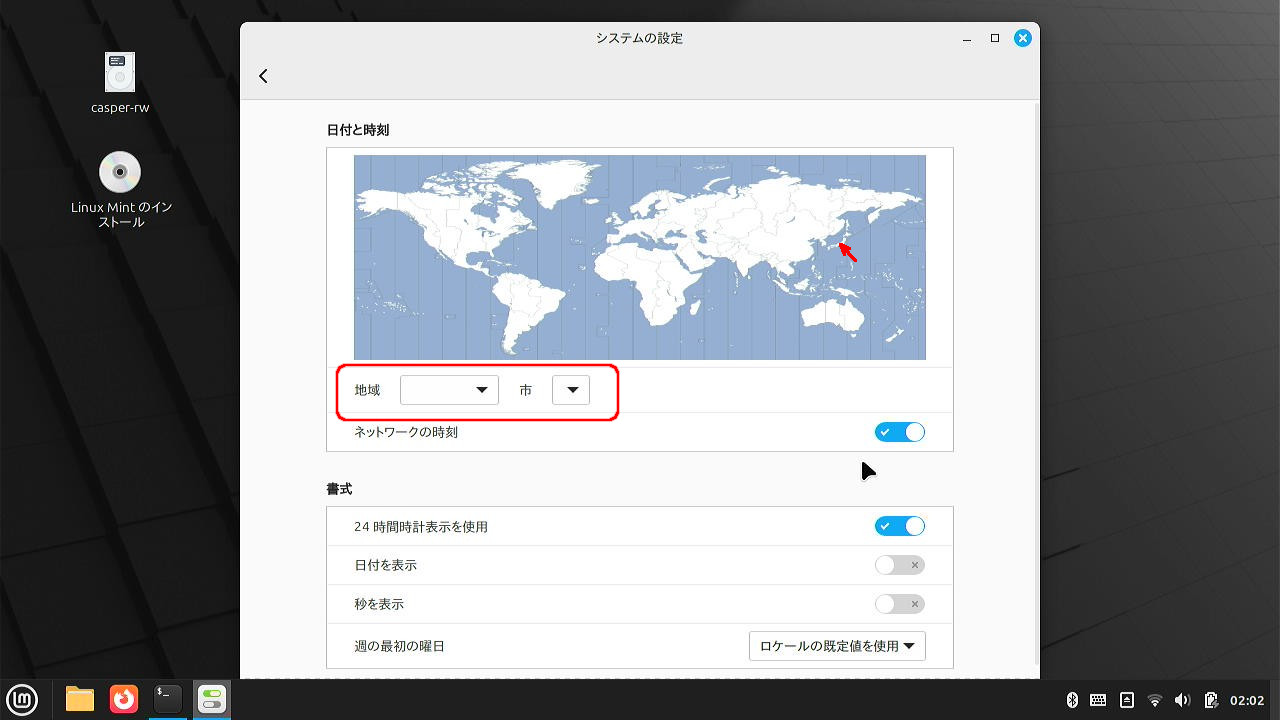
方法として2つあります。
- 地図の日本をクリック
- 「地域」をリストから「Asia」を選択し、次に「市」をリストから「Tokyo」を選択
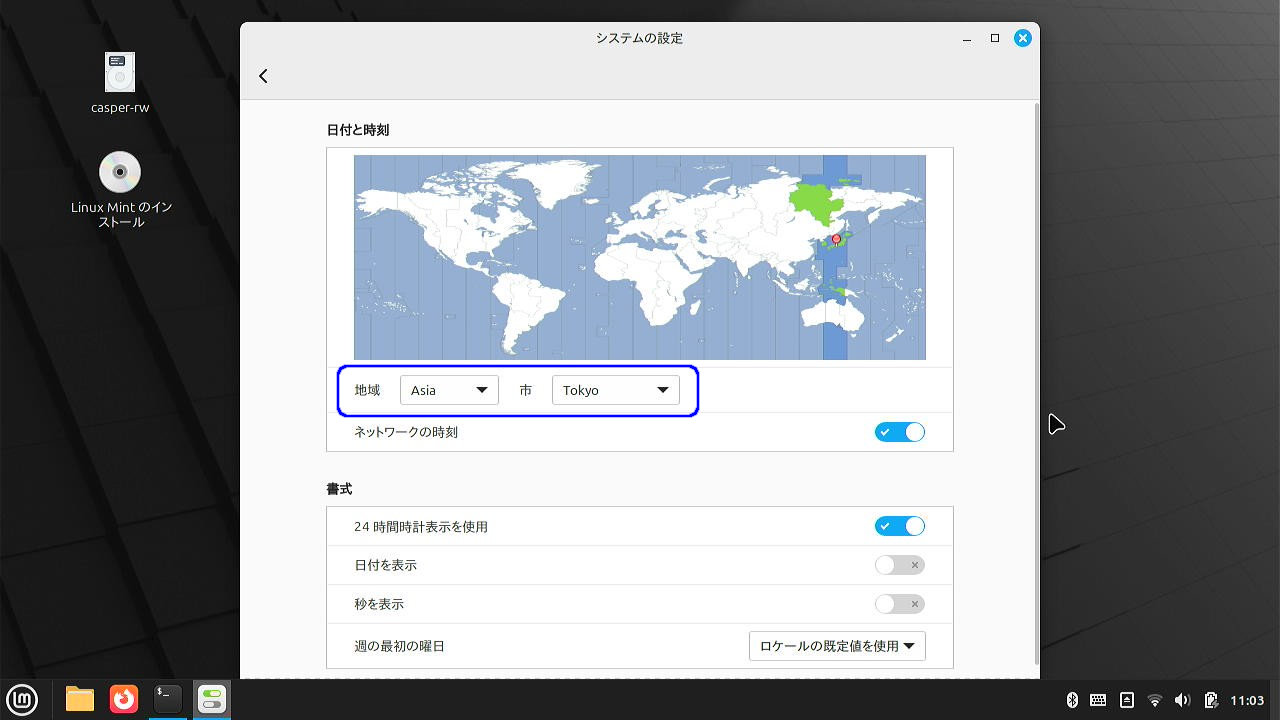
これで設定完了です。
WIndowsと時計がずれる問題
LiveUSBを使用したあと、同じPCでWindowsを起動すると、時計がずれます。
こちらを参考になおしましょう。


コメント
初めての投稿ですが失礼します。
当方 永作と申します。Linux mintに興味が出て調べているうちに
此方の「保存できるLiveUSBをつくろう!」編に辿り着き見よう見まねで
作成しましたが保存画像の画面の表示に成りません。
10回数回説明を見ながらUSBに書き込みましたがデスクトップに保存のUSBアイコンが出来ません。
rufusでの保存領域の設定の有無だけが違うことしか判りません。
お気付きの点が有りましたらご指摘よろしくお願いします。
USBは32㎇ 3.2。PCは古い東芝ダイナブックです。
コメントありがとうございます。
「rufusでの保存領域の設定の有無だけが違うことしか判りません。」とのことですが、LiveUSB作成時に、保存領域を設定していないということでしょうか。
設定しなければ、通常の書き込みできないLiveUSBが作成されます。
書き込みできるLiveUSBを作成するには、保存領域の設定は必須のため、もし保存領域を設定していないのであれば、設定してみてください。
今晩は。はじめまして失礼します。
早速のご返答ありがとうございます。結果的にご指摘の通りですね。
あとisoファイルのバージョンが肝かなと思います。
おかげ様で本日本日完成しました。此方のページが無ければたどり着く事は出来なかったです。
ありがとうございました。
CAPTCHA コードみずらいですね。j
今晩は。はじめまして失礼します。
早速のご返答ありがとうございます。結果的にご指摘の通りですね。
あとisoファイルのバージョンが肝かなと思います。
おかげ様で本日本日完成しました。此方のページが無ければたどり着く事は出来なかったです。
ありがとうございました。
CAPTCHA コードみずらいですね。p
すいません。コメントいただいたのを見逃しました。
うまくいったようで何よりです。
一度できるようになるまでが、大変ですよね。私も、何度も失敗してます。
CAPTCHAコードですが、どなたかが作ったプラグインを利用させていただいているので、私の力ではなんともできず。お手数をおかけしました。
はじめまして、大島と申します、保存できるLiveUSB作成が上手く作成出来ません、アドバイスお願いします。。
Rufus-4.7とlinuxmint-22.1-xfce-64bit.isoを元に「保存できるLiveUSBをつくろう!」を参考にさせて頂き、LiveUSBを作成したのですがCasper-rw」アイコンが表示されません。rufusでの保存領域は最大値にしました。
コメントありがとうございます。
Linux Mint 22.1 Xfce Editionでためしてみました。たしかに、「Casper-rw」はデスクトップ上に現れないのですが、LiveUSBのユーザー「mint」の各フォルダ、「Document」や「Download」などにファイルを保存することができます。
(記事中にINFOとして画像付きで追記しましたので参照ください)
これらは、「casper-rw」の中にあるフォルダなので、実用上は問題ないかと思います。
ただ、私も時間無く、1個だけファイルを保存し、再起動後に、保存したファイルを開けるのを確認しただけなので、ご自分でお試しいただいた方が良いかと思います。
早速のご返答ありがとうございます、記事中のINFO読ませて頂きました、VLCのインストール、Mintフォルダ下のvideoフォルダにmp4ファイルをコピー、壁紙の変更をしてログアウト、ログインしてからシャットダウン、再度MintをたちあげるとVLCやmp4ファイルがありません、壁紙も元に戻っています、linuxmint-22.1-cinnamon-64bitで試してみても同じです、また無線の接続も保存されません。
連絡遅くなりました。2日間かけて検証してましたが、保存されない状態が再現できません。
Linux Mint 22.1 cinnamon、Xfceとも保存できています。
テストに使用したPCは、Let’sNote CF-SV8、HiMeLE Overclock4C、GMKtec NucBoxG9、MINISFORUM NAB9で、Windows11 24H2、Rufus4.7pで書き込みしてます。
いずれも、VLCのインストールも、動画ファイルの保存・再生もできており、再起動後も消えることなく保存されています。
Rufusの設定も、MBRをGPTに変えたり、FATをNTFSにしたり、保存領域をMAXから減らしたりしましたが、いずれも症状はでません。
これ以上は、申し訳ありませんがわかりません。
Rufusのサイト、https://rufus.ie/ja/ にFAQや問い合わせが先が書かれていますので、そちらでお問い合わせください。
お手数をおかけしました、先頭メニューは相変わらず保存出来ませんがcompatibility mode(上から二番目のメニュー)で起動したところ設定が保存出来ました、その後、こちらのページを参考にさせて頂き日本語化も上手くいきました、本当にありがとうございました!、当方Linux初心者でこれからのスキルアップにモーさんのサイトを参考にさせて頂きます。今回はかなり古い東芝PC(R731 Win10にUpgrade済)を使用したのでその辺に原因あるかもしれません。
なんとかなったようで何よりです。
拙い記事ですが、お役に立てれば幸いです。