
はじめに
前回は、Windows11Proをクリーンインストールしました。

今回は、同じSSDにをインストールし、LinuxとWindows11Proのデュアルブートを実現します。
Linuxには、Linux Mint Debian Edition ・・・LMDE6を使用しました。

事前準備
インストールメディアの作成
Linux MintのダウンロードサイトでLDME6のISOファイルをダウンロードし、balenaEtcher等で、USBメモリへ書き込みます。
このあたりの記事を参考にしてください。

BitLockerの解除
Windows11Proで起動し、BitLockerを解除します。これをやらないと、Linuxで起動した後に、Windows11Proを起動すると、毎回解除キーの入力を求められます。
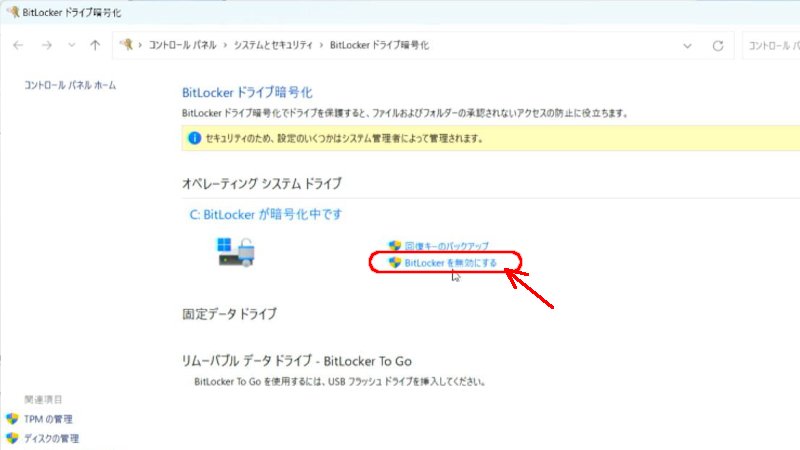
コントロールパネル>システムとセキュリティ>BitLockerドライブ暗号化 を開き、「BitLocerを無効にする」をクリックします。
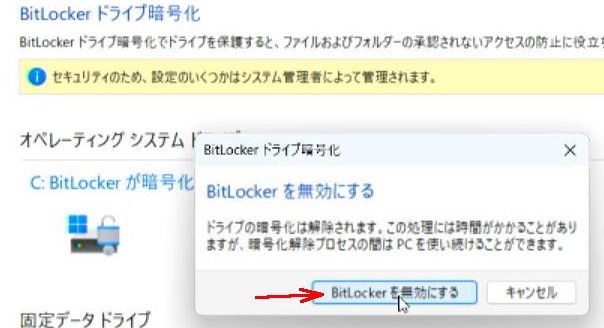
確認メッセージが出ますが、「BitLockerを無効にする」をクリックして進めます。
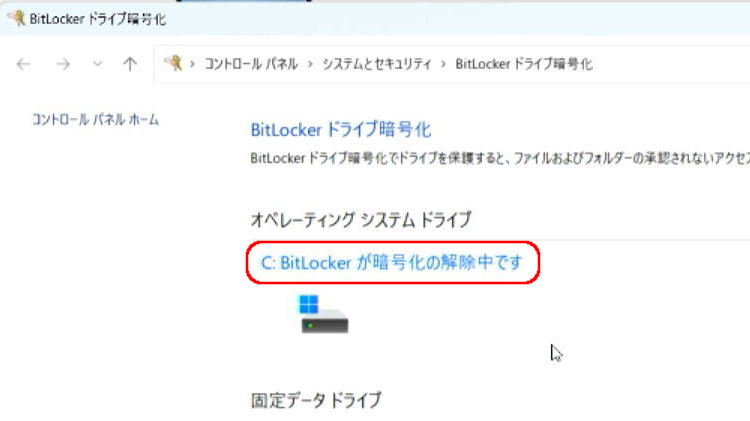
解除中のメッセージがでるので、しばらく待ちます。
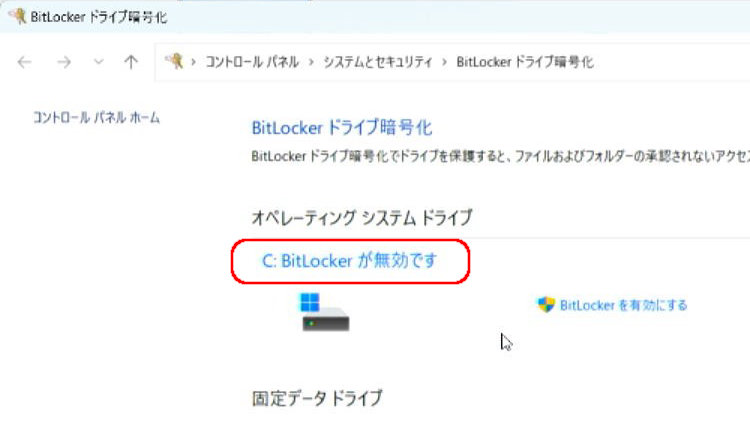
「BitLockerが無効です」
となれば完了です。
SSDパーティションの変更
Linux Mint Debian Edition ・・・LMDEのインストールメディア(USBメモリ)から起動し、パーティション編集ツールである、GPartedを使って、内臓SSD内に、LMDEのインストール領域と、LMDEとWinowsの両方からアクセスできる共通の保管場所を作ります。
LMDEのインストールメディアから起動
LMDEのインストールメディア(USBメモリ)をLet'sNoteに差し、電源をいれます。

「Panasonic」のロゴが表示されたら、
F2 もしくは Del キーを連打します。
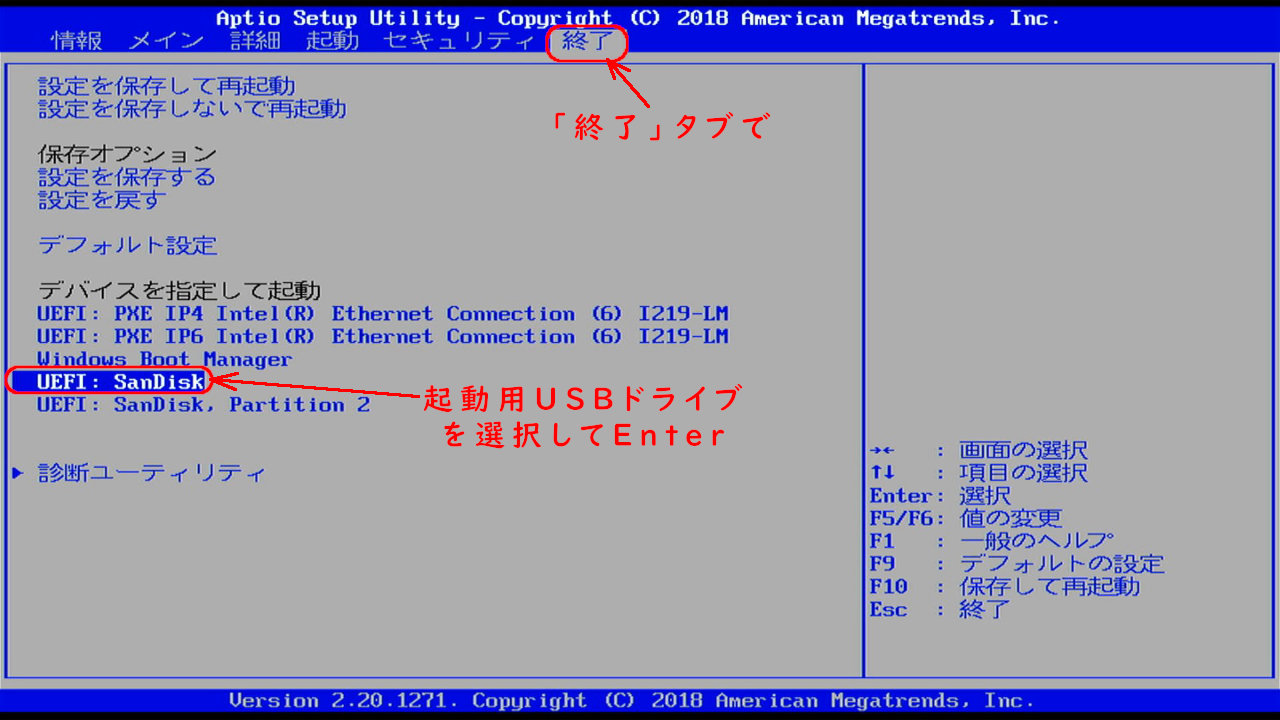
「終了」タブへ行き、「ディバイスを指定して起動」の中から、USBメモリを選択し起動ます。
「UEFI :」の後ろに、メーカー名やUSBメモリの名称が出るようです。
今回、SanDisk製のものを使用しているため、「SanDisk」と表示されています。
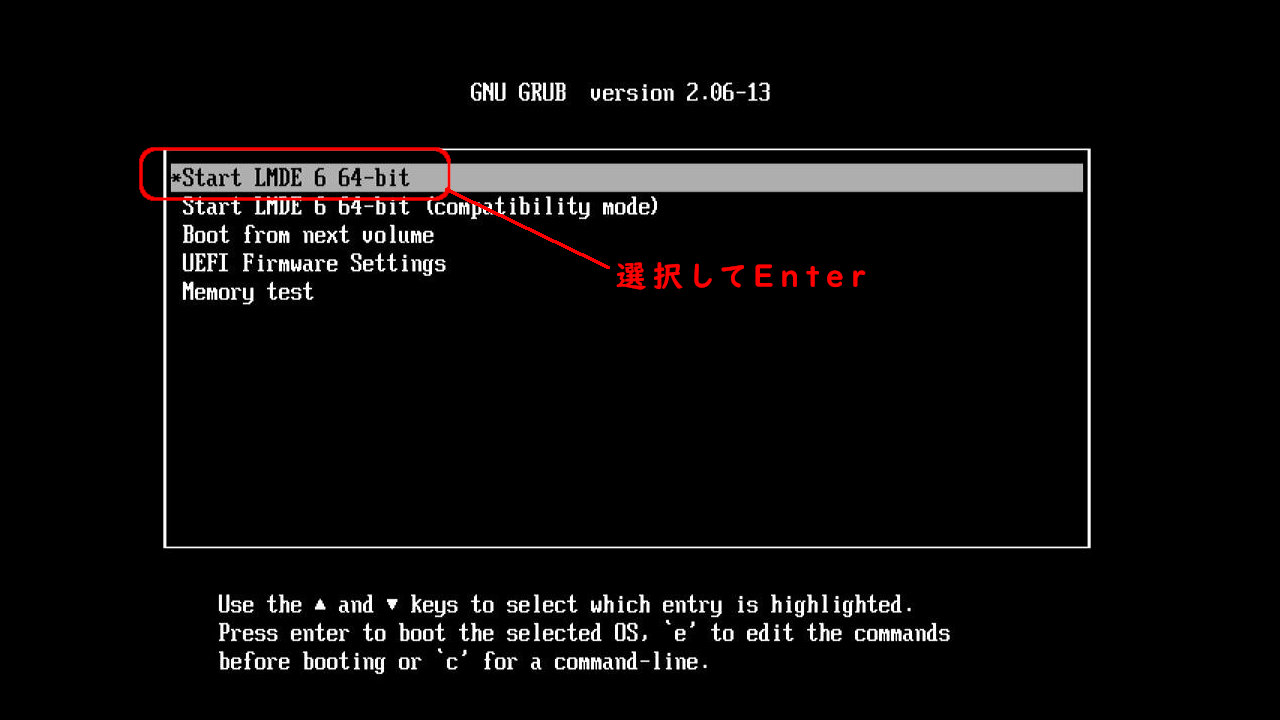
起動選択画面がでるので、一番上の「Start LMDE 6 64-bit」を選択肢、Enterで起動します。

ロゴが表示され、起動が始まります。
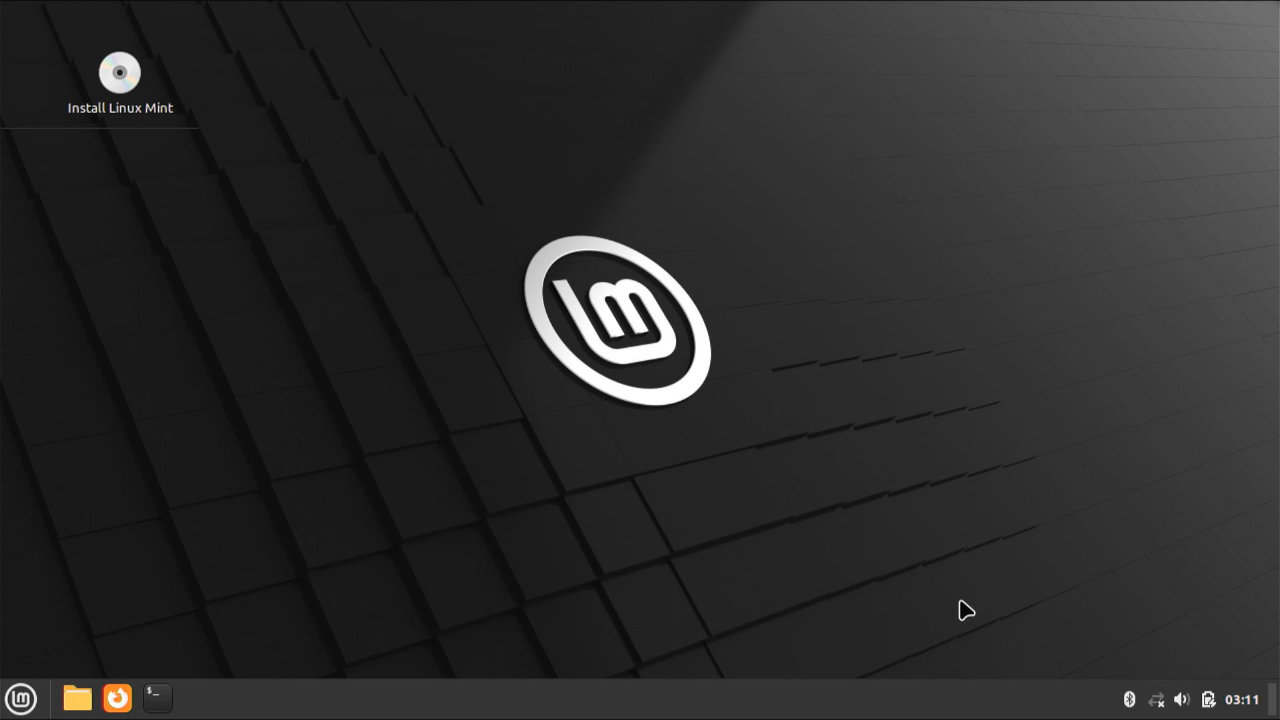
起動しました。
GParted
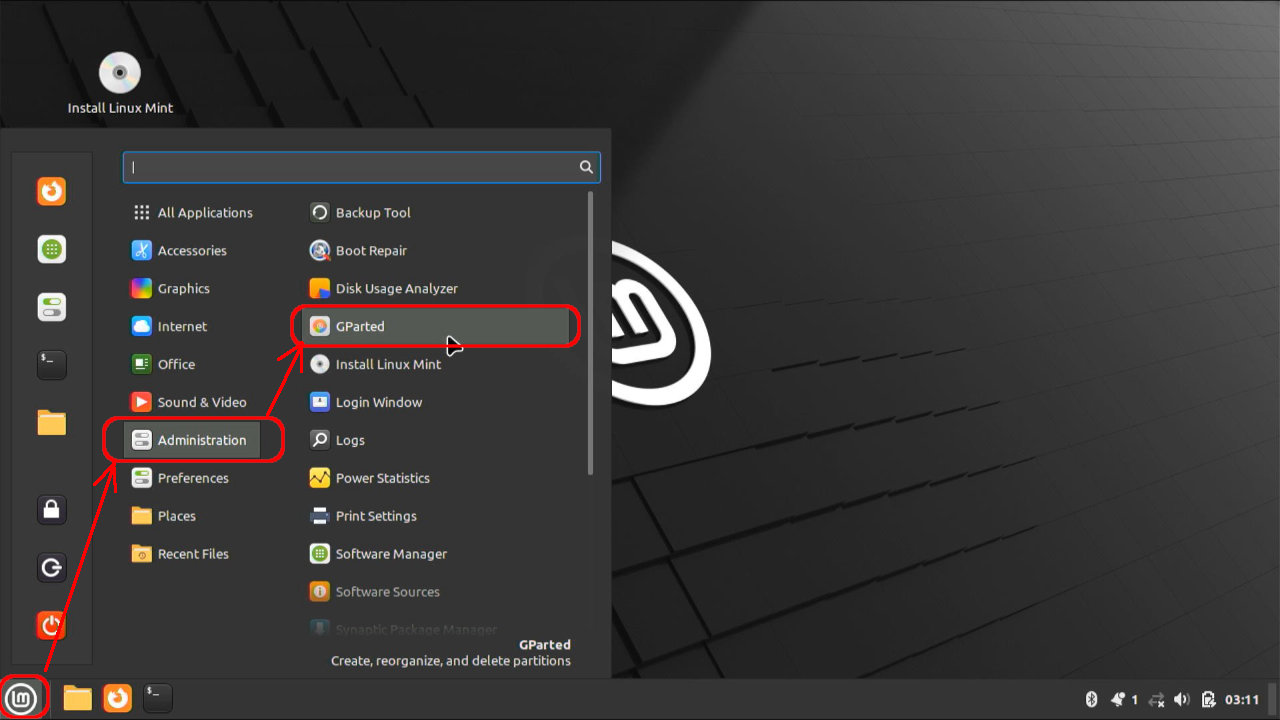
左下のメニューボタン > Administration > Gparted
とたどり、GPartedを起動します。
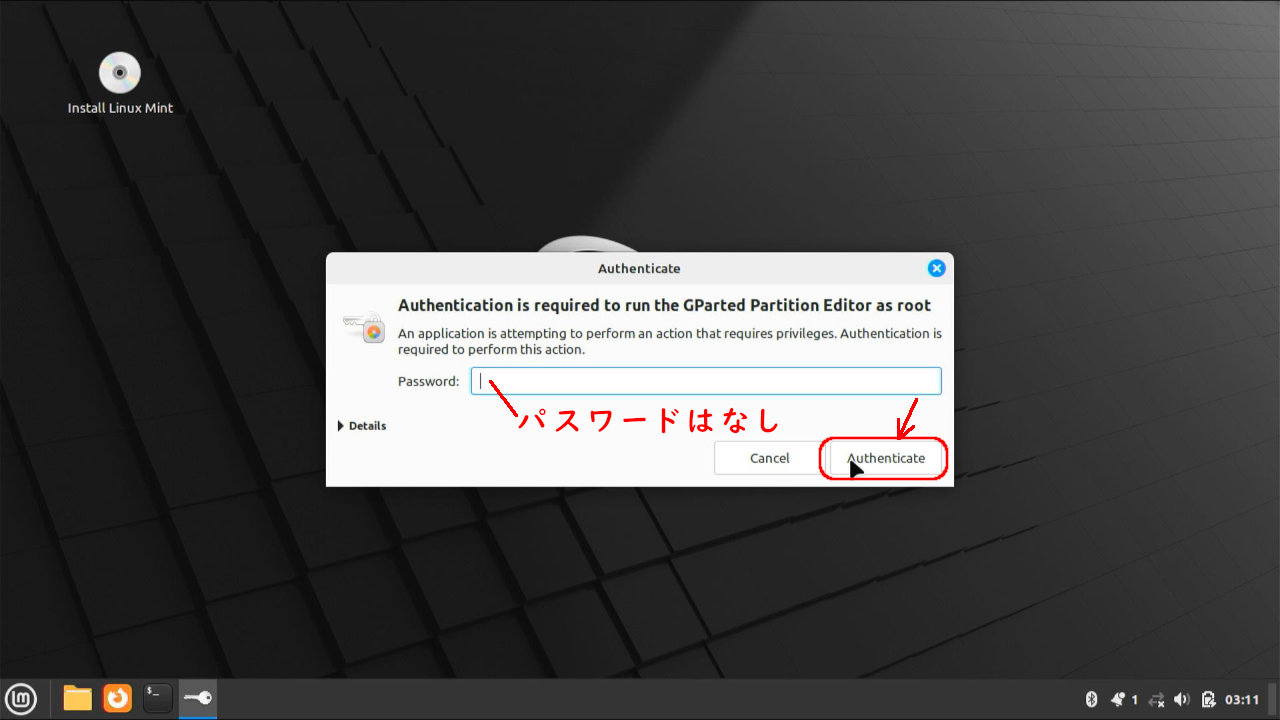
LMDEのインストールメディア(USBメモリ)から起動した場合は、Gpartedを起動するのにパスワードはありません。
そのまま「Authenticate」ボタンをクリックします。
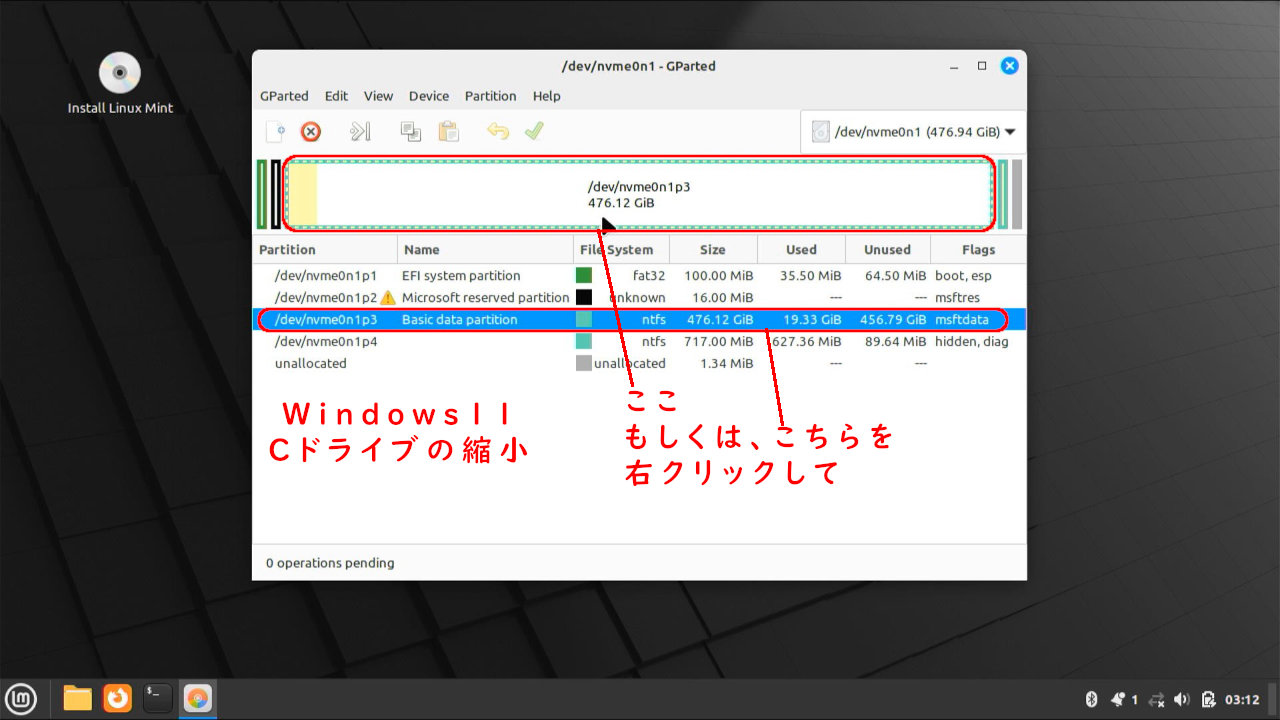
内臓SSDのパーティションが表示されます。
Windowsで全体を使用していて、空きがありません。
まず、WindowsのCドライブを縮小します。
Cドライブである、/dev/nvme0n1p3の部分を右クリックして、
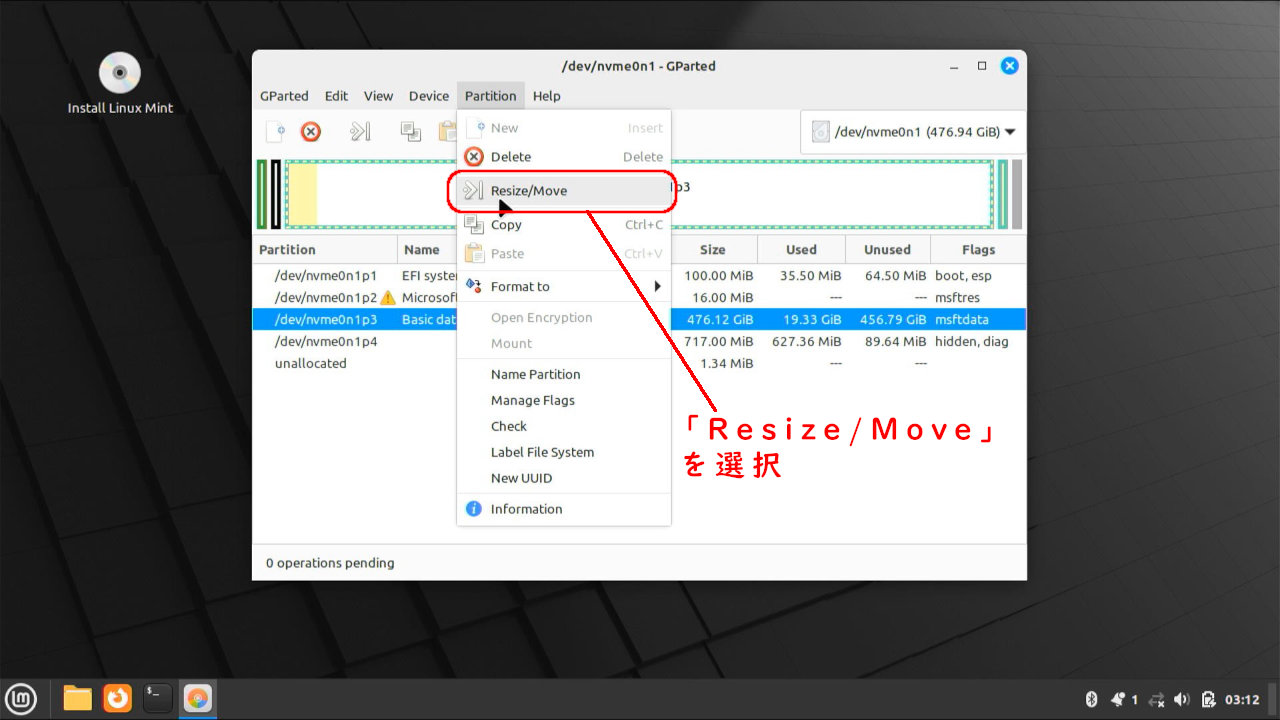
メニューから「Resize/Move」を選択します。
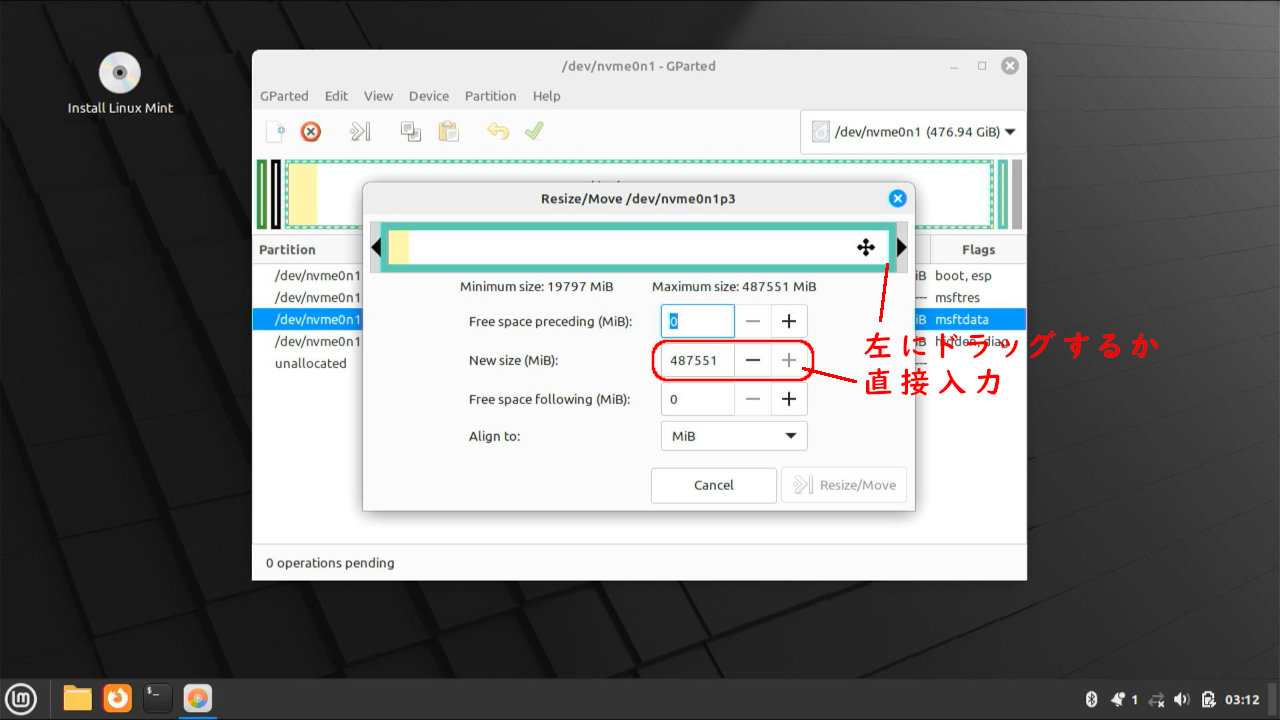
Cドライブを縮小します。
方法としては、ドラッグによる方法と、サイズ(「New size (MiB):」のところ)を直接入力する方法があります。
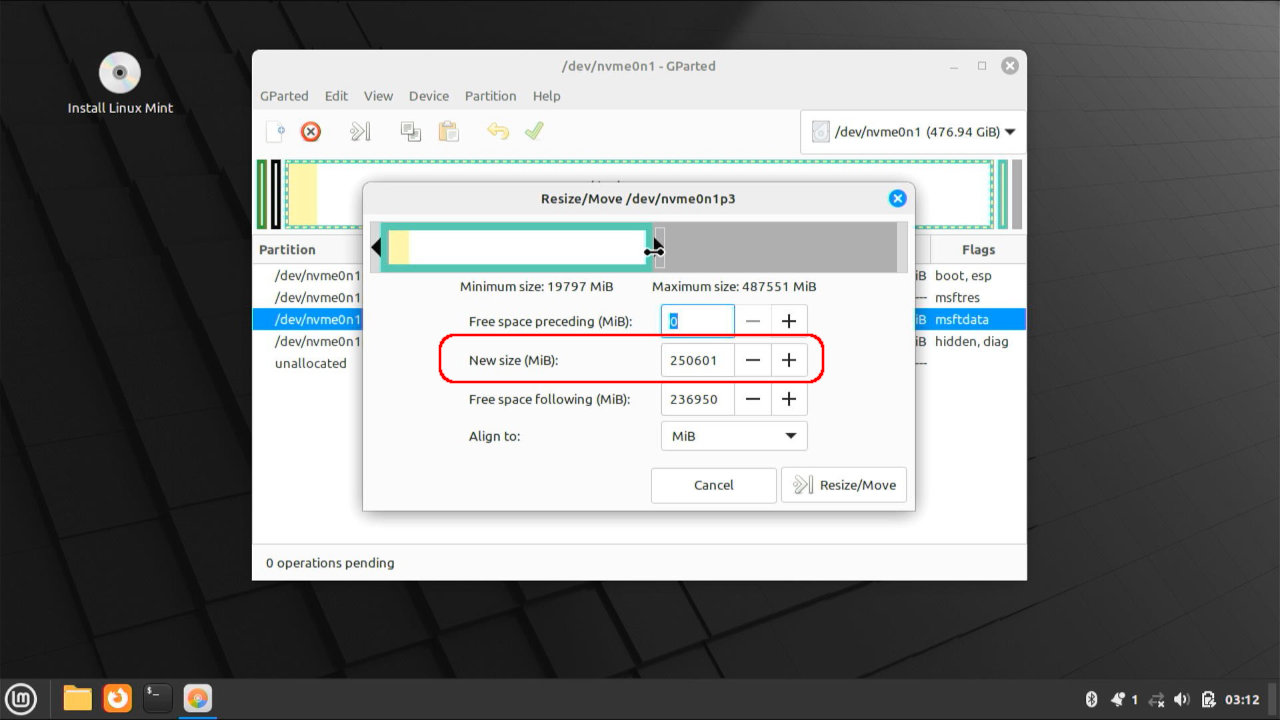
今回、ドラッグで調整しました。
SSDの半分ほど、250GBぐらいにしました。
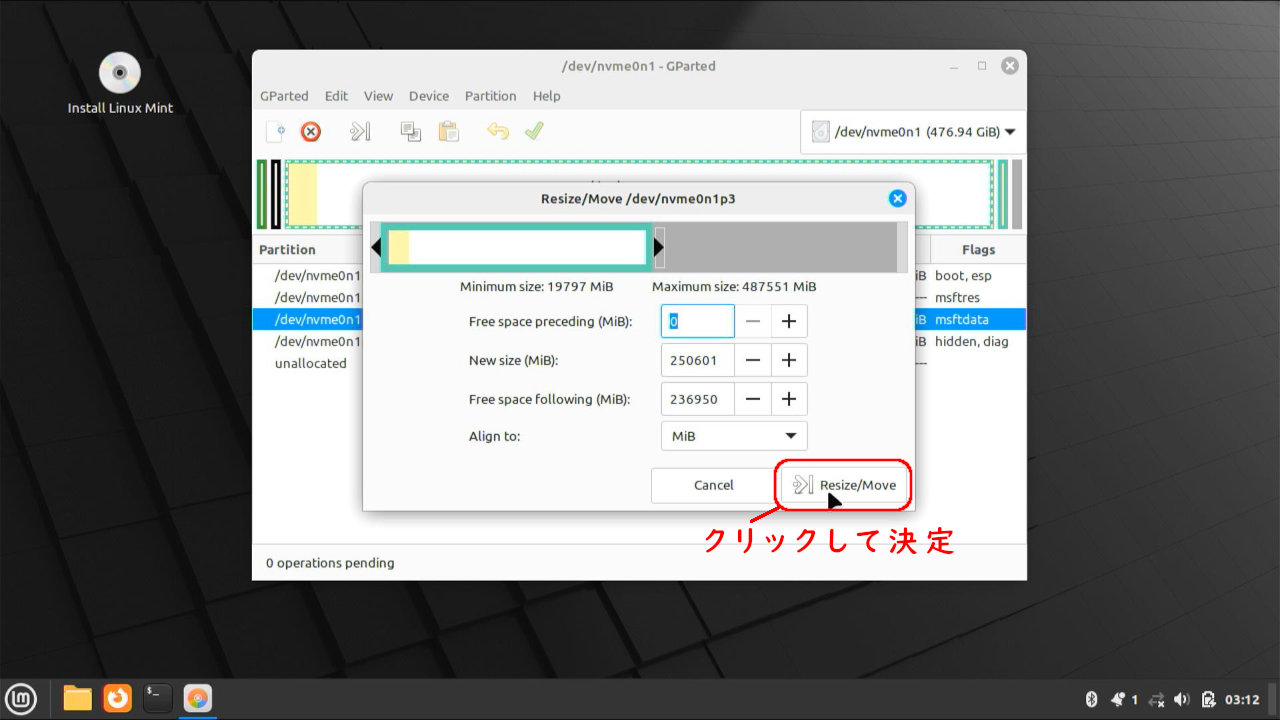
「Resize/Move」をクリックして決定します。
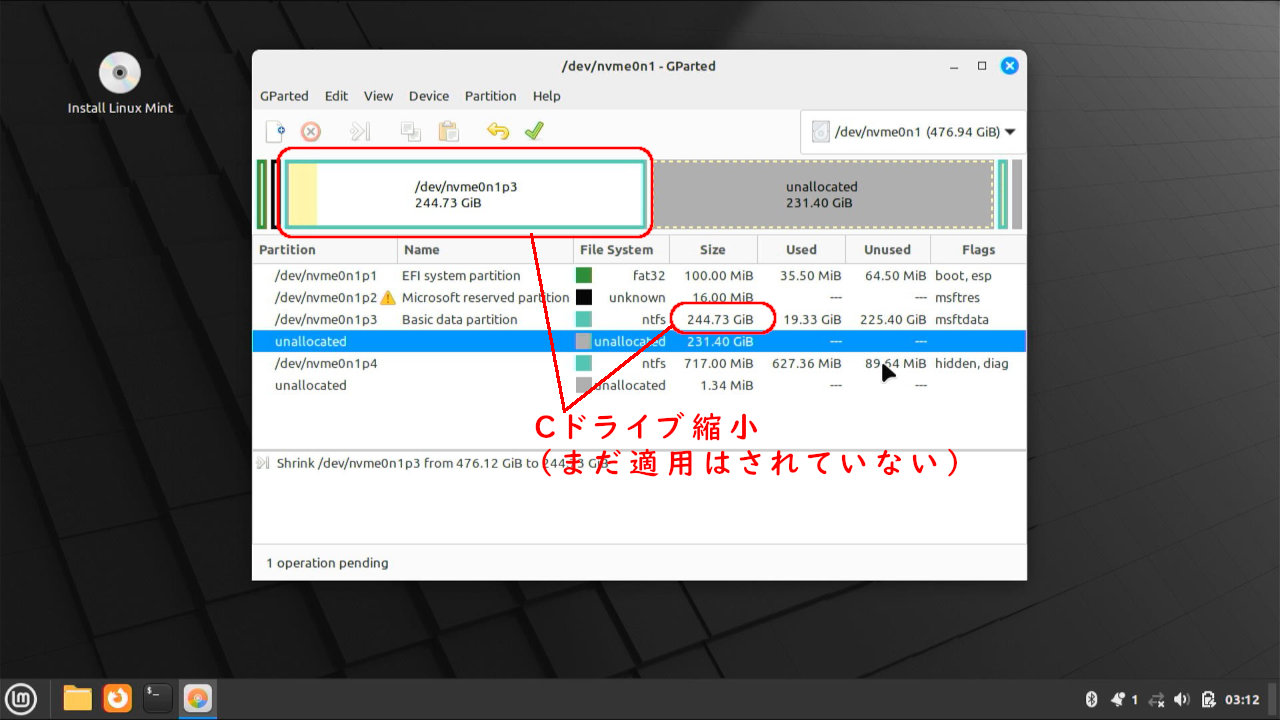
操作した内容が反映されています。
この時点では、まだSSDは変更されていません。
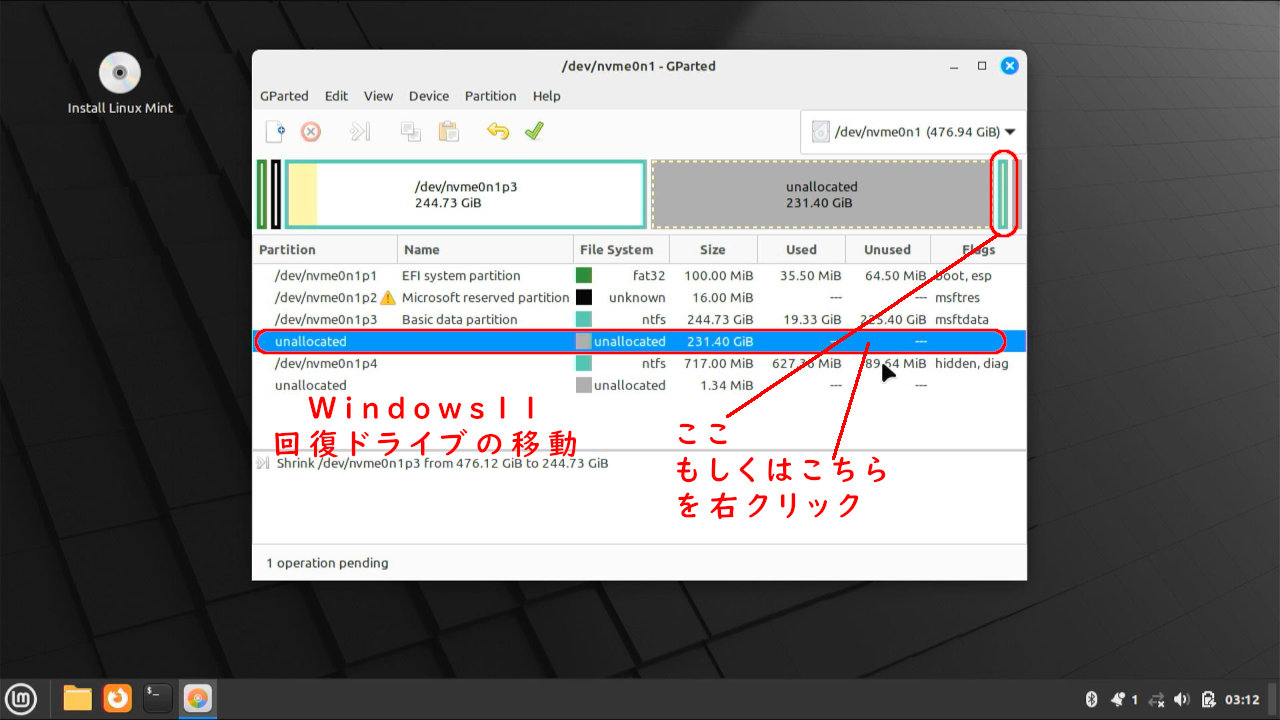
次に、Windowsの回復パーティションを、縮小したCドライブの後ろにくっつけるように移動します。
画像のように右クリックして、
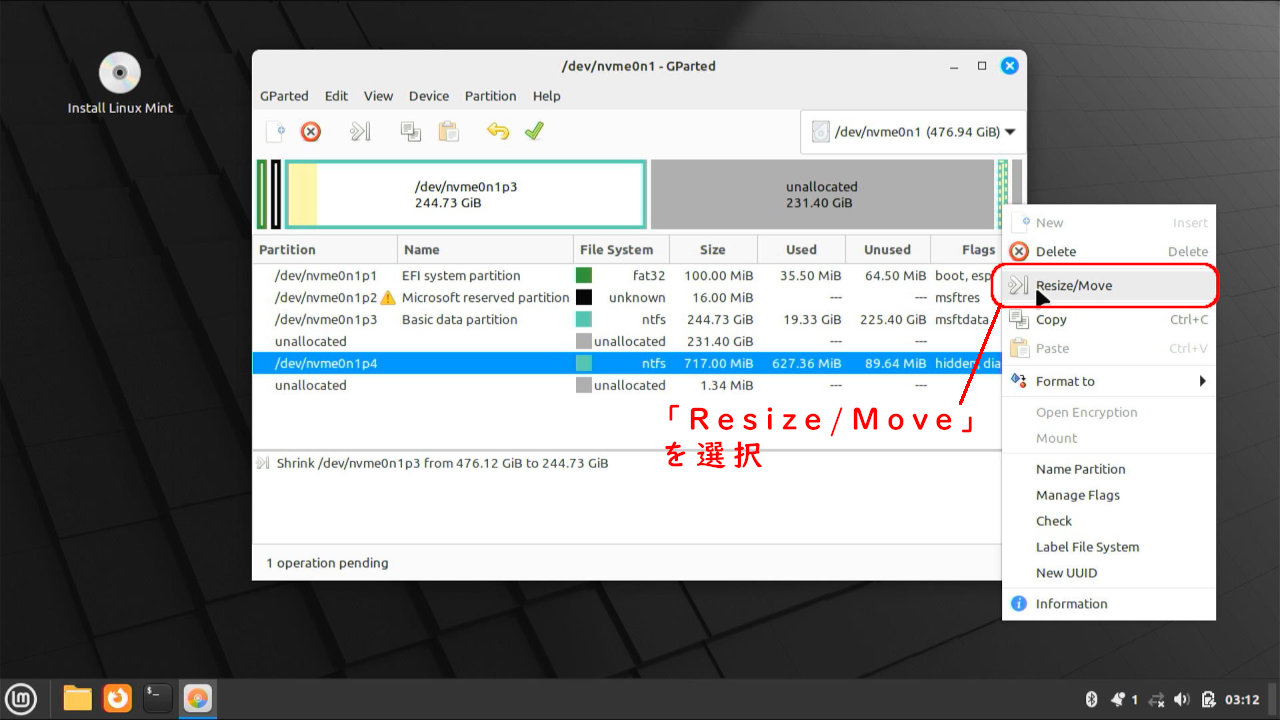
「Resize/Move」を選択
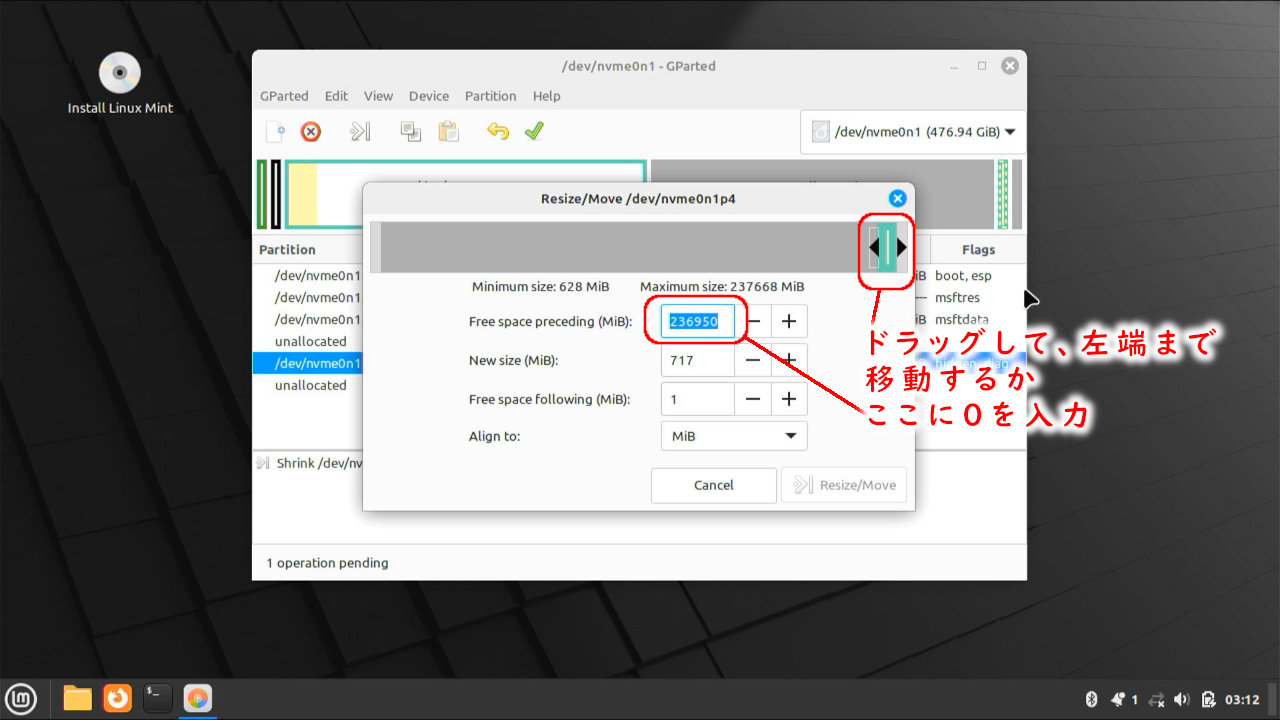
回復パーティションを移動していきます。
方法としては、ドラッグによる方法と、前のスペース(「Free space preceding (MiB):」のところ)を直接入力する方法があります。
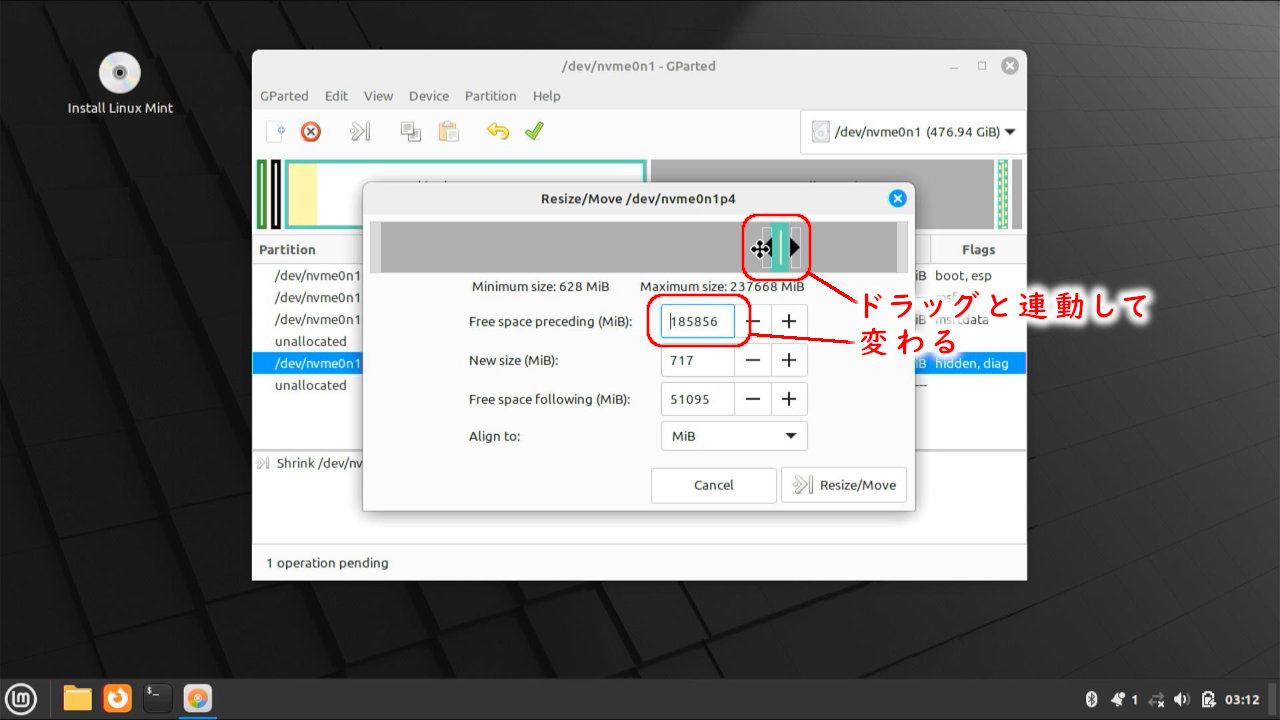
前のスペース(「Free space preceding (MiB):」のところ)を0と入力するのがもっとも簡単ですが、今回はドラックして調整してみます。
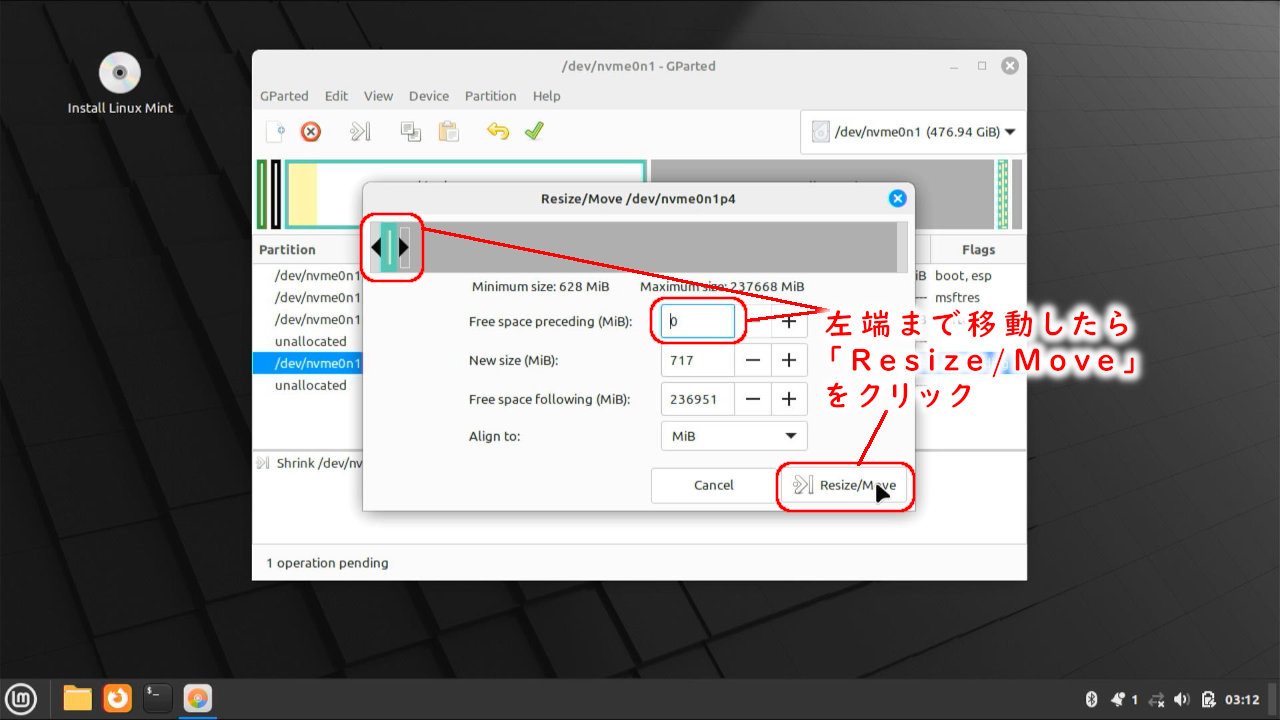
回復パーティションを左端まで移動したら、「Resize/Move」をクリックして確定させます。
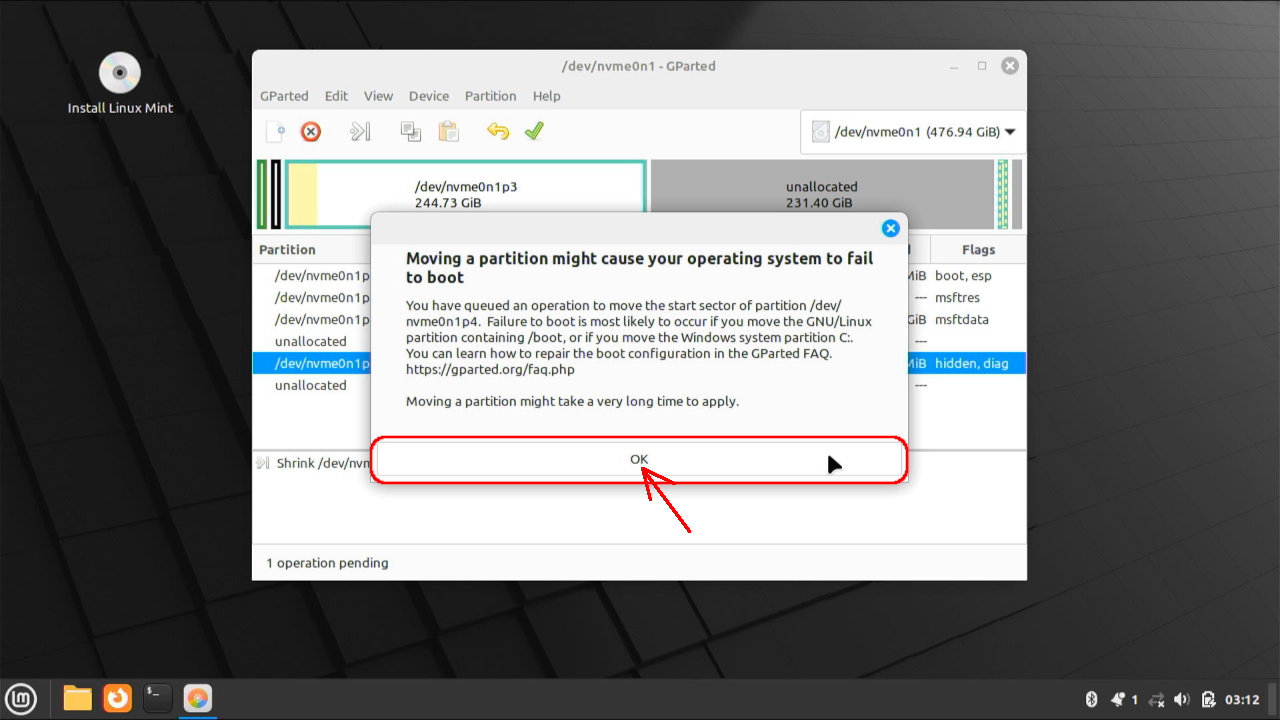
「起動できなくなるかも」と警告が出ますが、回復ドライブのところで、大丈夫なので、「OK」をクリック。
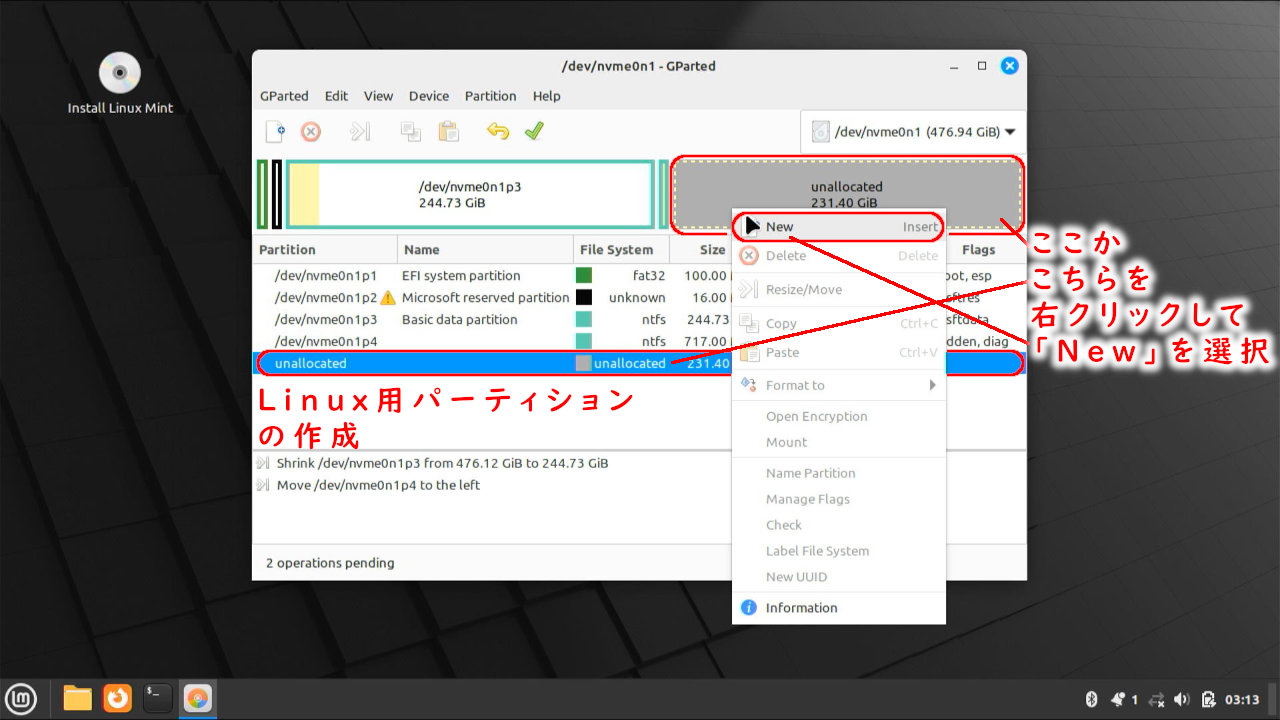
空いた部分に、LinuxであるLMDEをインストールするパーティションを作成します。
空き部分(unallocatedと表示されている部分)を右クリックして、「New」を選択。
LMDEインストールパーティションを作成します。
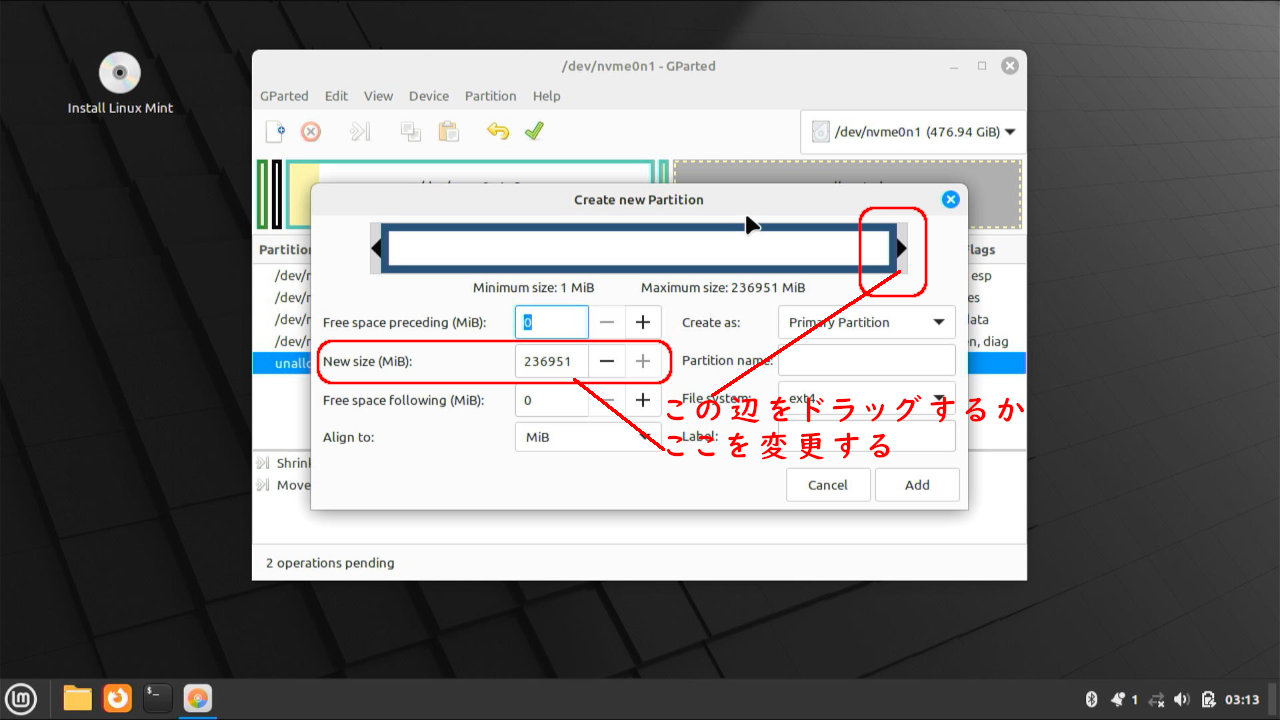
方法としては、ドラッグによる方法と、サイズ(「Free space preceding (MiB):」のところ)を直接入力する方法があります。
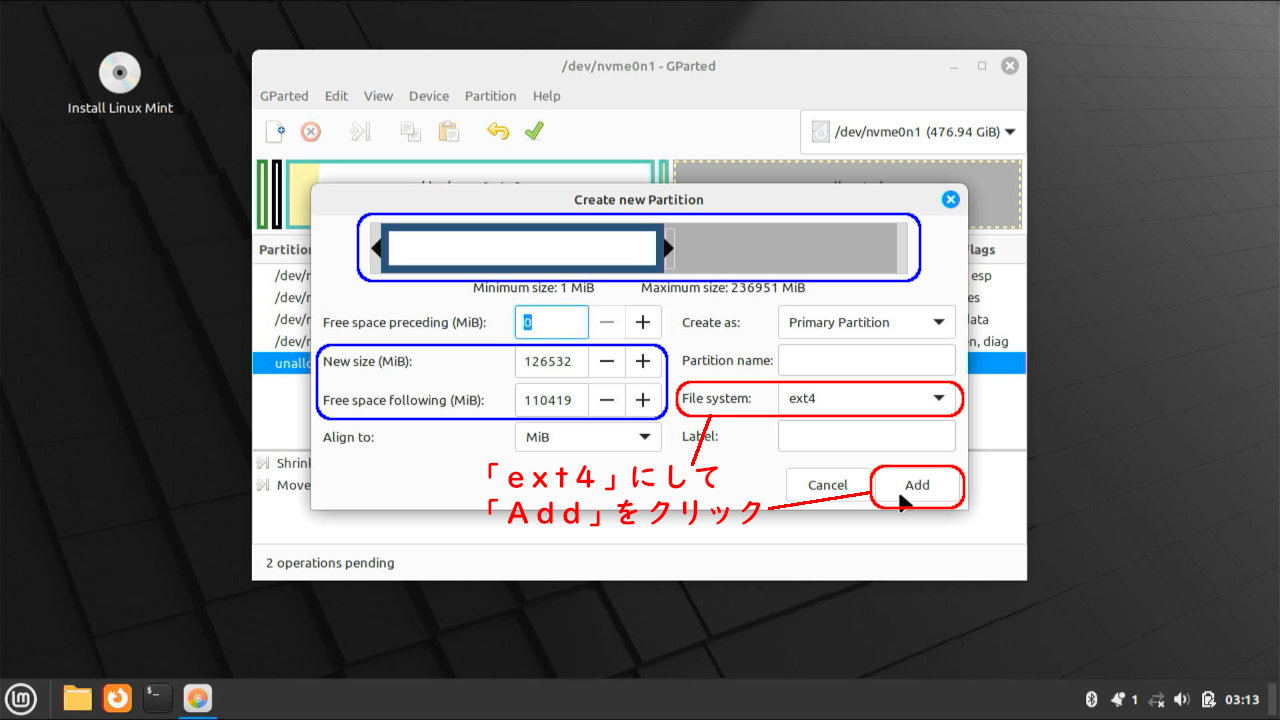
今回、おおよそ120GBに設定
File Systemは、「ext4」にしておきます。
「Add」をクリック。
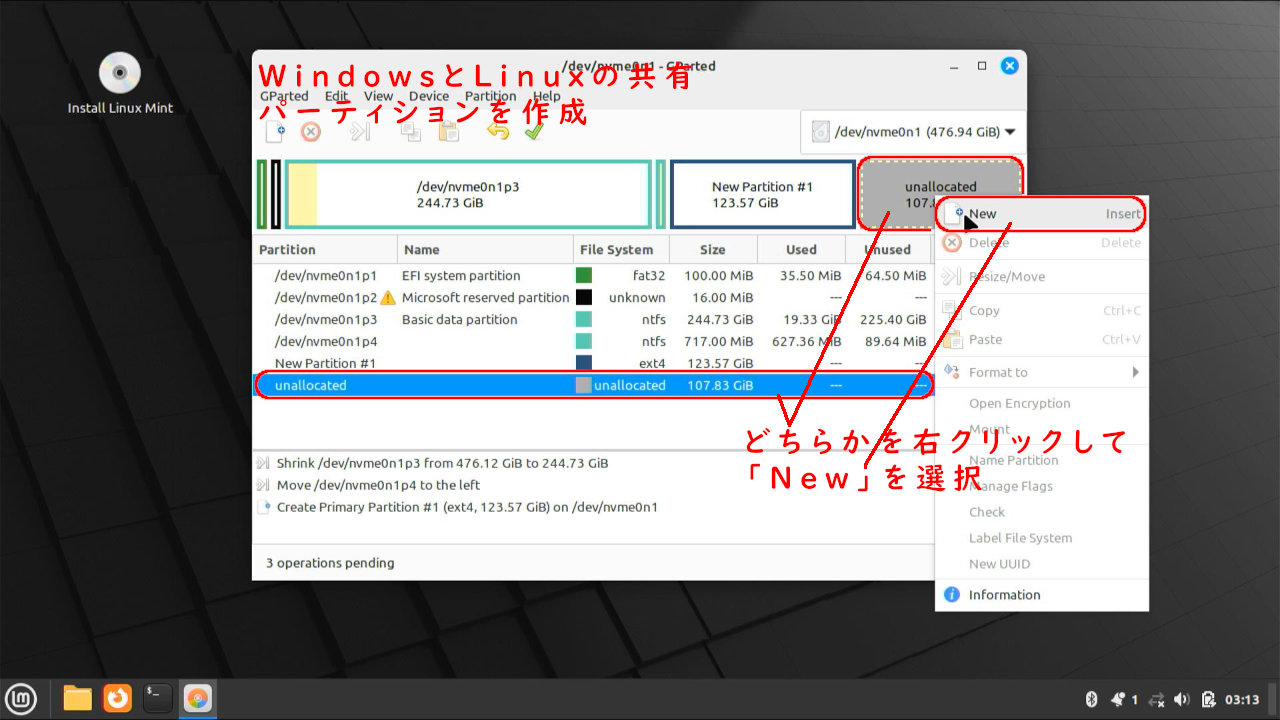
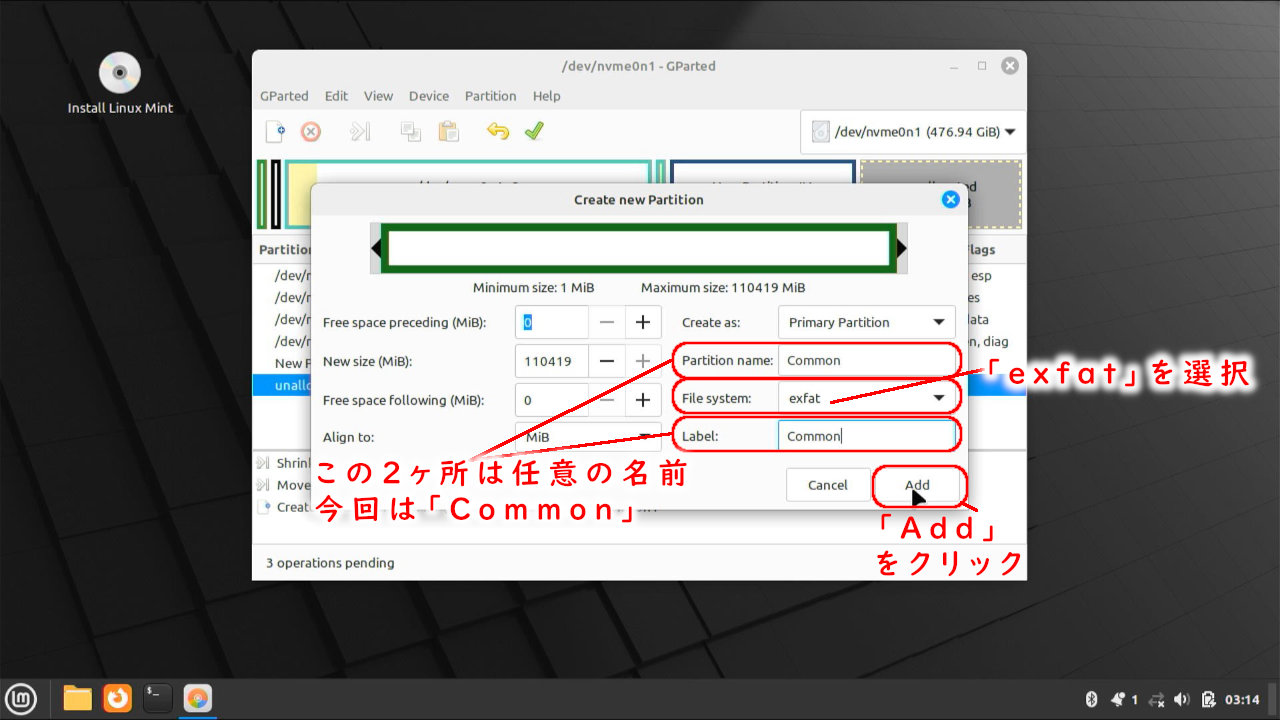
最後に、WindowsとLinux 共通の保管場所を作成します。
残りのunallocated部分を右クリックして、「New」をクリック。
今回は残った空き容量をすべて使用します。
File system は、WindowsとLinux両方とも読み書きできる「exfat」とします。
Partition nameや、Labelには、任意の名前をつけます。
「Add」で確定します。
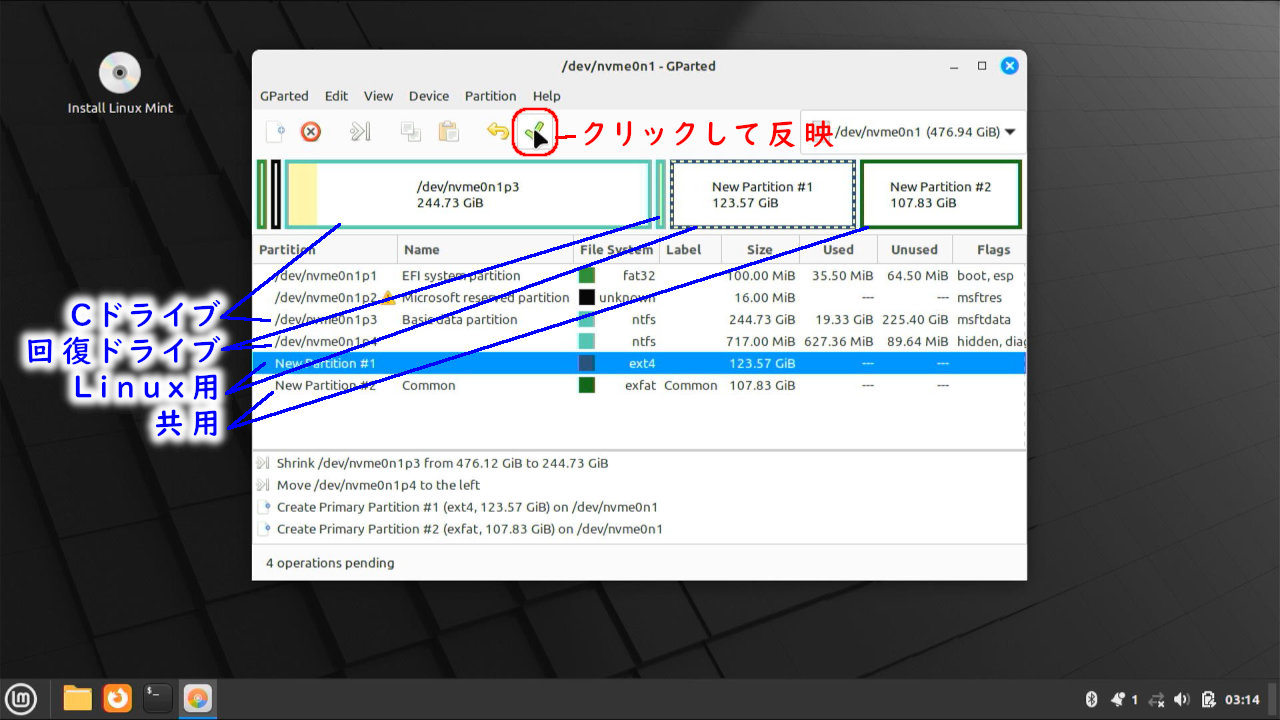
全体を見返して、よければメニュー部分にある「レ」をクリックしてSSDの変更処理を実行します。
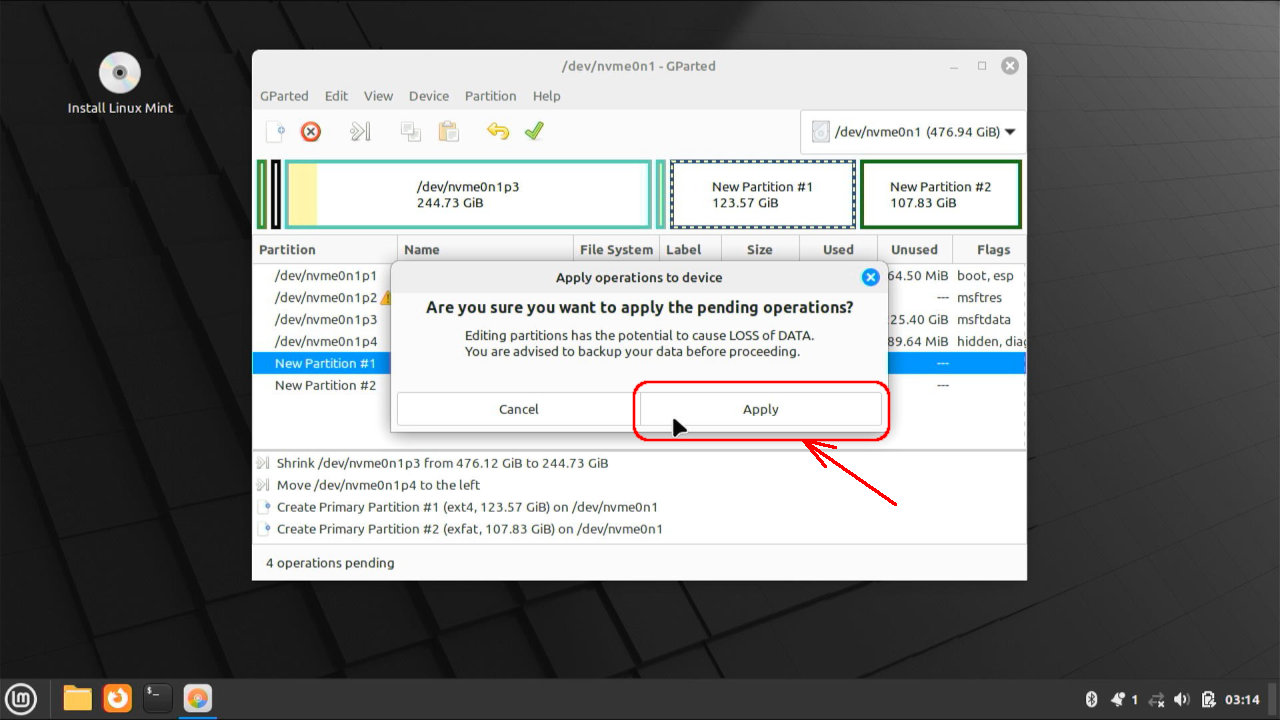
本当に実行していいか聞かれますので、「Apply」で実行します。
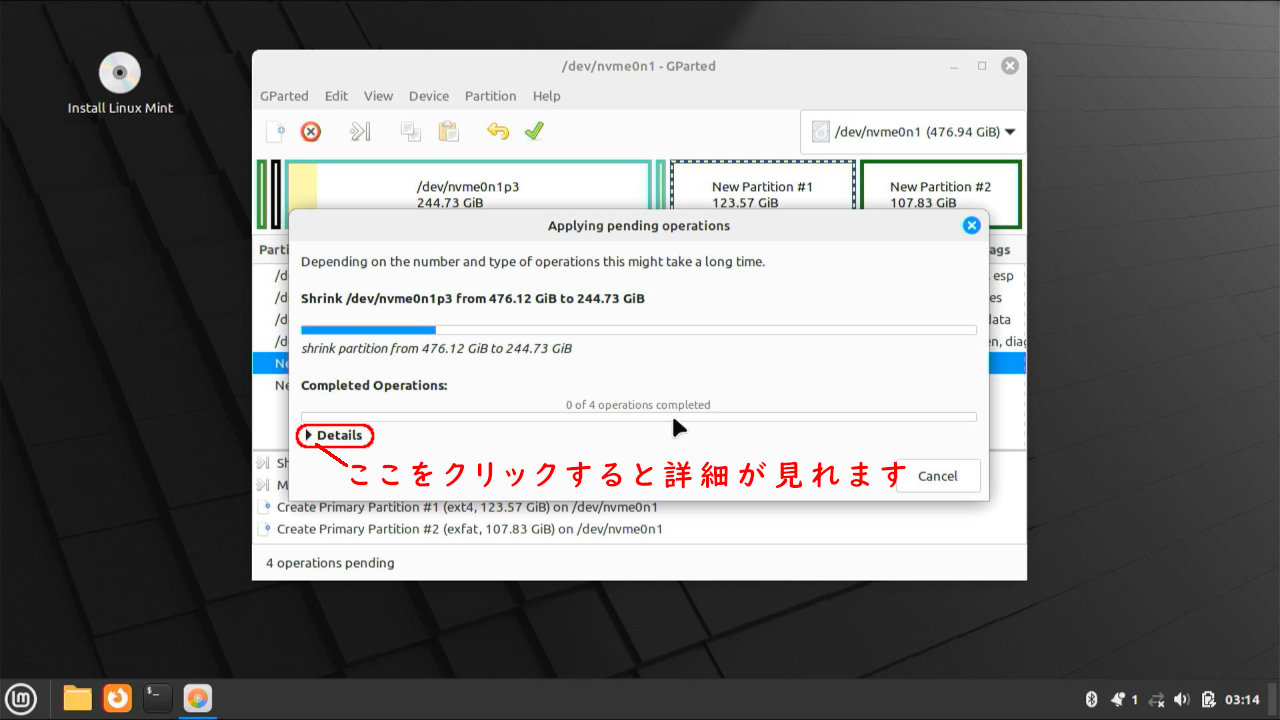
処理が始まります。
Detailsとかかれたところをクリックすると、詳細を見ることができます。
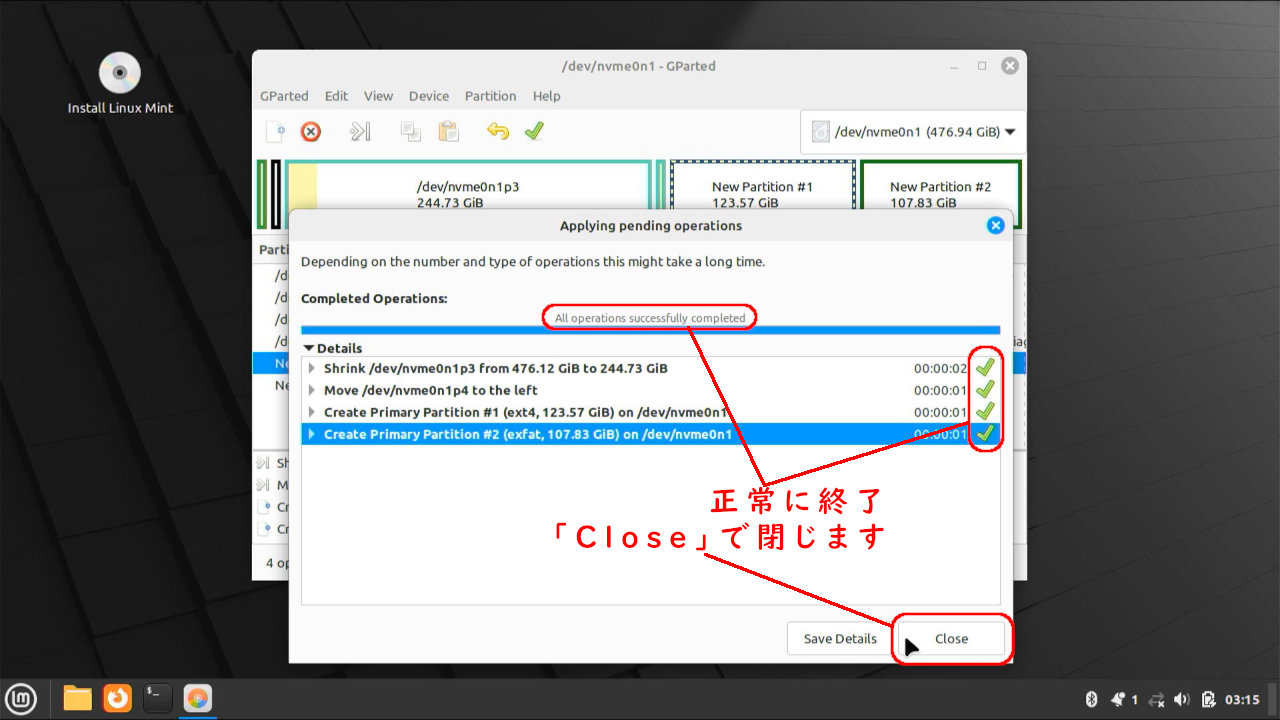
正常に終了しました。
「Close」で閉じます。
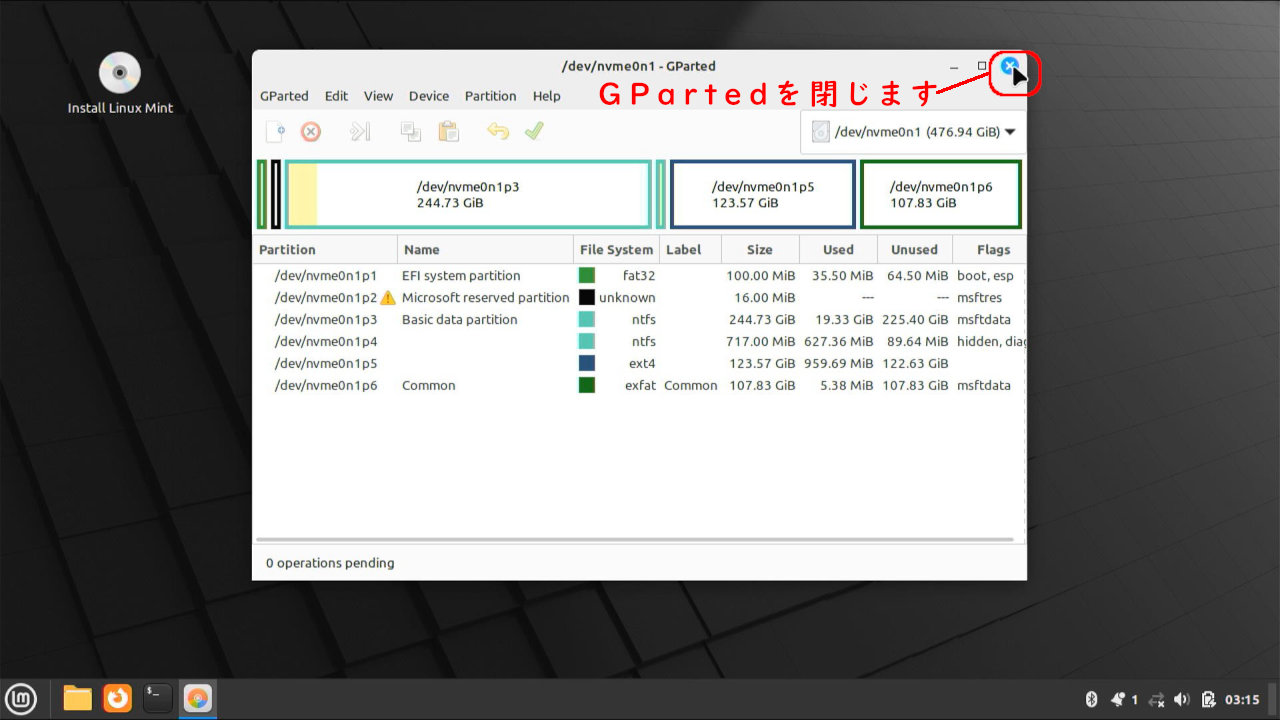
GPartedを閉じます。

Linux Mint Debian Edition : LMDE のインストール
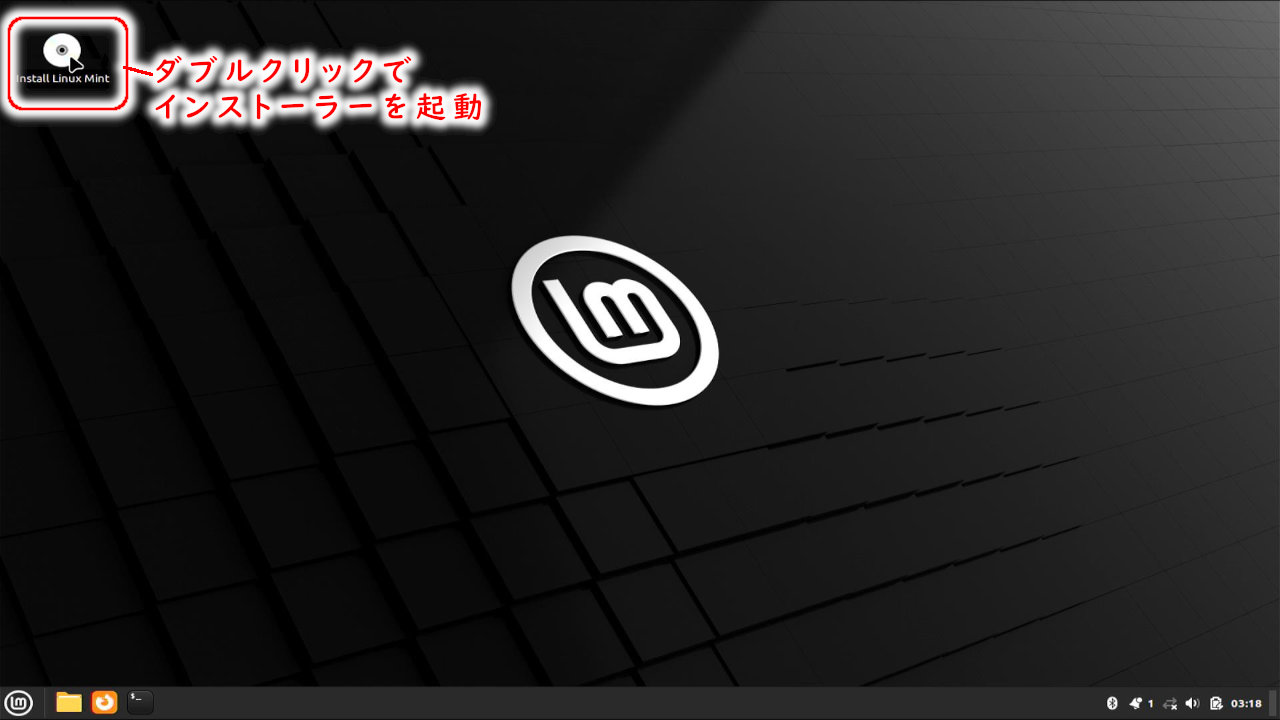
デスクトップ左上のアイコンをダブルクリックして、インストーラーを起動します。
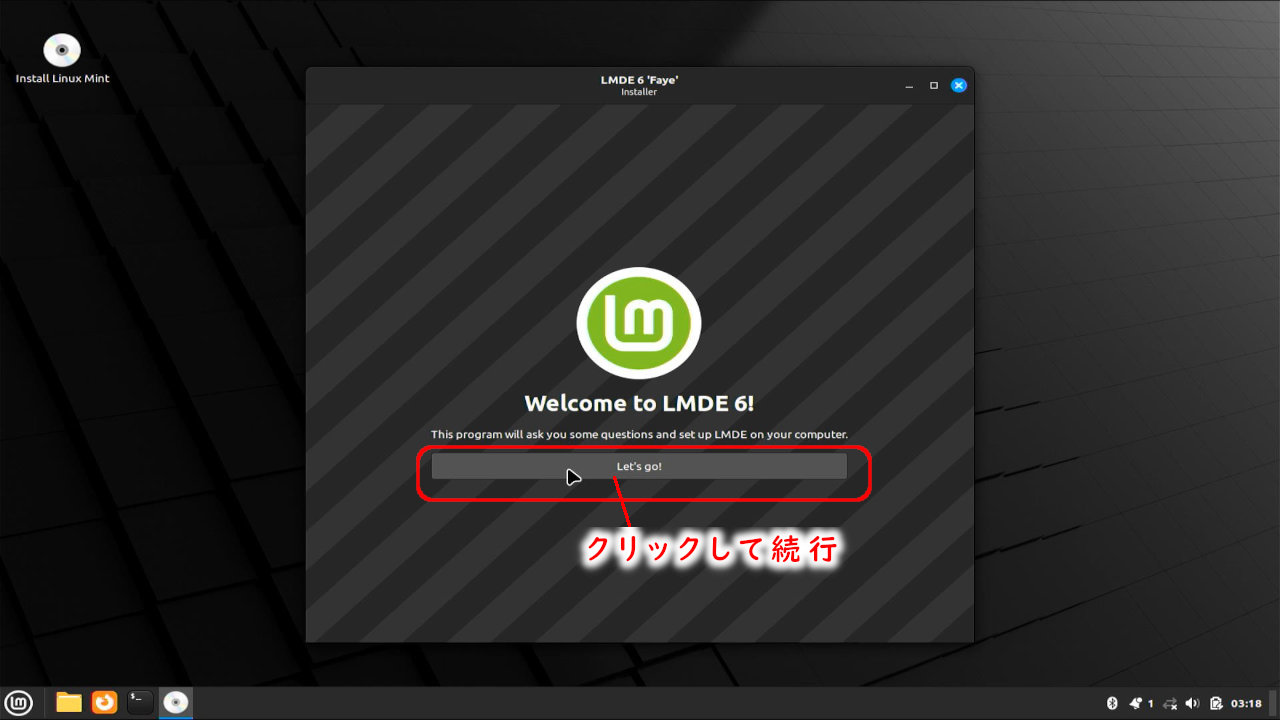
「Let's go!」をクリックして続けます。
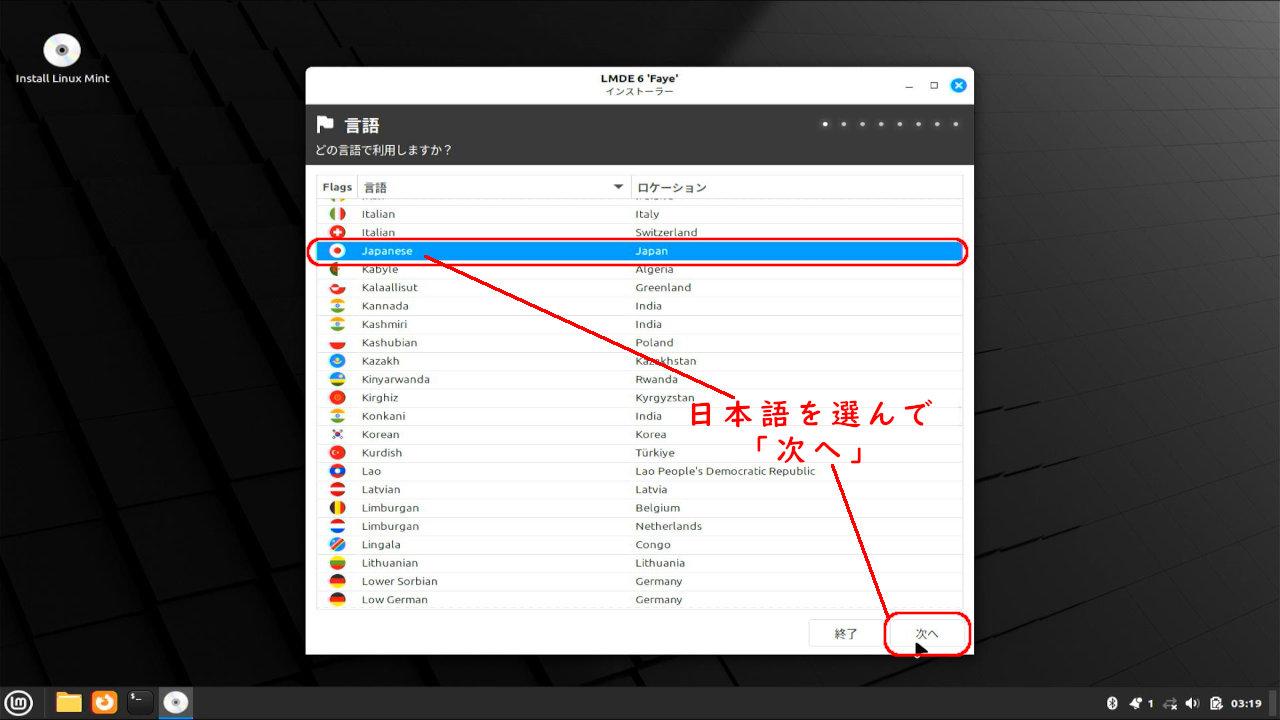
日本語を選択します。
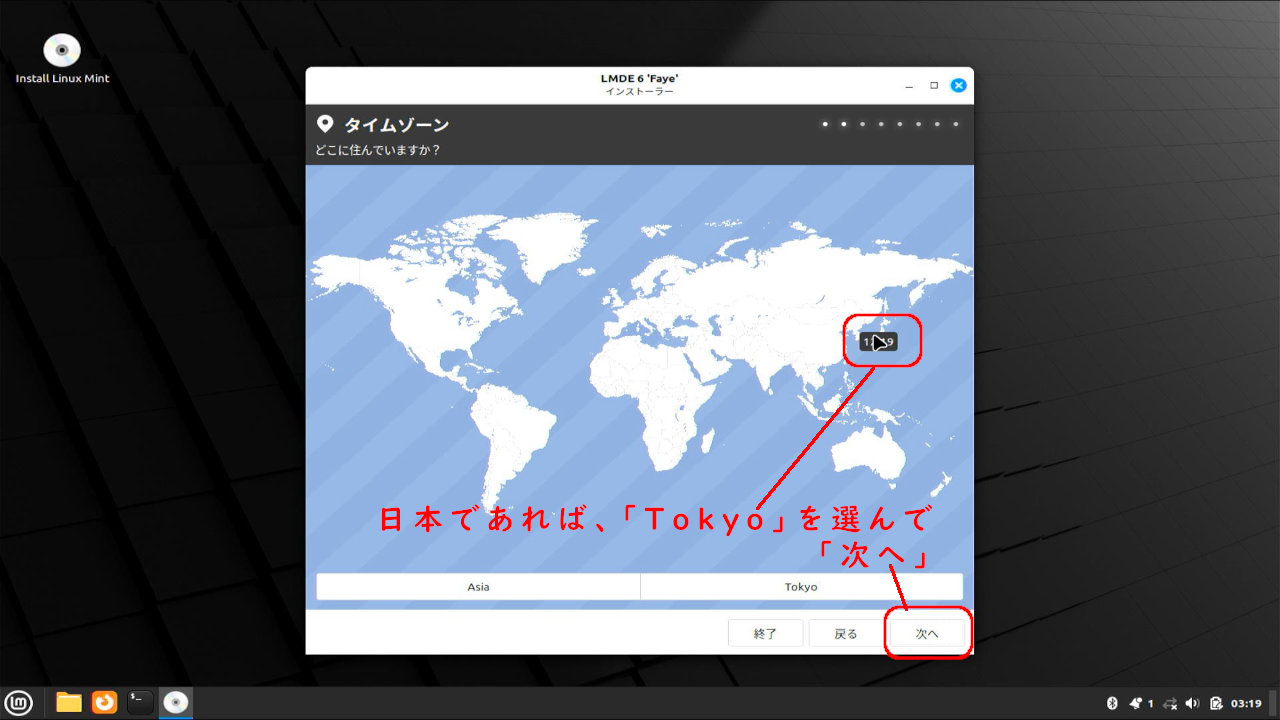
タイムゾーンを「Tokyo」に設定
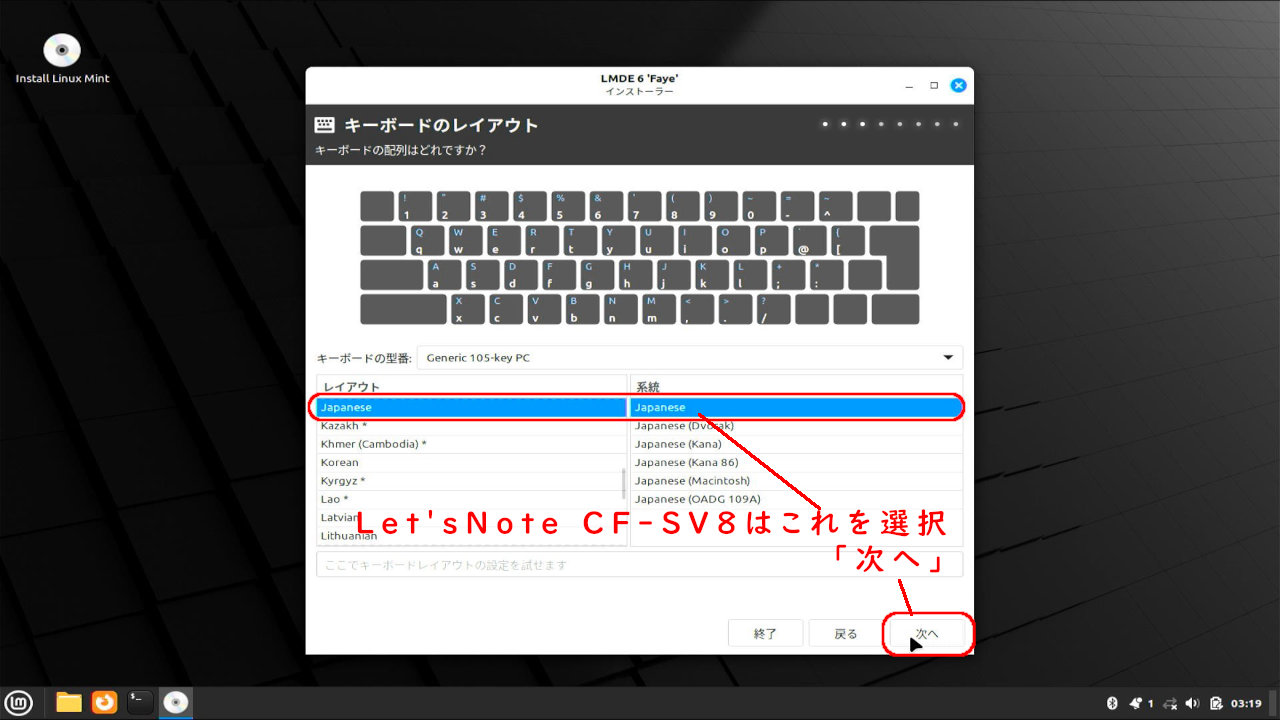
日本語配列キーボードを選択します。
Let'sNote CF-SV8は、日本語配列キーボードなので、これでOKです。
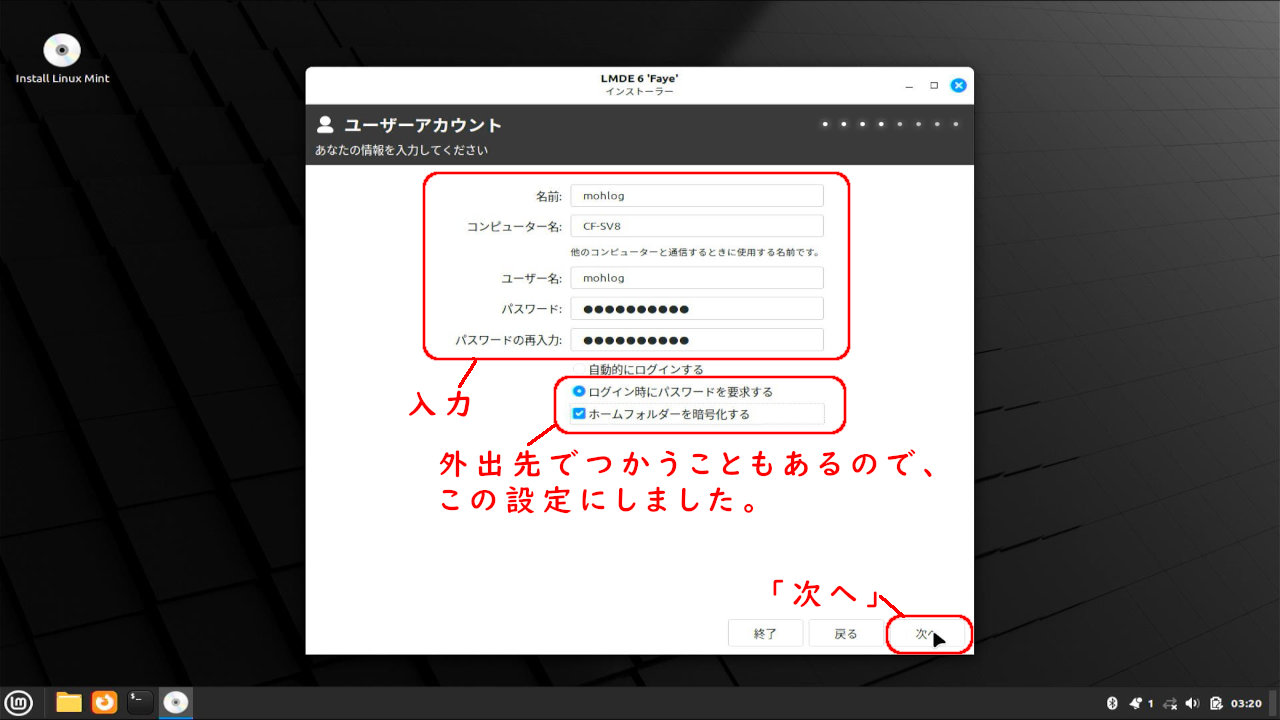
名前やユーザー名、パスワード等を入力していきます。
外出先で使うこともあるので、パスワードを入力しないとログインできないようにしました。
また、ホームフォルダの暗号化もチェックを入れています。
Linux上では暗号化を採用してますが、WindowsではBitLockerを解除しているという、中途半端な状態になってます。
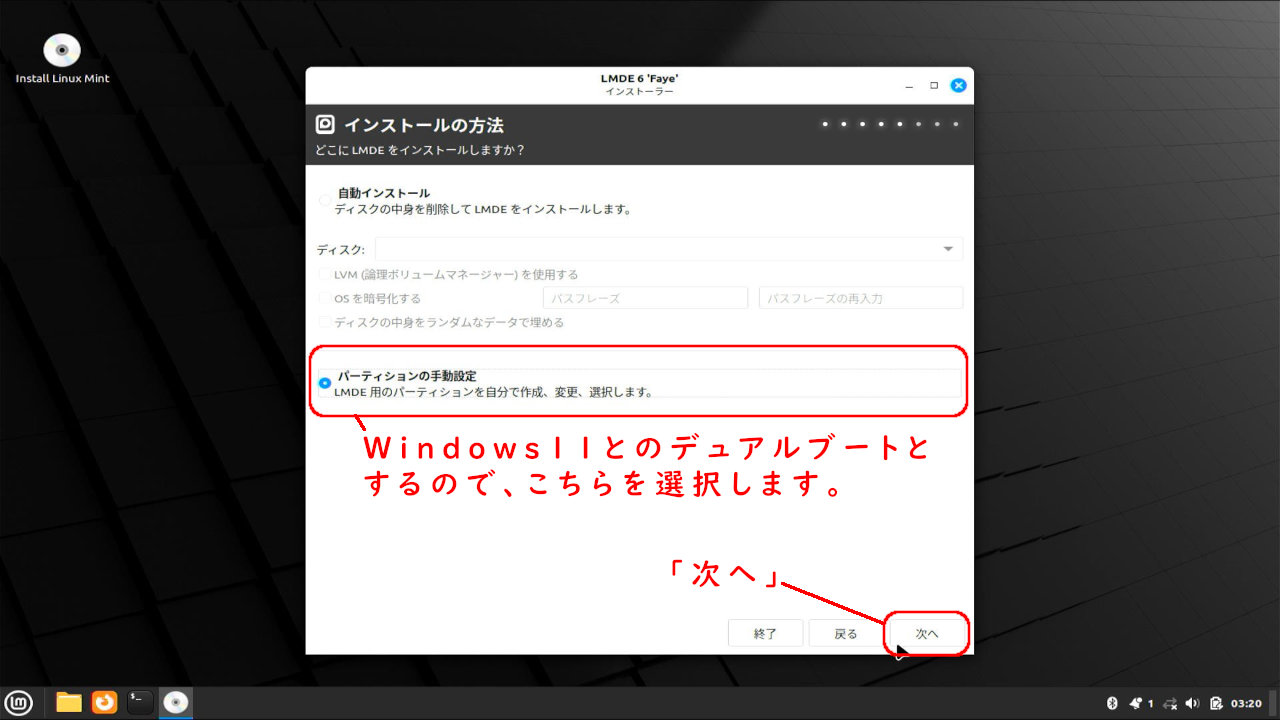
インストール先パーティションは、手動で設定します。
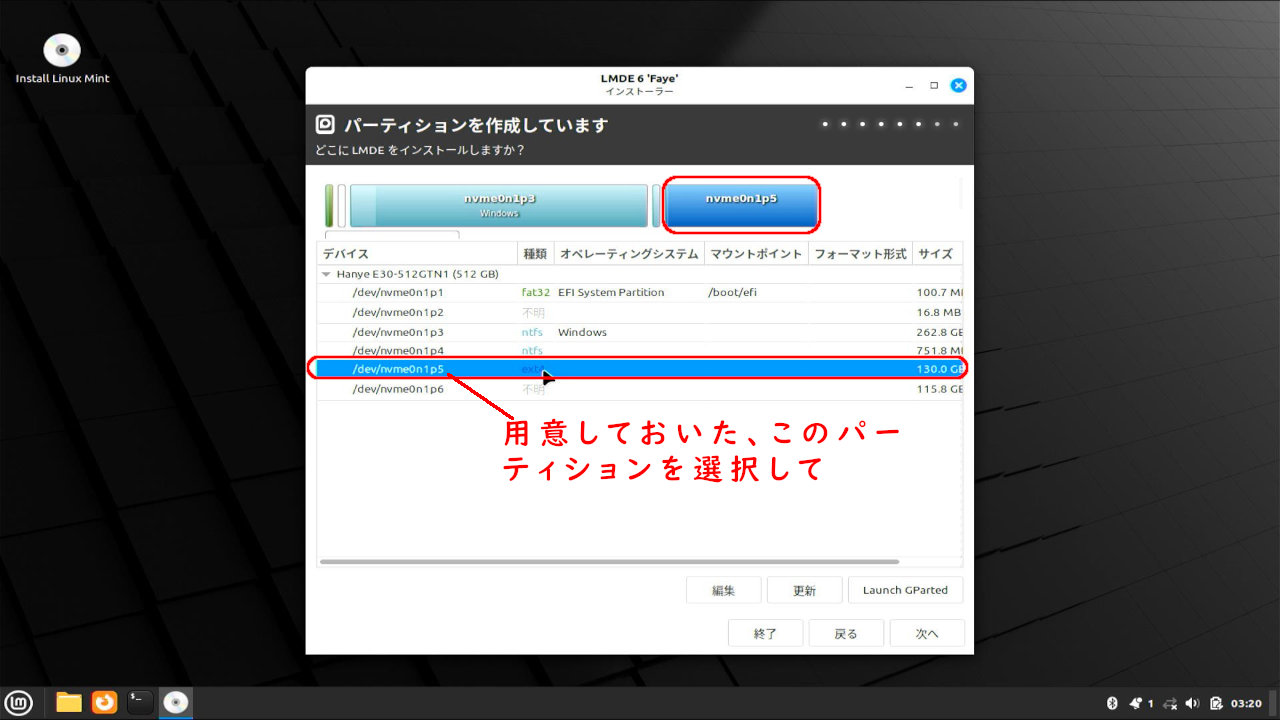
GPartedで作成しておいたパーティション(/dev/nvme0n1p5)を選択します。
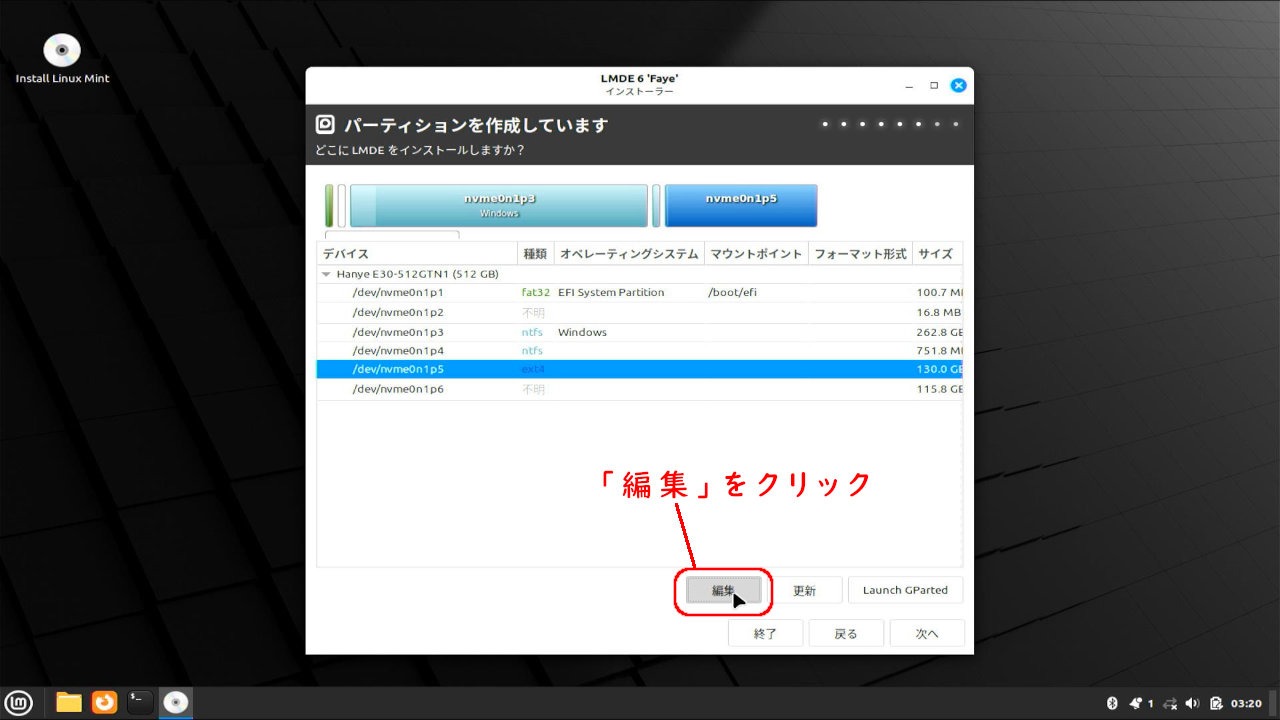
「編集」をクリック

マウント場所を「/」に
形式を「ext4」
とし、「OK」をクリックします。
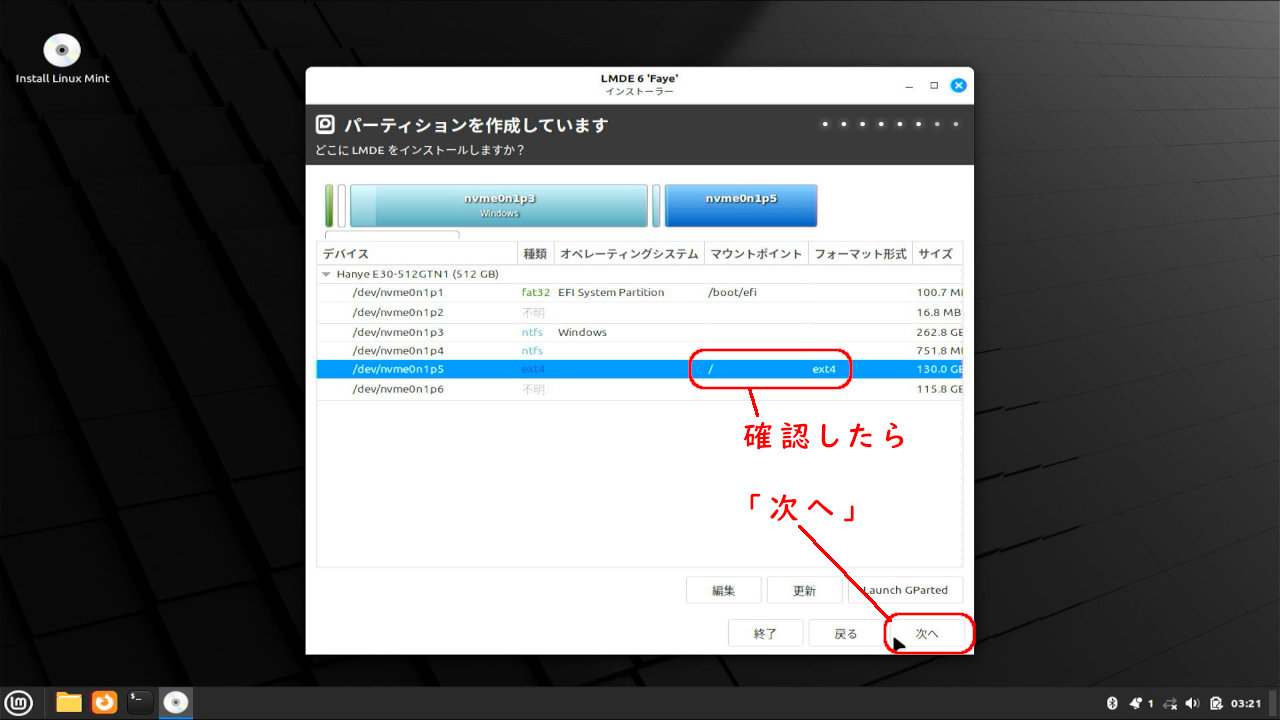
言葉が変わってますが、
マウント場所 → マウントポイント:/
形式 → フォーマット形式:ext4
を確認できたら、「次へ」をクリック
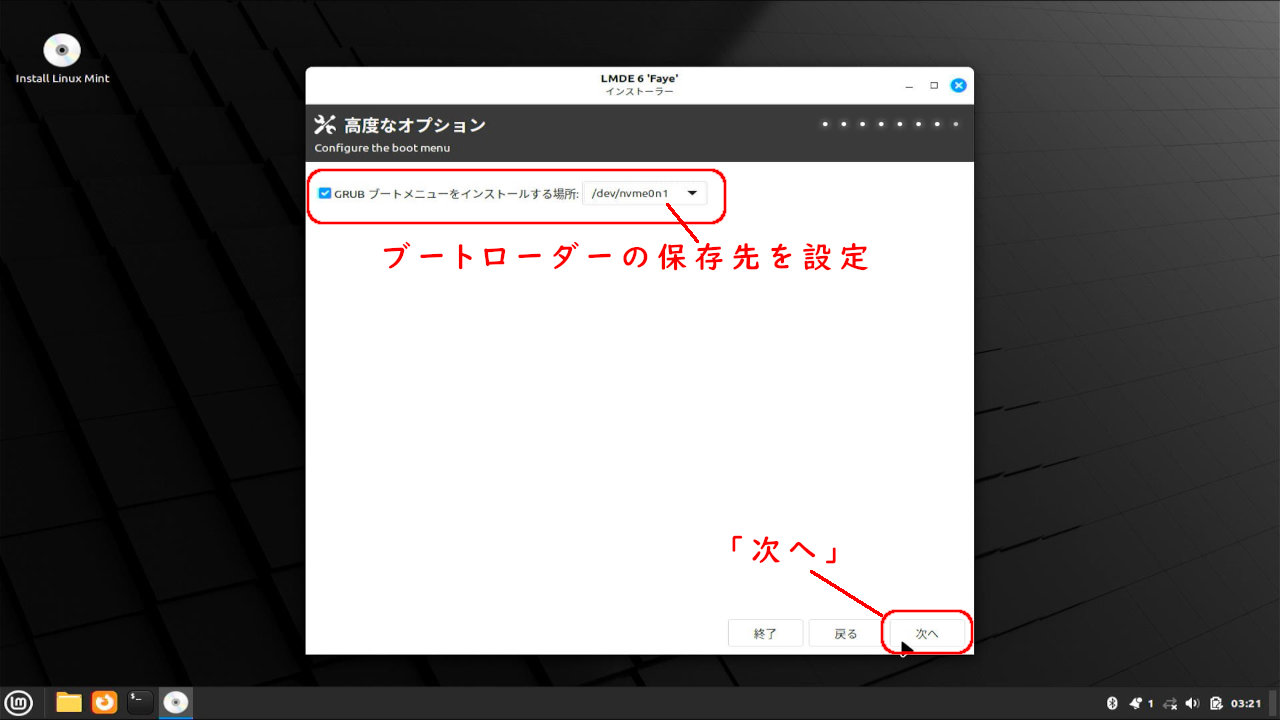
ブートローダーの保存先の設定になりますが、何も触らずにOKでよいです。
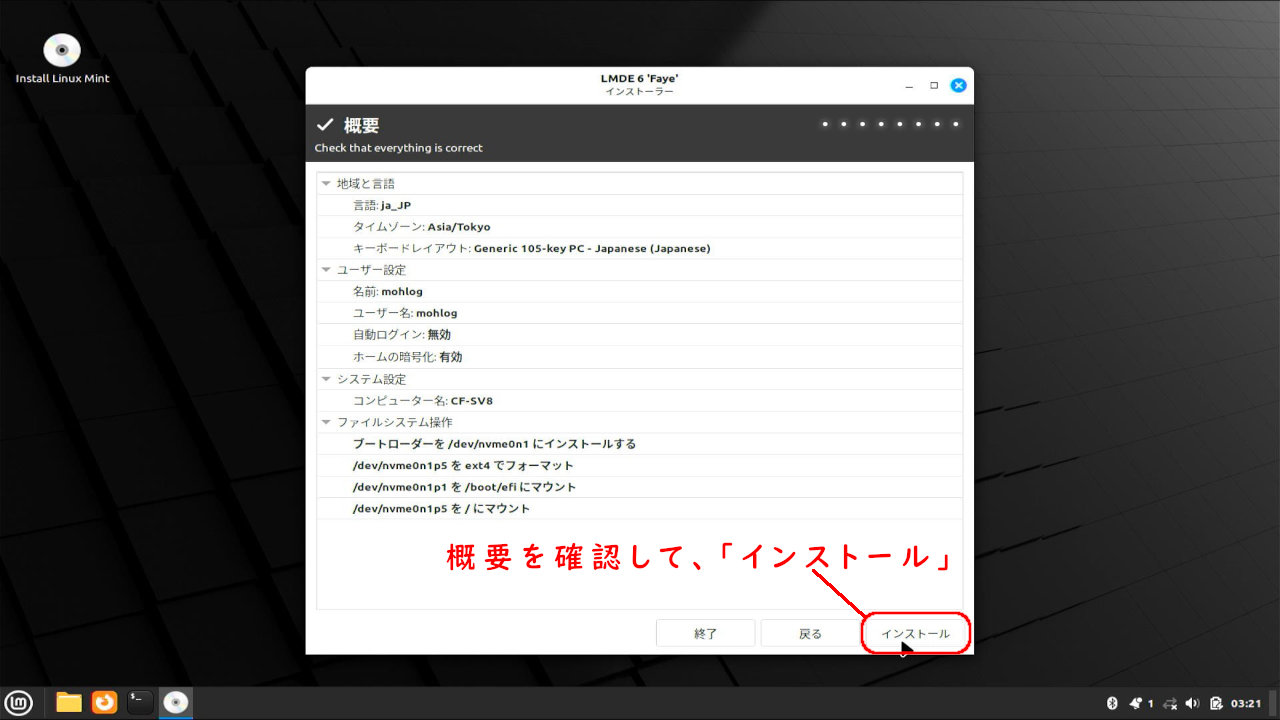
概要が表示されますので、一通り確認して、「インストール」をクリックします。
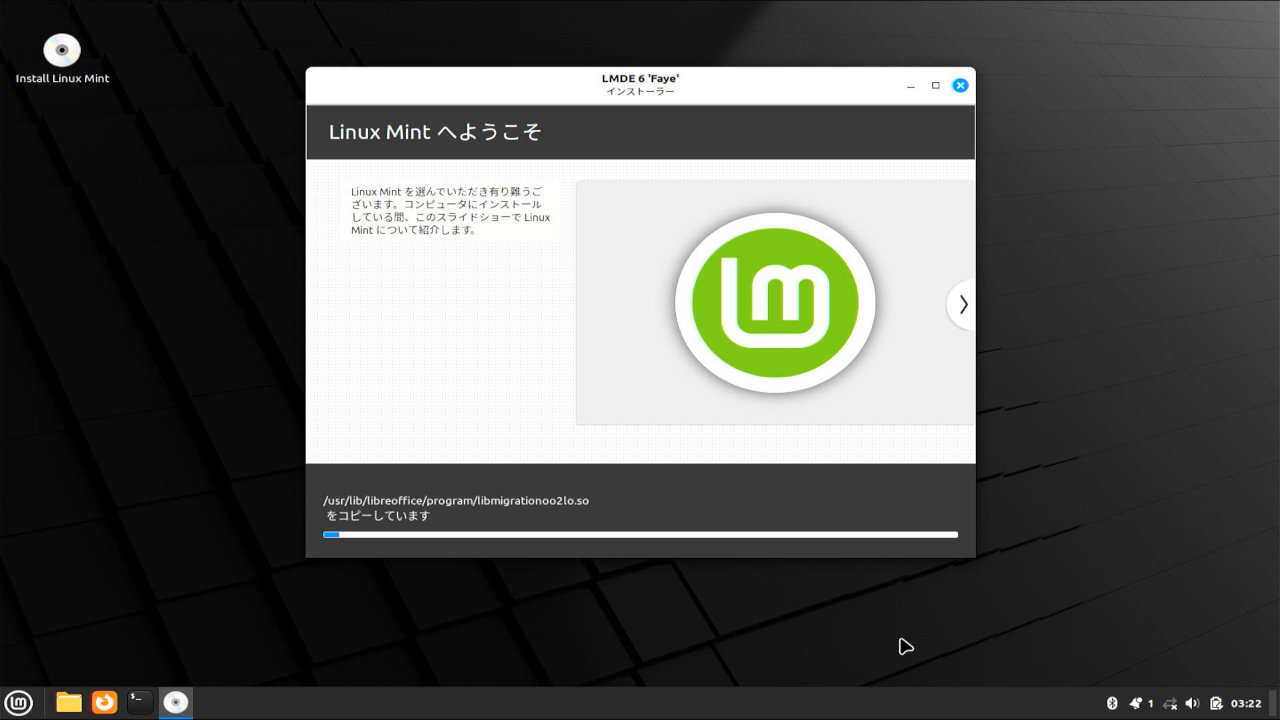
インストールが開始されます。
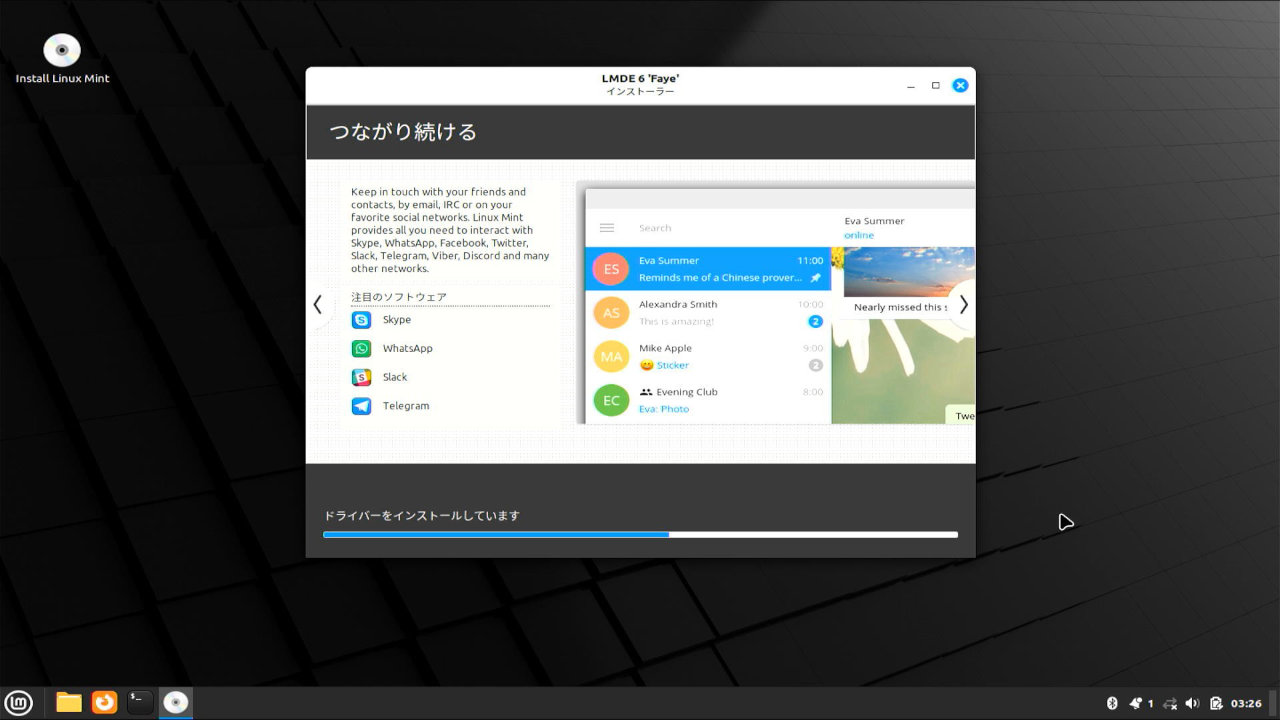
終了まで待ちます。
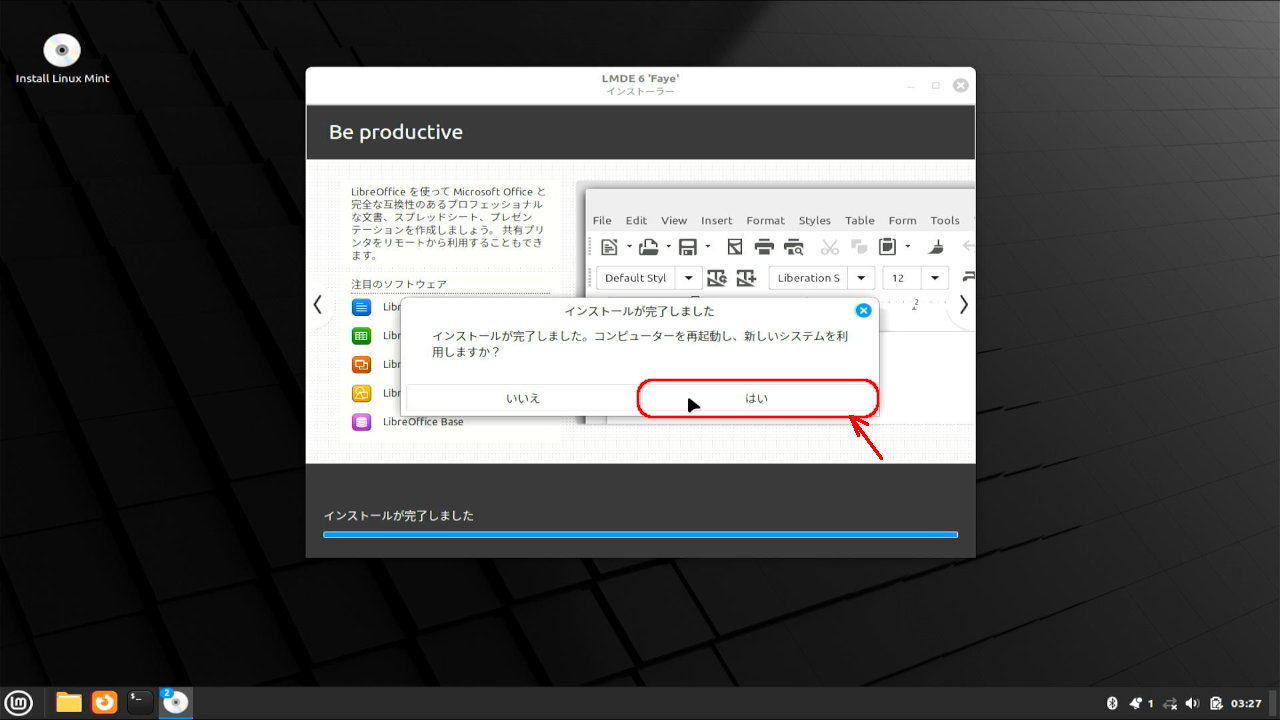
インストールが完了しました。
再起動を促されるので、「はい」をクリックします。
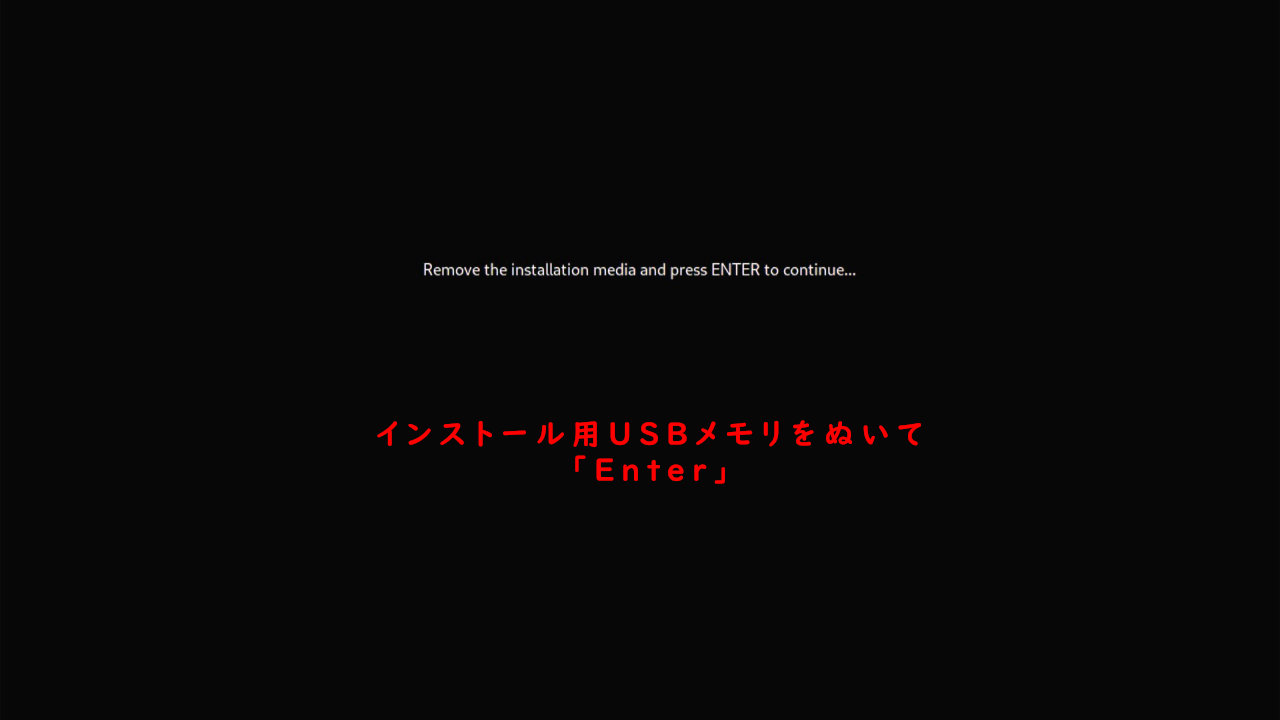
この画面がでたら、インストールメディアのUSBメモリを取り外し、「Enter」キーを押します。
再起動がはじまります。
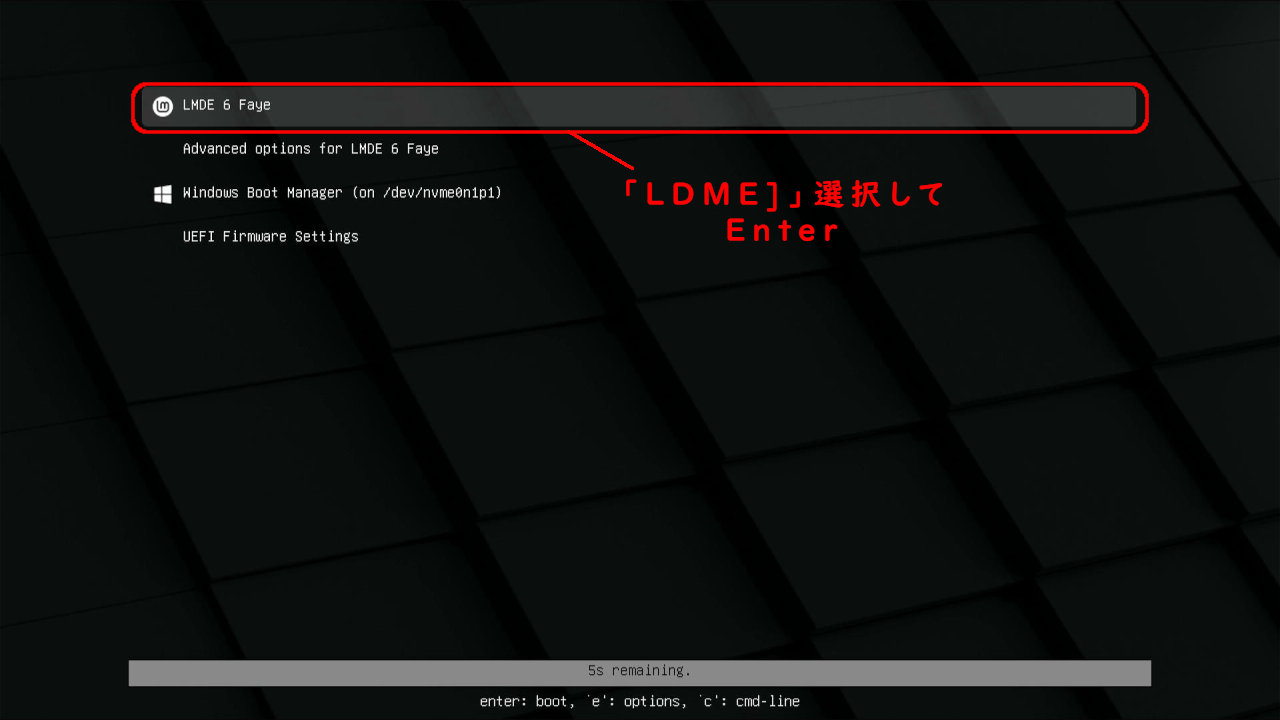
起動の選択画面が表示されます。
「LMDE 6 Faye」を選択して、「Enter」キーを押します。
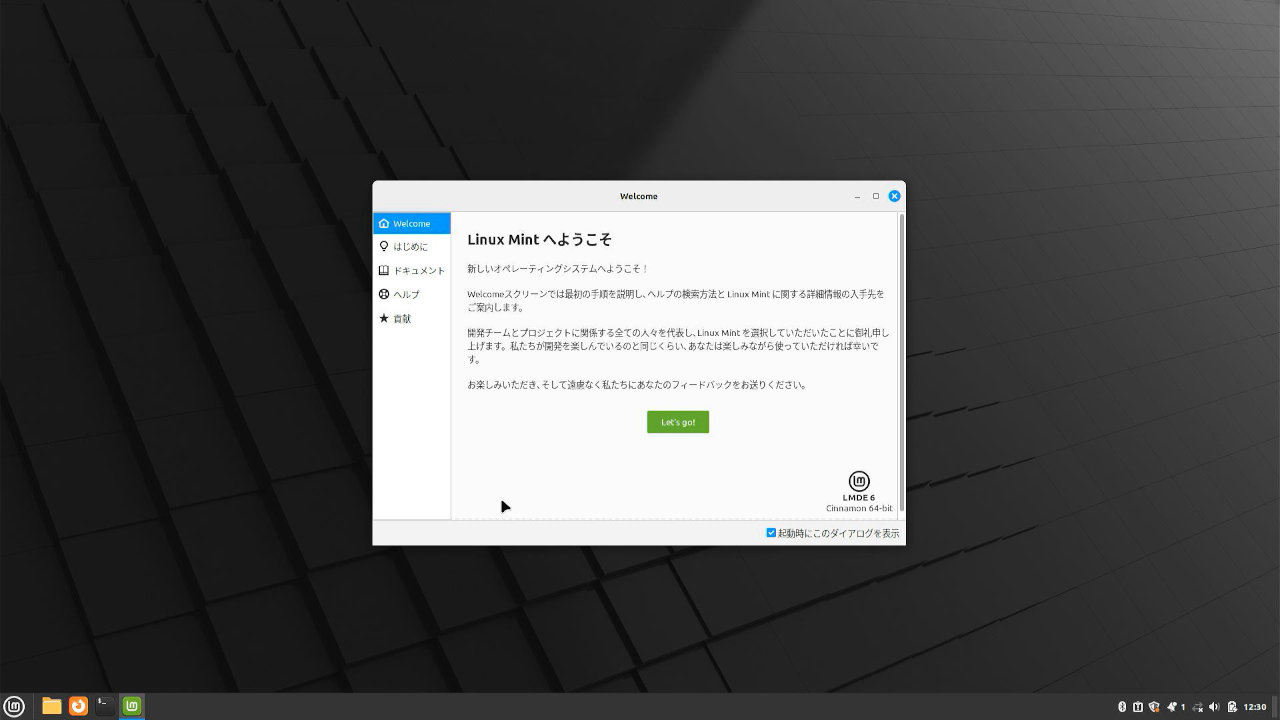
Linux Mint Debian Editin 6・・・LMDE 6が起動しました。
ここから設定等ありますが、本ページではここまで。
まずはお疲れさまでした。
Windows11の起動は?
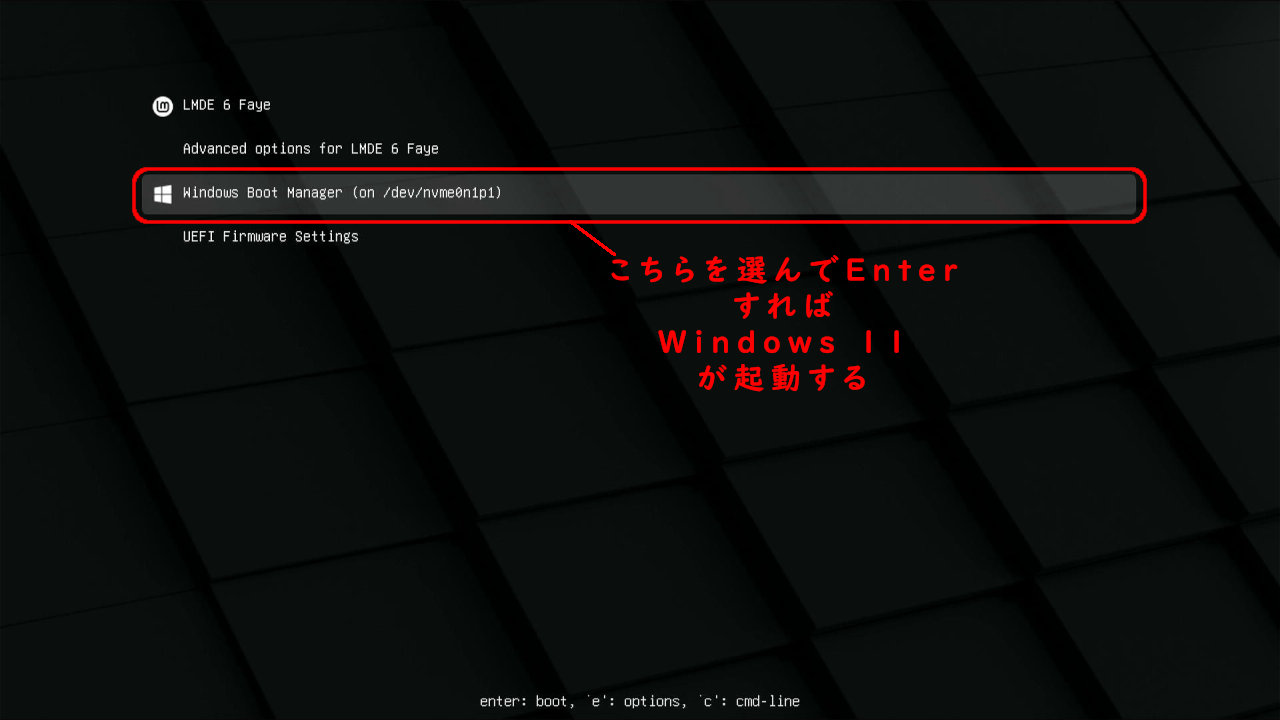
Windows11Proは、先ほどの起動選択画面で、
「Windows Boot manager」を選択して「Enter」キーを押すことで起動します。
BIOSから起動することもできます。
おわりに
これで、Windows11ProとLinuxであるLinux Mint Debian Editin 6・・・LMDE 6のデュアルブート環境が完成しました。
他のLinux、UbuntuやMX Linuxでもやり方はほぼ同じですが、Linuxの中でセキュアブートに対応していないものもあり、その場合はBIOSでOFFにする必要があります。(Let'sNote CF-SV8は、BIOS上デフォルトでセキュアブートになっている)
また、過去Windowsの大型アップデートで、Linuxが起動しなくなったこともありました。Windows11は、これから22H2から23Hへのアップデートが控えていますので、時期がきたら検証して結果をアップしてみたいと思います。


コメント